

Choosing Analog Bikes for Speed?
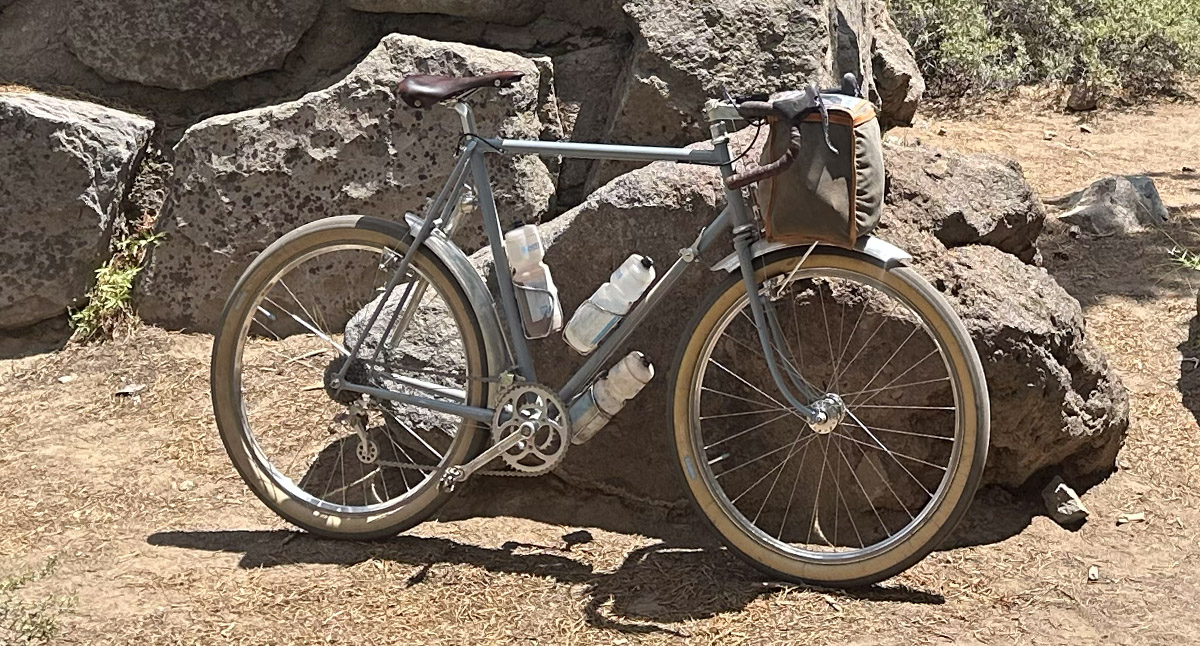
The Rene Herse I rode during my recent 41-hour ride on the Oregon Cascades Volcanic Arc 400 course is almost the antithesis of the bikes we see in the Tour de France. Analog shifting instead of electronic derailleurs. Rim brakes instead of discs. A steel frame with round tubes instead of wind-tunnel-shaped carbon. And then there’s the wheel size: While the industry has decided that ‘bigger is better,’ my bike unapologetically runs 26″ wheels.
A friend and journalist from Germany once commented: “You’ve got to admit, you’ve got a lot of love for classic rando bikes.” He wasn’t wrong—that love is real—but love alone is not enough to set FKTs (Fastest Known Times).
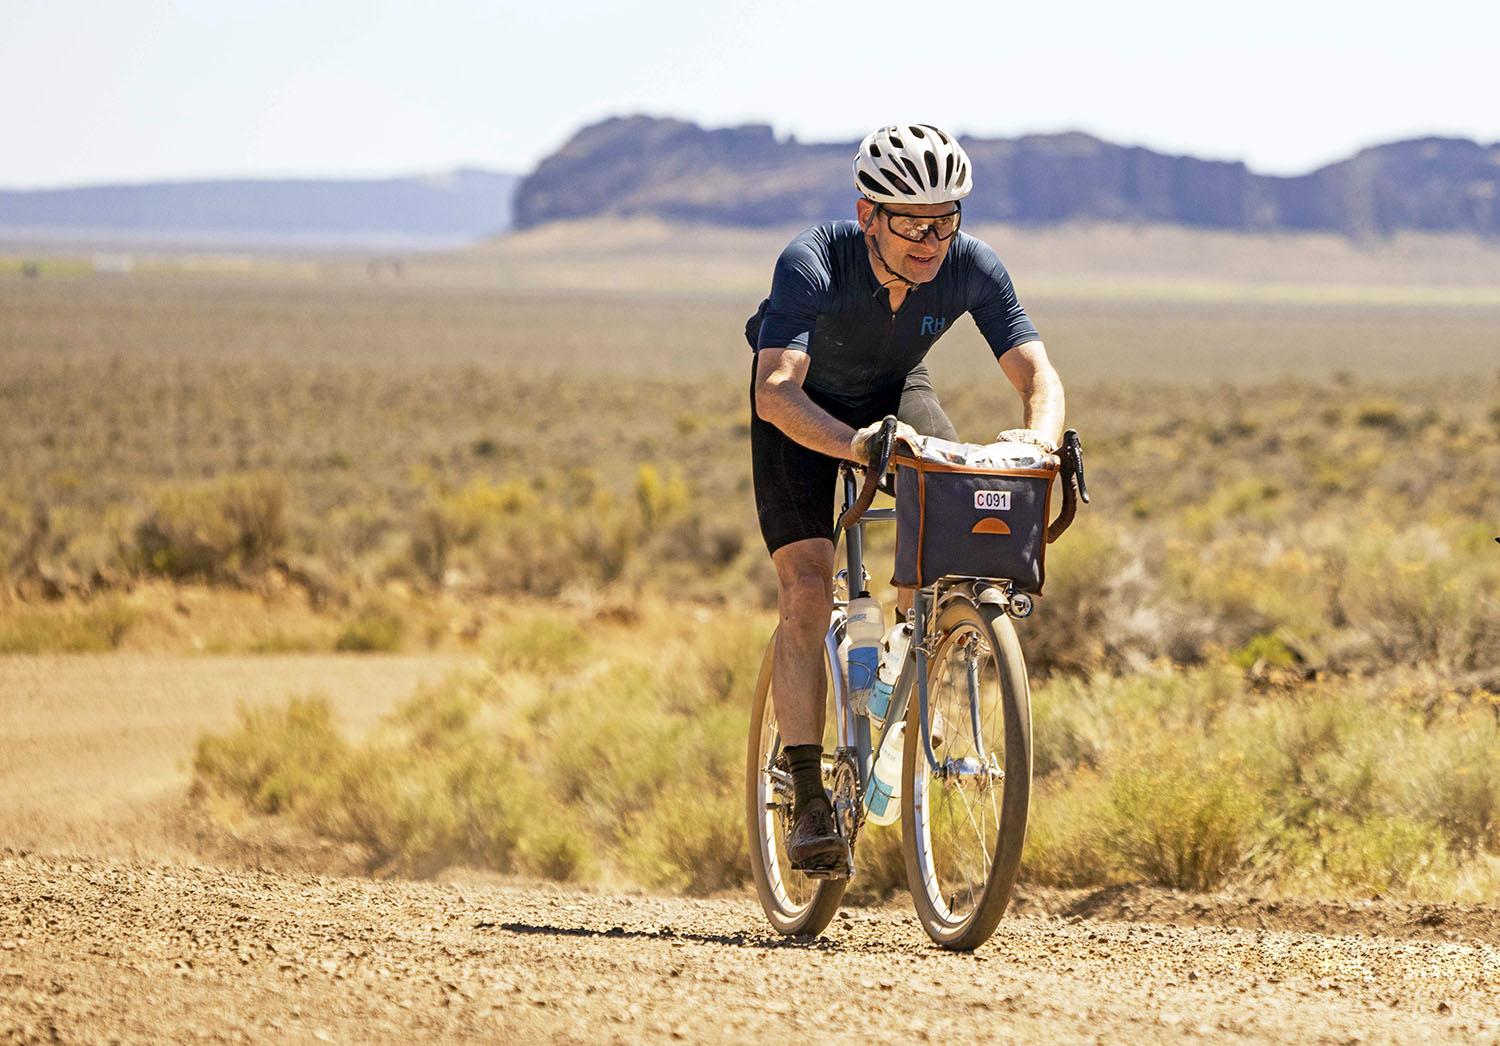
The bike I rode in the OCVA was built for the Oregon Outback (above), where the previous FKT had been set by one of Portland’s fastest racers. After that, I rode the bike in Unbound XL, the 350-mile race across the Flint Hills of Kansas. The XL is the unofficial world championships of long-distance gravel racing. THe race attracts the fastest riders from the world over. I’m proud that both Mark (on a similar bike, see below) and I placed in the top-10 of all riders over 40 years old.
In those settings, love alone isn’t going to cut it. I need the fastest bike I can find, and for unsupported long-distance rides of 24-50 hours, I can’t think of a faster bike than this. That may come as a surprise if you’re following the mainstream cycling media. To explain the science behind this bike—and tell you how it works in practice—is the goal of this article.
At Rene Herse Cycles, we’ve got a history of thinking outside the box: Wide tires for road bikes? Narrow handlebars for aero? Compact cranks? Direct-mount rim brakes? All those things were far outside the mainstream when we first introduced or proposed them. Today the first three (wide tires, narrow bars, compact cranks) have made it into the Tour de France, while the fourth has only recently been superseded by disc brakes. It goes to show that careful science usually produces results that stand the test of time. It’s entirely possible that, in a few years, my bike will be less of an outlier than it is now.
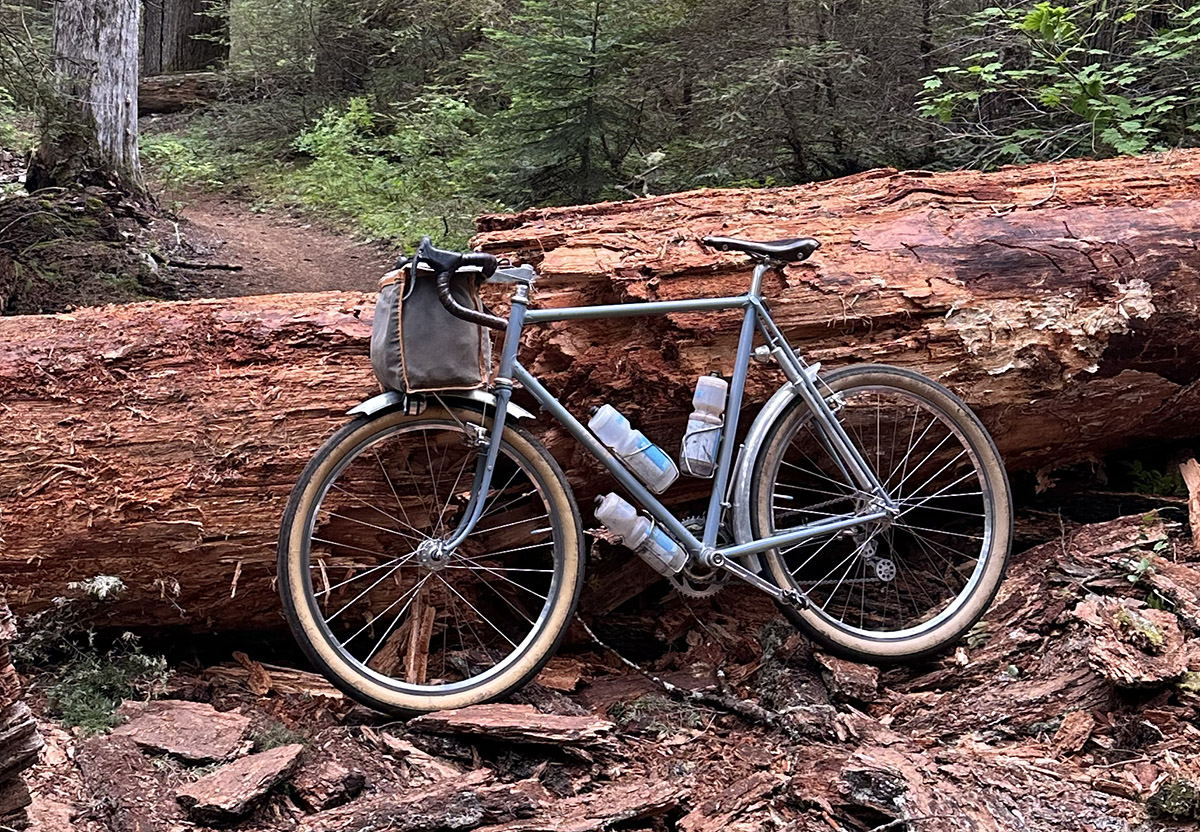
The road bikes in the Tour de France tend to look alike, but there’s no agreement (yet) on how to build the perfect bike for rides that include pavement and gravel, that involve riding at night, and that require carrying food and clothes for an unsupported adventure. There’s a simple reason for this: A lot of people are spending a lot of time and money optimizing bikes for Tour de France stages, but I can’t think of anybody else who has put a bikepacking bike into the wind tunnel to determine the most aero luggage solution. Or who has spent countless hours and made dozens of prototypes to optimize the location of headlights so they cast the best beam for fast descending at night. During long rides, things like these make a bigger difference than aero-shaped headset spacers.
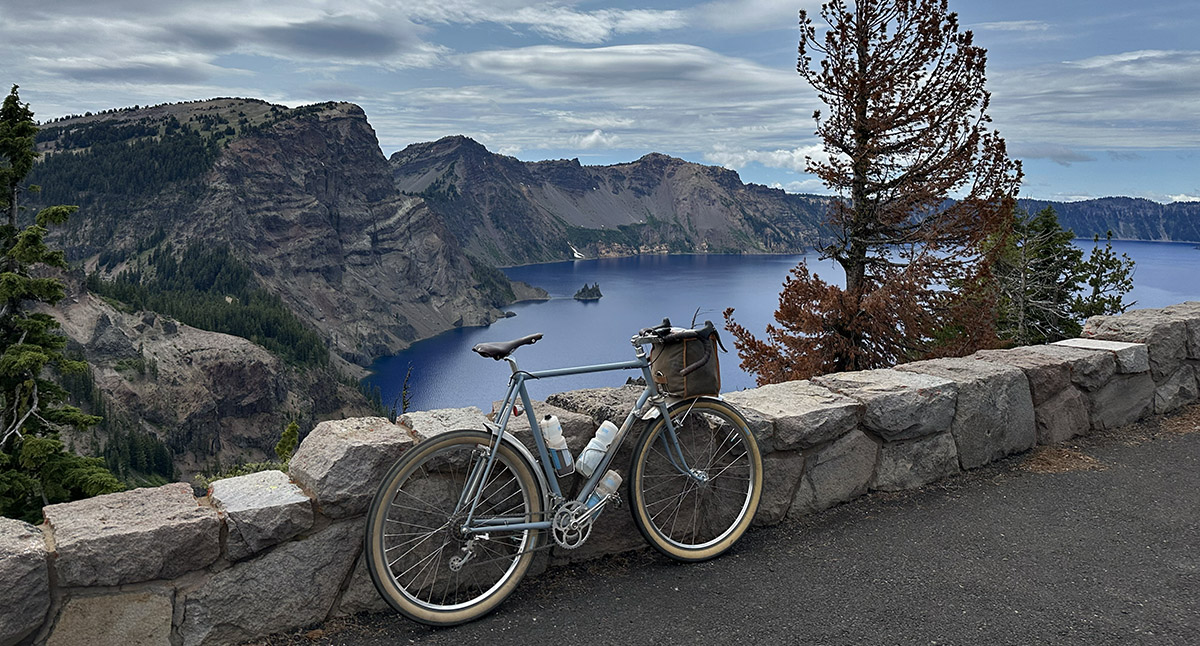
It’s not just about speed. What makes this bike fast also made my 41-hour ride more fun. We all know that comfort = speed, because vibrations aren’t just uncomfortable, they also slow us down. They also make riding less fun. Conversely, riding a bike that breathes with the surface rather than crashes into obstacles is one of the greatest feelings I know. The ‘love’ helps, too: Analog shifting keeps me engaged and alert during the long ride, which otherwise might get a little boring at times. (The beautiful scenery helps, too.) Looking back, the OCVA 400 was thoroughly enjoyable, and time passed quickly during the ride.
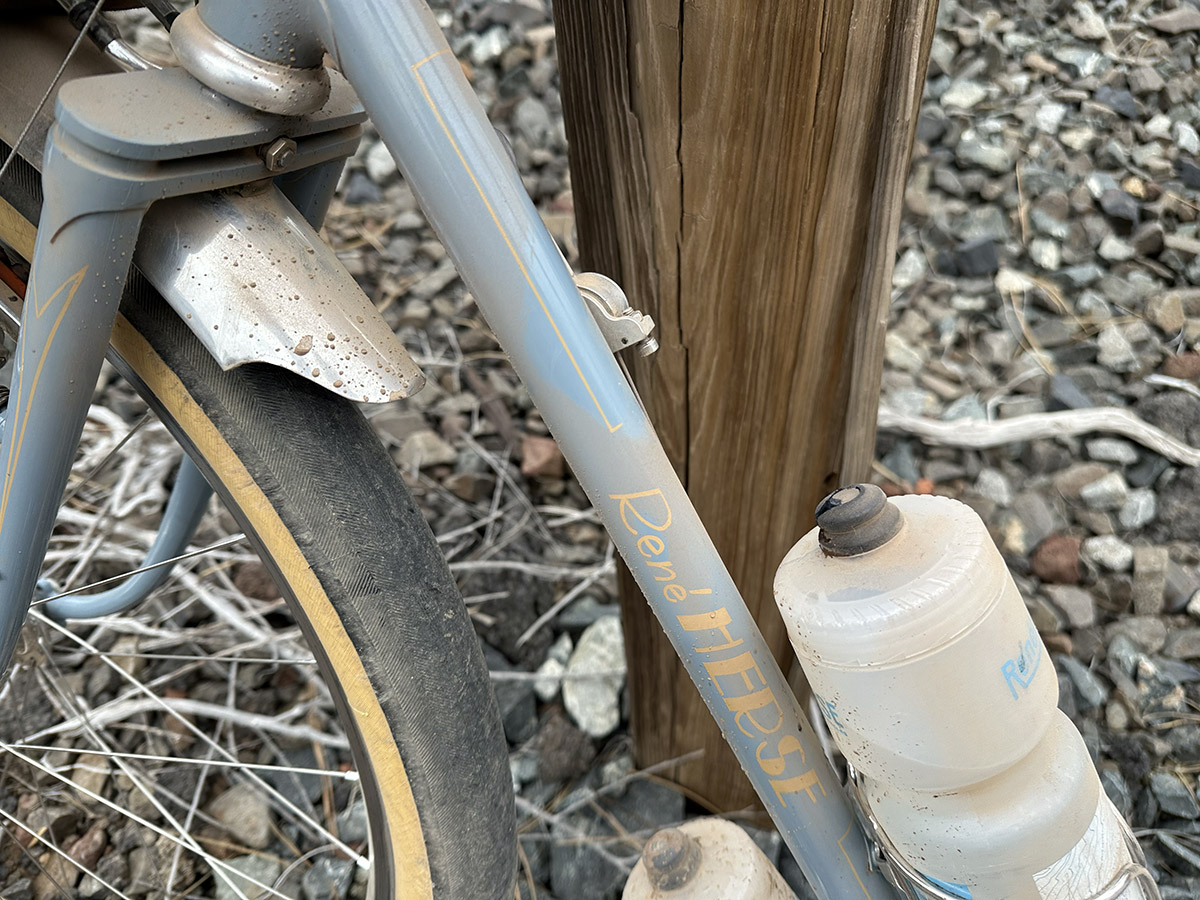
Here are some features that define the performance of the bike I rode in the OCVA 400. The photos show the bike on the road and at the finish of the long ride, still covered in the dust of those 419 miles (675 km). I firmly believe that great bikes exist to be ridden. In my eyes, the patina of use makes them even more beautiful.
Steel vs Carbon
How can a round-tubed steel frame compete with wind-tunnel-optimized carbon? There’s no doubt that a steel frame is heavier than a carbon frame. But that’s looking at the frame alone, rather than the complete bike.
Making a bike like this from carbon would be possible, of course. But it would require making new molds, and that’s only feasible if you make a large production run, not for a one-off or small series. Steel is infinitely customizable, which means that luggage, lights and other parts can be integrated from the get-go, rather than added after the bike is complete. That leads to significant weight savings with things like attachments for lights and racks. There are no clamps or adjustable brackets on this bike, and all the bolts are short.
Once it’s equipped with everything I need for riding day and night with minimal stops, my bike weighs less than most carbon bikes that line up for similar events. Including bag, lights, pedals, pump, bottle cages—ready to go—this bike weighs just 10.5 kg (23.2 lb). In the age of 6.8 kg road bikes, that may not seem particularly light, but it’s actually less than a Tour Divide-winning bikepacking bike weighs before adding lights and bags.
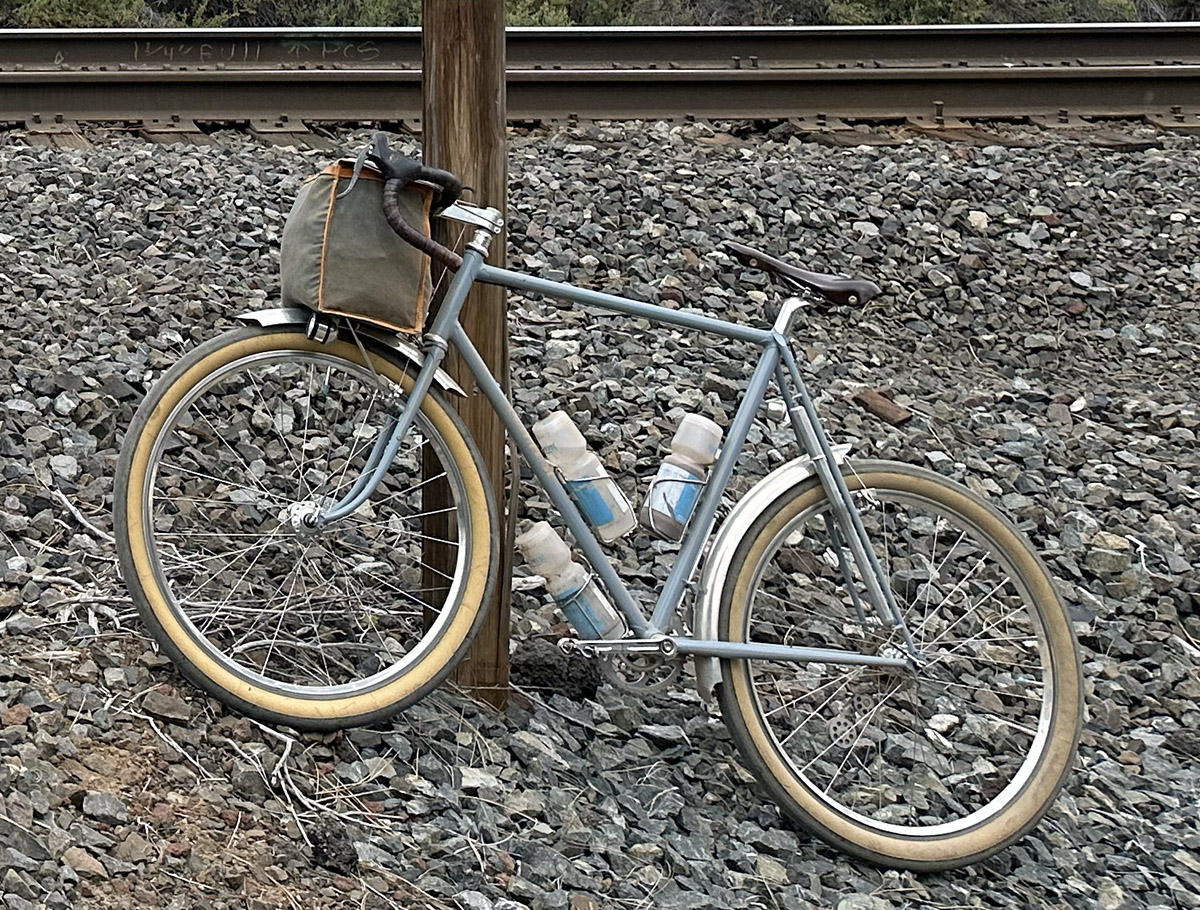
Some things on this bike would be hard to do in carbon: The slender steel fork blades provide suspension. There isn’t a lot of travel, but enough to take the edge off bumps. Riding this bike feels very similar to a Lauf carbon fork or a Rockshox Rudy XPLR gravel fork—but the fork is significantly lighter.
I know that the verdict on suspension in gravel racing is still out. However, there’s significant evidence that the bodies of mere mortals are different from those of pro racers—and hence are affected differently by suspension losses. Our research suggests that suspension losses go up as riders get tired. That makes sense: As we fatigue, our ‘bodies of steel’ turn into, well, not quite jello, but you get the idea… So if the likes of Brennan Wertz and Jenna Rinehart prefer to ride Unbound on rigid forks, that doesn’t necessarily mean it’s the best choice for the rest of us. My on-the-road experience also suggests that an ultra-stiff front end rolls slower over bumpy terrain than one that breathes with the surface.
What about aero? Aren’t round frame tubes a big disadvantage compared to the shapes of modern carbon bikes? Only if you look at the bike alone. Once you add the rider, it’s the position on the bike, more than anything else, that makes a bike aero. That’s why aerobars are so effective. So why don’t I use them? I used to race in Washington’s cross-state races with aerobars—and they were fast! However, I was taking long stops because I needed to stretch and recover before getting back onto the bike. Here’s why: With aerobars, the rider’s elbows rest directly on the handlebars. All bumps and vibrations are transmitted directly to the rider’s shoulders. With standard bars, bent elbows provide suspension. Beyond that, the advantage of aerobars relies on a low and narrow setup, but that’s not really feasible for these long rides. I know that other long-distance riders love aerobars—it’s really a personal choice.
My Rene Herse is designed to be aero where it makes the most difference: high-speed descents. Strava says I hit 61.1 mph (98.3 km/h) during this year’s OCVA 400 ride. Now Strava speeds need to be taken with a grain of salt, but there’s no doubt that I hit big velocities on the descents. It may come as a surprise that I don’t pedal on steep downhills. Instead I tuck in the aero tuck.
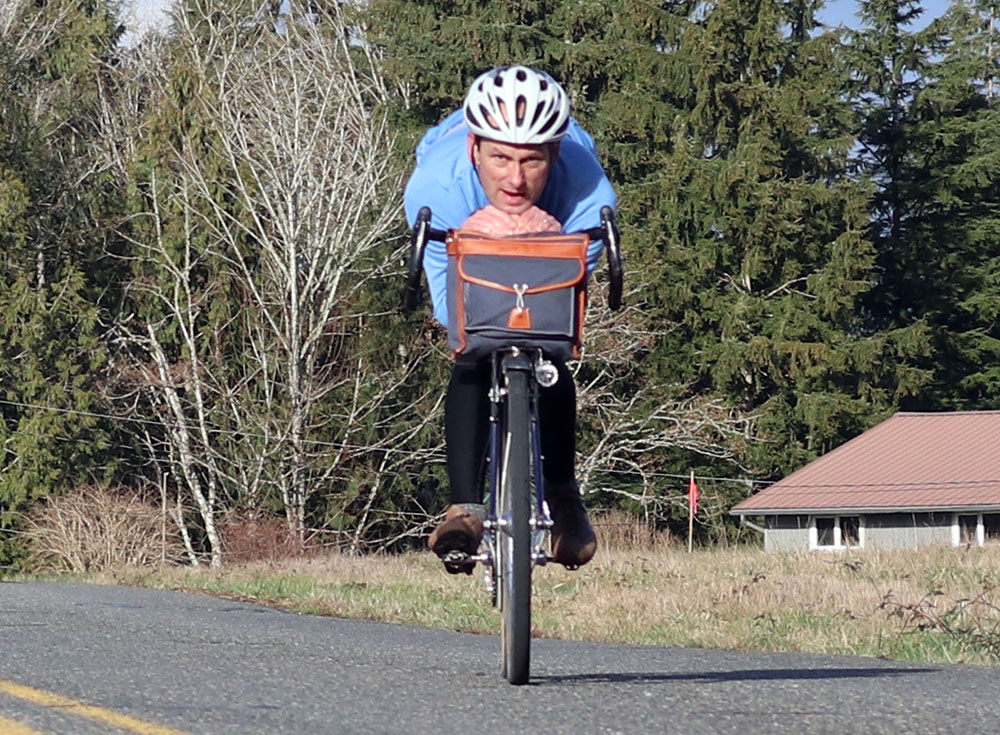
The photo above shows me in that position on my Paris-Brest-Paris bike. My riding position is the same on both bikes. (The PBP bike is optimized for pavement with 42 mm tires, centerpull brakes and full fenders.) The aero tuck works great on any bike, but there are a few additional tweaks that make it even more effective on my bikes. When I tuck, the handlebar bag works as a fairing that deflects the wind around my torso. (We’ve tested that in the wind tunnel. The boxy shape is actually more aero than a more rounded one we also tested.)
The tall frame allows my knees to touch each other below the top tube—making me about 2 inches (50 mm) narrower than on a modern carbon bike with a sloping frame, where the top tube is between my knees. The narrow Q factor of the cranks brings my feet closer together, too, which further reduces the frontal area. This also allows bringing my knees together without strain. (My lace-up shoes are also supposed to be more aero, but I chose them for the breathability of the real leather uppers. No more hot feet!)
What look like short fenders are actually fairings on top of the wheels. We’ve fine-tuned their shape in the wind tunnel, so that they cut drag significantly—more than a set of aero wheels. If you look at a Moto GP bike, you’ll see similar fenders. The UCI doesn’t allow fairings for road racing, but that’s not a concern for bikepacking FKTs or gravel races like Unbound XL.
My bikes have been using narrow handlebars since long before that became popular. It obviously reduces the frontal area. (The bars measure just 36 cm wide on the ramps.) The low-trail geometry requires only a light touch to guide the bike, so it works well with the narrow bars.
Take all this together, and you get a significant aero advantage. The aero tuck reduces my wind resistance by 33% on downhills, where it makes the biggest difference. On the flats, the bag still provides a little aero advantage, and the fairings over the wheels and the narrow bars remain effective as well.
Cantis vs Discs
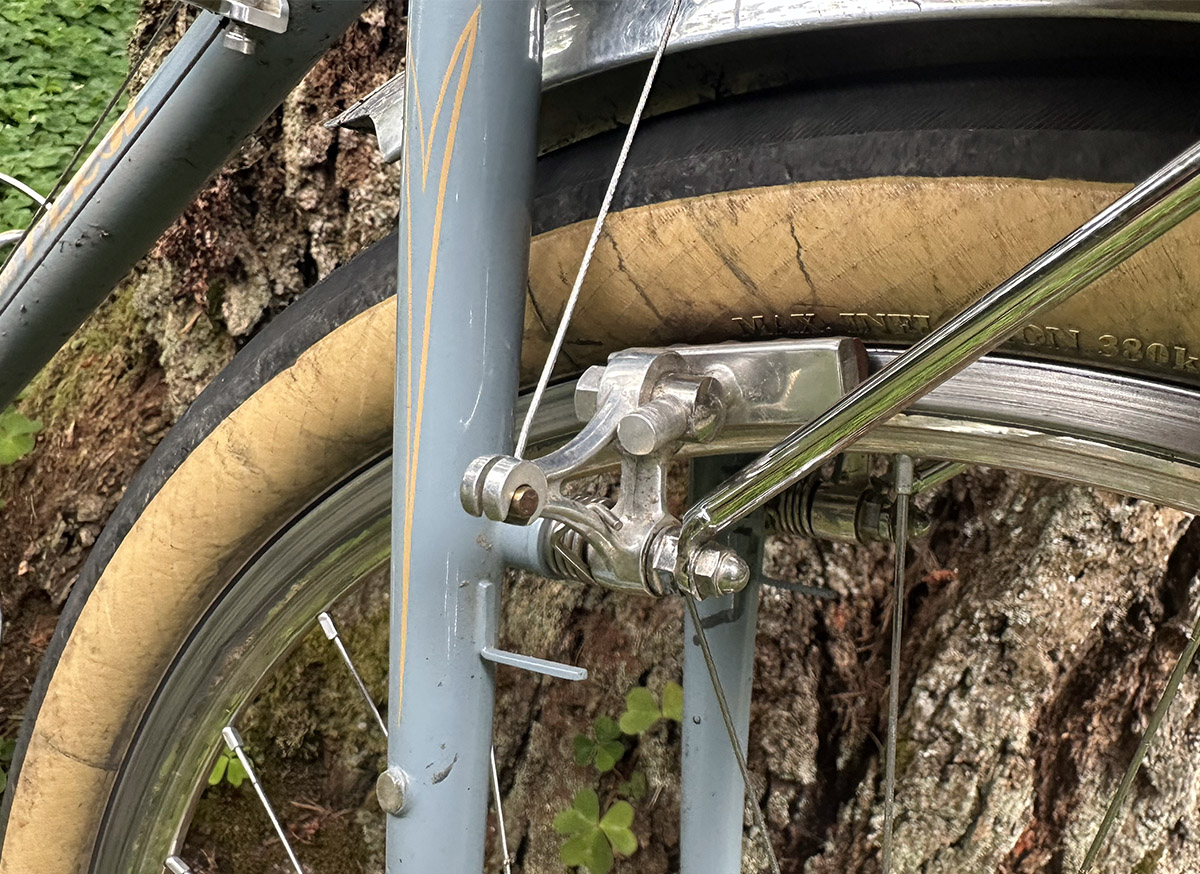
The cantilever brakes are also part of the system. There’s no doubt that modern disc brakes are powerful and work great. But they require stiff fork blades. In other words, the flexible fork blades on my bike work only with rim brakes. Otherwise, I’d have to use a Lauf fork or a telescopic suspension fork, and those add weight and make it difficult to integrate the rack and aero fender fairings.
Rim brakes are lighter than discs, and the Rene Herse cantis are the lightest you’ll find anywhere. Above you can also see how attaching the rack to the brake bosses with special double-ended bolts saves further weight. In case you wonder, the L-shaped tabs are a feature found on mid-century Rene Herse bikes. They prevent the brake arms from rotating into the spokes if brake or straddle cables fail. We put them on as a nod to history, not because it’s needed with modern cables. Speaking of love… (They weigh less than a gram each, so there’s no big penalty.)
Another plus of rim brakes is the direct connection from brake lever to rim and tire. This improves brake feel, so I can take the front wheel to the point where it’s almost locking up. With discs, the feedback from the tire/rim first has to travel through the spokes to the hub and disc rotor. From there, the hydraulic fluid further cushions the connection to the brake lever. The difference in feel is small, but it’s something I notice and appreciate when I’m descending for hours on loose gravel in the middle of the night.
Discs have one advantage: They work equally well with tires of all sizes. Rim brakes have to reach around the tire. With wide tires, rim brakes really need to be optimized in every detail to match the performance of discs. In other words, average disc brakes are far better than average rim brakes, but the best rim brakes are as good as the best discs, especially on gravel. (You can read more about that here.)
Quick Release vs Thru-Axle
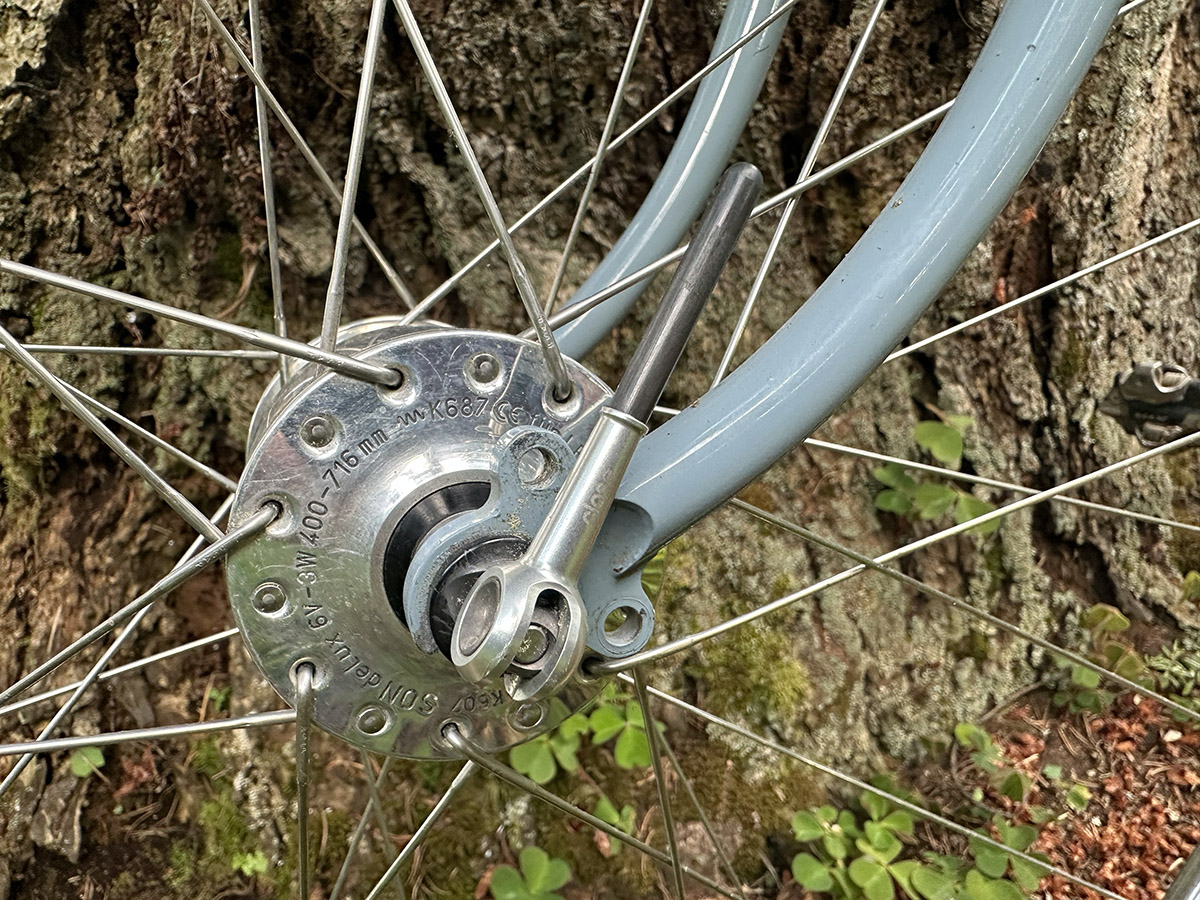
Disc brakes work best with thru-axles, for safety. And thru-axles work well with carbon forks. Carbon is light, but bulky, so there’s lots of material, and carbon works better with holes than with slots.
Steel is very strong, and that’s why it lends itself to slender shapes. As a result, steel forks for thru-axle hubs are unnecessarily heavy. Surrounding a 12 mm thru-axle with steel—compared to a 9 mm quick release axle—takes a lot of extra material.
The slots in Rene Herse dropouts are oriented so the forces of braking (front) and pedaling (rear) can’t move the wheels out of alignment. The quick releases only keep the wheels from falling out when the bike bounces over bumps—they don’t need to clamp the wheels ultra-tight. In that setting, titanium quick release skewers provide additional weight savings without compromising safety or reliability.
Analog vs Electronic Shifting
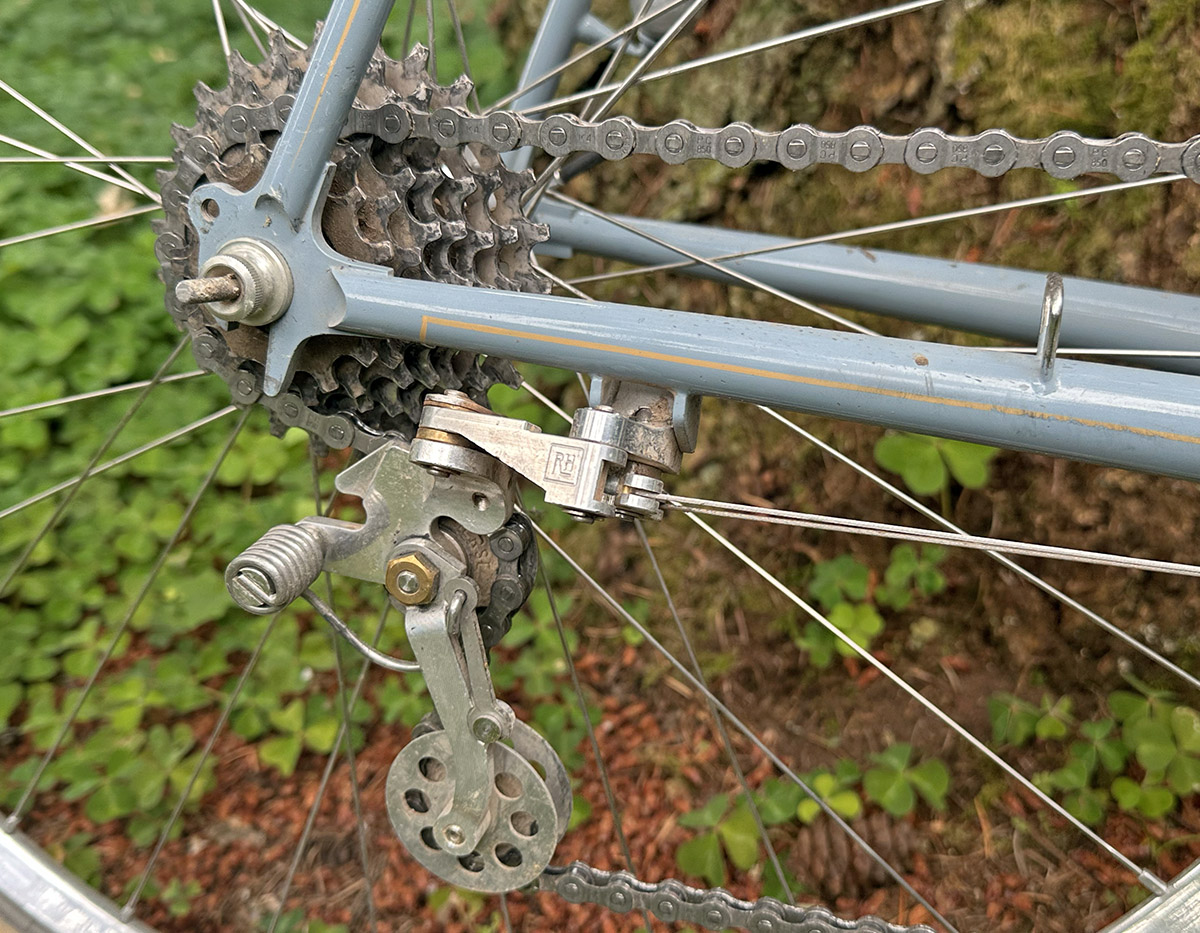
This is where the love comes in. I really enjoy the feel of the gears engaging when I move the lever. The desmodromic derailleur—with two cables and no return spring—is connected to the shift lever with absolutely no slack. Even the slightest movement of the shifter immediately moves the derailleur exactly the same amount. The result are lightning-fast and direct shifts. It doesn’t make me faster, but, for me, it’s more fun.
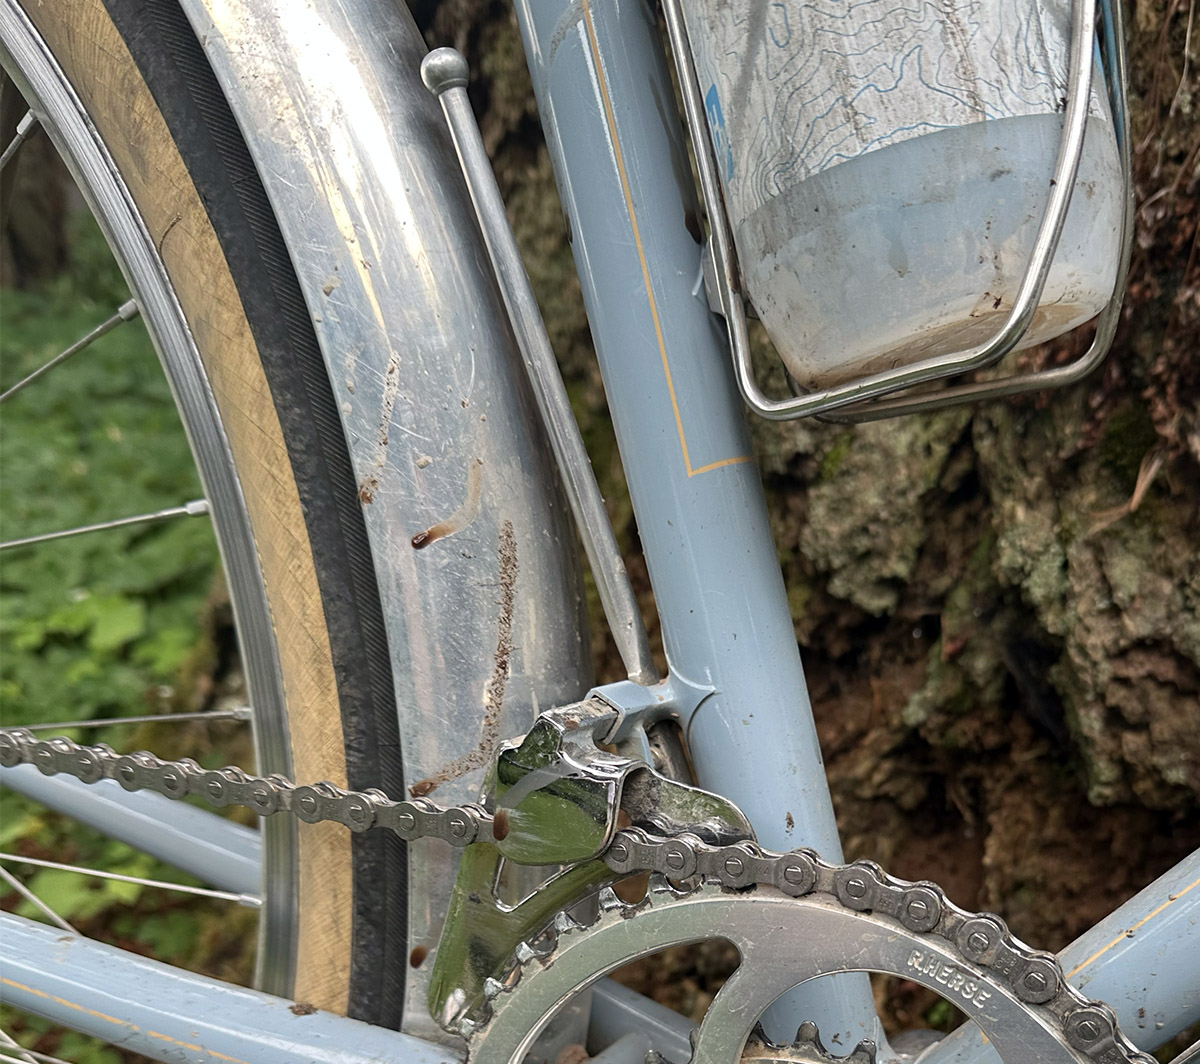
The front derailleur isn’t just superlight, it also shifts reliably over the huge 18-tooth gap between my chainrings. Shifting isn’t difficult—it’s not much different from reaching for a water bottle on the seat tube. And the ‘gymnastics’ of moving my body from time to time during front shifts help stave off aches from riding in the same position for too long. The little video below shows similar derailleurs in action on my first Rene Herse from 2011.
I won’t deny that electronic shifting also has advantages: The main one is effortless shifting while climbing out of the saddle. On the rough mountain bike trails that make up about 30 km (18 miles) of the OCVA 400 course, that would have saved a little time and effort.
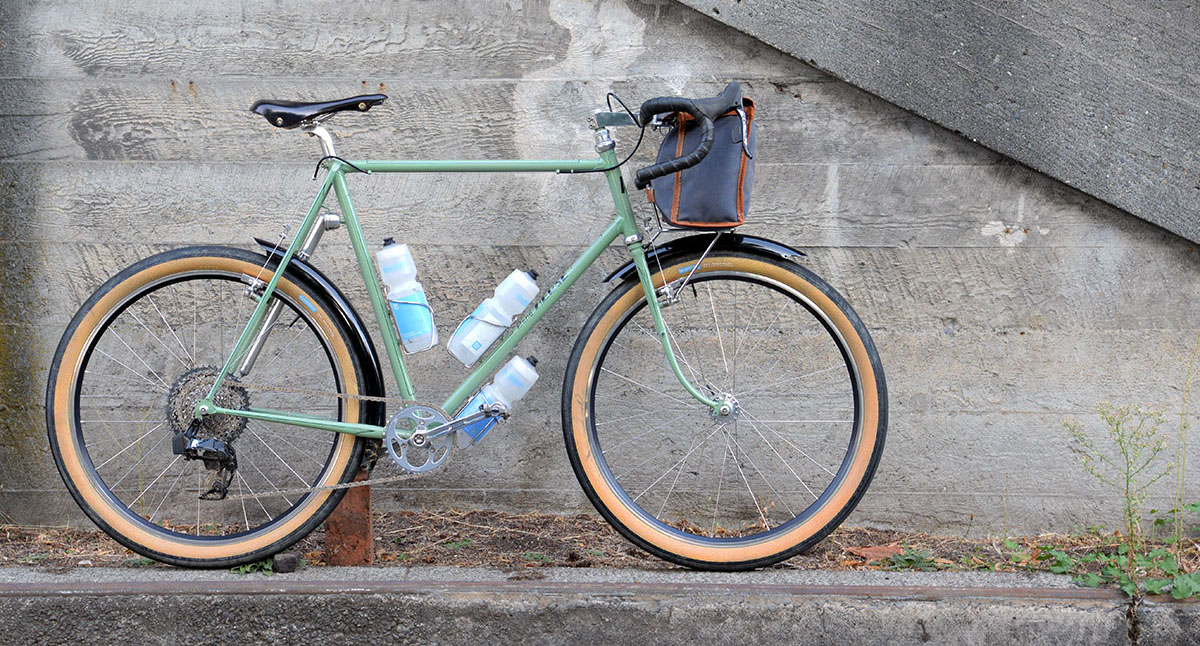
Why didn’t I ride the bike we built for Mark for the Unbound XL (above)? It’s an almost identical twin, except that it runs a SRAM XPLR derailleur. I’ve ridden this bike in the Arkansas High Country Race and the Dark Divide 300. I love riding it, too.
The decision to ride the Nivex-equipped bike came down to reliability. Both bikes are now almost 5 years old, and I wasn’t sure which of my eTap batteries is still able to hold a charge for 41 hours. That’s a beauty of analog bikes: They are reliable and easy to check. If the cables move freely and aren’t frayed, there’s little to go wrong during the adventure.
Most of the climbs in the OCVA 400 are road climbs—on gravel or pavement—where I tend to climb seated, and where there’s little difference in shifting performance between the Nivex and electronic shifting.
TPU vs Tubeless
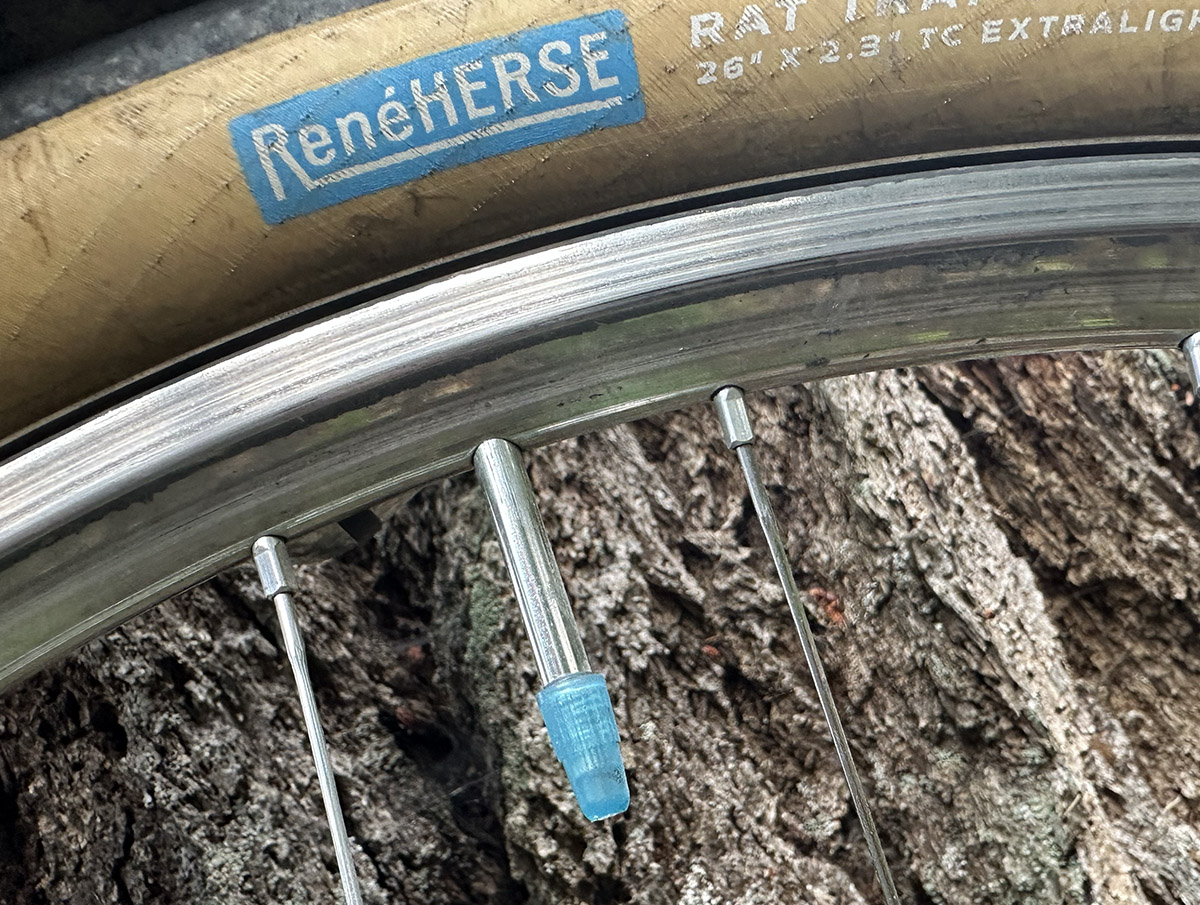
Tubeless is the obvious choice for most gravel racers: If you’re racing in a peloton and don’t even see the rocks before you hit them, you need the pinch-flat protection of tubeless. But for an ITT (Independent Time Trial), where I ride alone and can pick my line, TPU tubes are faster and lighter, since there’s no sealant inside the tires adding drag and weight. Running 54 mm tires also means I don’t need to worry much about pinch flats.
Even for gravel racing, unless you are at the pointy end, TPU tubes can work well. I’ve run them in Unbound XL without any problems.
Custom Gearing
A bike with a 7-speed freewheel may seem like a relic from the last century, but it works really well if you customize your gearing so you have only the gears you need. On most modern bikes, I rarely use smallest three of the 12 or 13 cogs.
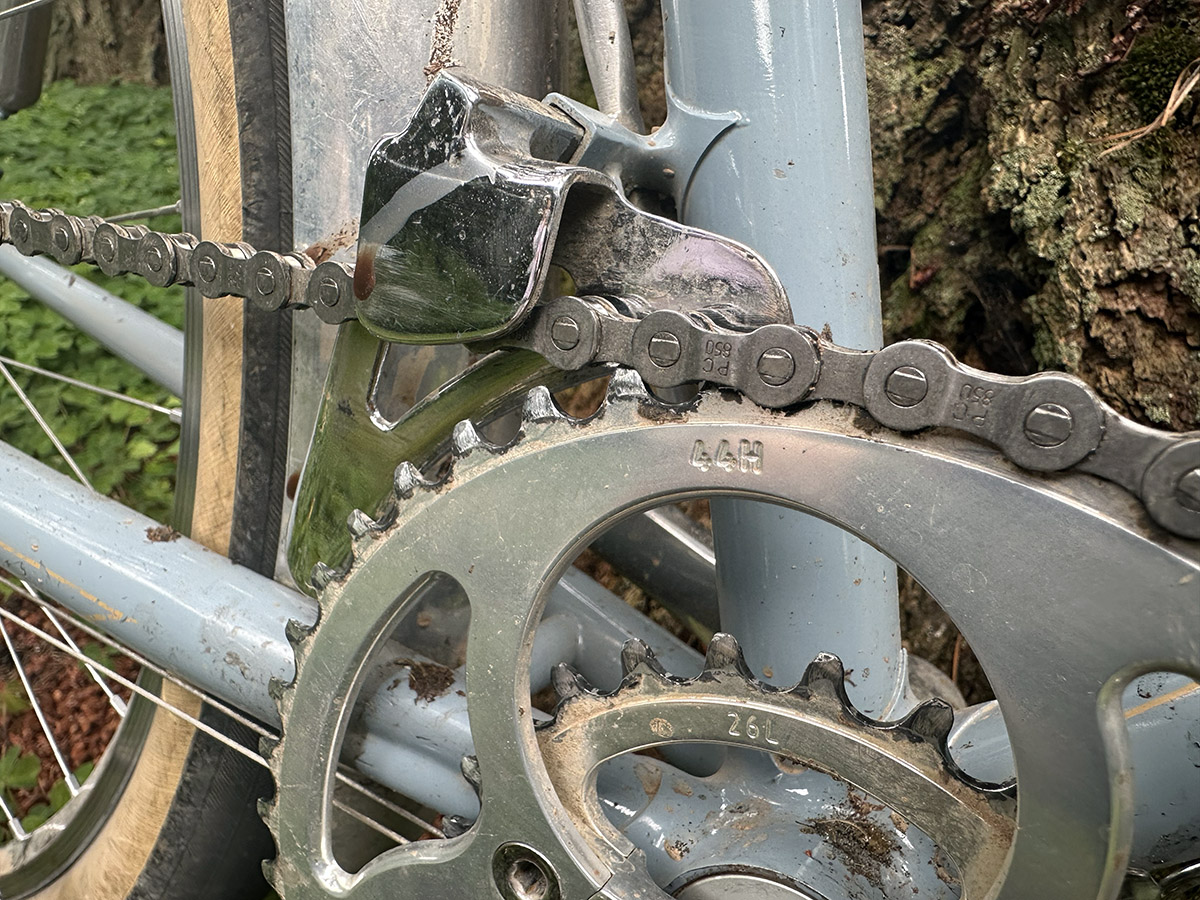
We make almost two dozen different chainrings for our Rene Herse cranks, and the ultra-small bolt-circle diameter allows combinations that aren’t possible with most other cranks. For the OCVA 400, I ran a 44×26 combo that would be hard to get with more mainstream cranks. I used the largest gear a few times on long, gentle downhills, and the smallest gear was (just) small enough for the steeper climbs.
The narrow Q factor of the cranks also means that the chainline is perfectly aligned front-to-rear, so every one of those 14 gears works and runs smoothly. (On most bikes today, the cranks sit further outward than is ideal, and ‘big-big’ gear combinations are best avoided.) And thanks to our Downshift Technology, I don’t have to worry about my chain falling off when I shift from the 44 to the 26 on bumpy terrain, even though that 18-tooth step is larger than anything you’ll find on mainstream cranks.
Comfort
For a 41-hour ride, it’s obviously essential to have a comfortable bike. With that much time in the saddle, any discomfort will make the rider slower and, just as importantly, less fun. Keeping stops short is essential for a fast time during unsupported rides, and a comfortable bike makes it easier (and more pleasant) to quickly get back onto the bike after a stop.
I think of comfort in three parts. The first is bike fit. For long distances, I want a bike that allows many different riding positions, from stretched out and low when I’m feeling strong and pedaling hard, to more upright when I’m ‘sitting up’ during a lull in the action. With a custom steel frame, it’s easy to dial in my position without compromises.
Second is reduction of vibrations and shocks. That is best done close to the source of those vibrations, where the ‘unsprung mass’ is low. Supple tires and flexible forks work best to improve comfort. Our testing has shown that cushioned handlebar tape and padded gloves aren’t as effective in reducing vibrations, because they have to deal with the entire front of the bike moving up and down.
Third is ergonomics of the contact points. For pro racers, what matters most are shoes and pedals: The pros push so hard on the pedals that their bodies are almost floating above the saddles, and their hands barely touch the bars. That’s why handlebar shapes aren’t a big topic these days…
I don’t have the power of a pro racer and I spend much more time on the bike. Pedals and shoes are important for me, too, but equally important is the shape of the handlebars. The Rene Herse Randonneur bars have a time-tested shape with generous curves. They allow riders to find the perfect position, where the bars fit nicely into the cups of their hands. That’s what the upsweep of the bars is for: It’s not to raise the bars, but to provide a convex shape that matches the concave cups of the rider’s hands.
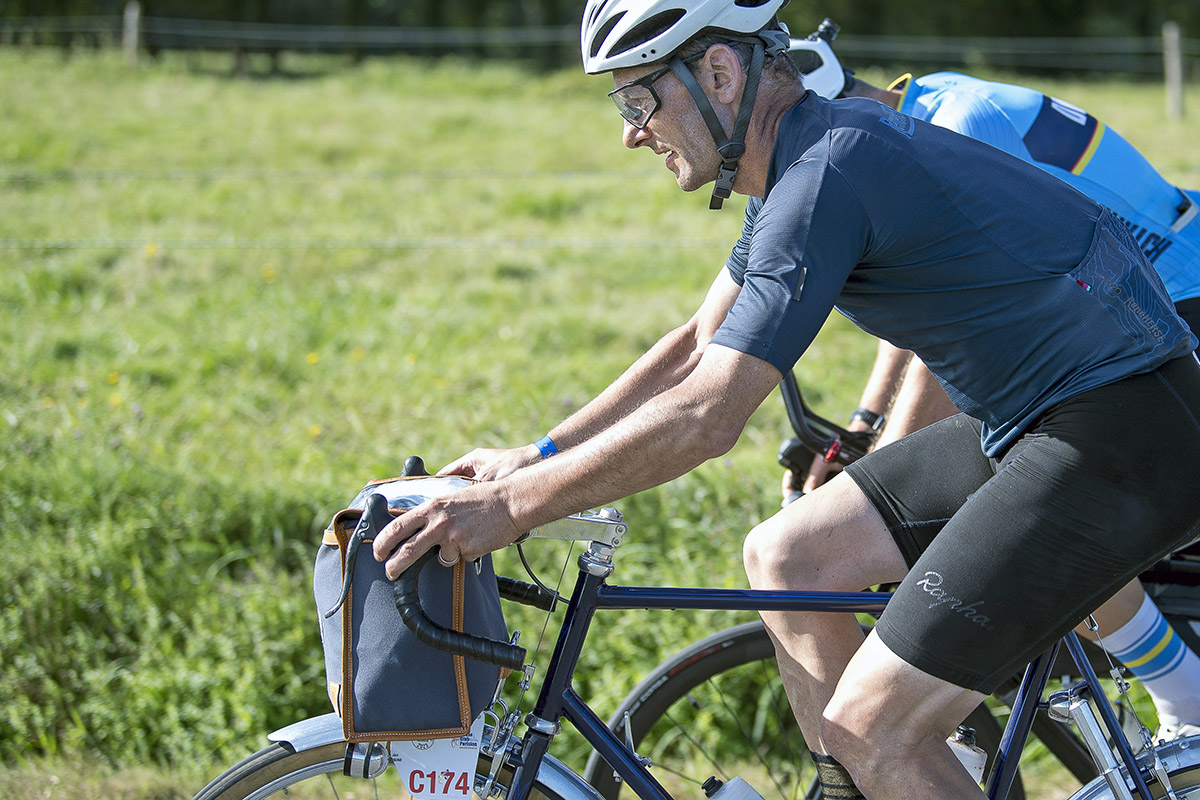
The bars also have a very long reach, which means I get many different positions, which helps with long-distance comfort. The photo above shows me riding these bars in the 1,200 km Paris-Brest-Paris. You’ve probably noticed that I don’t wear gloves—I didn’t during the OCVA 400, either. (Except full-finger gloves at night, to keep warm.) I find that with the right handlebars, gloves aren’t needed and can in fact cause chafing. Neither my hands nor my shoulders experienced any discomfort during or after the 41-hour ride.
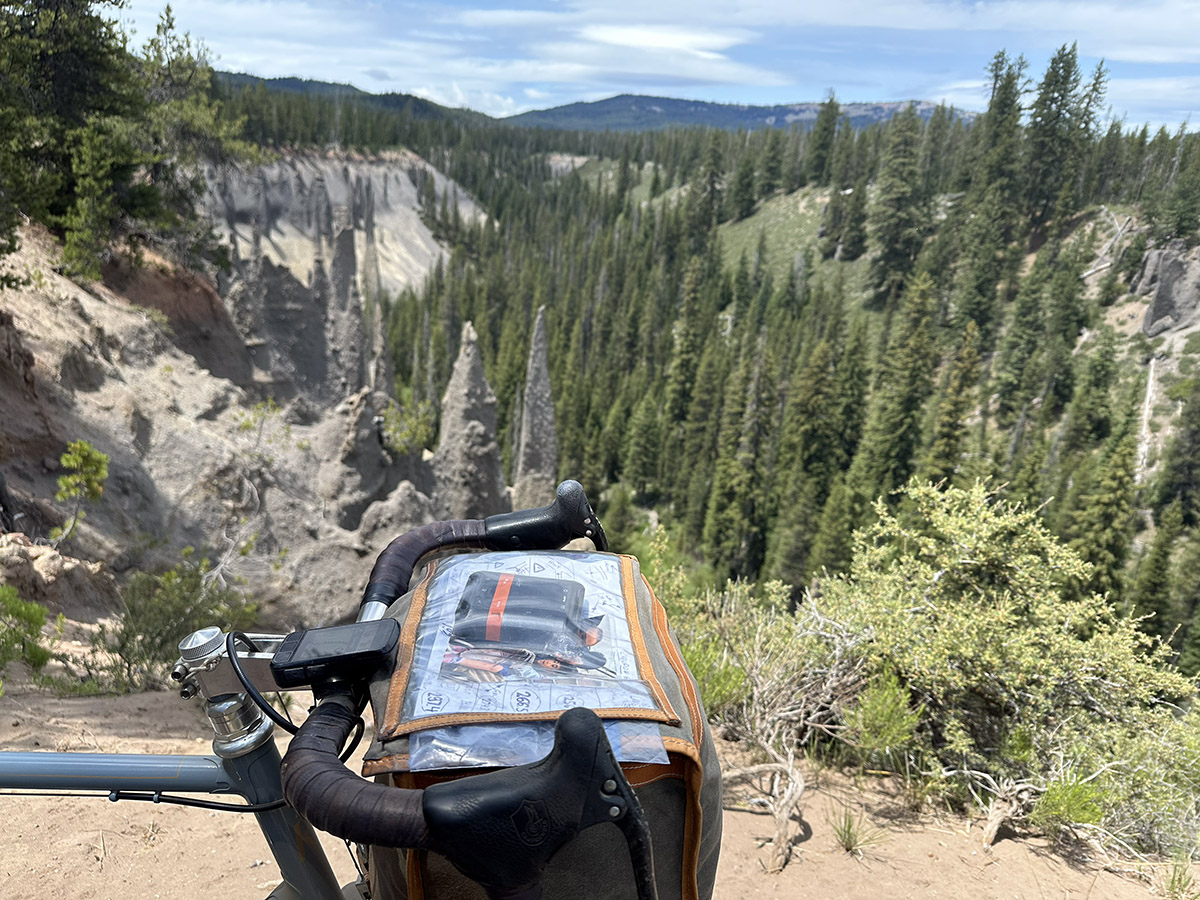
Luggage
We’ve seen above that the handlebar bag acts like a fairing when I descend, but that’s not the only reason I prefer it over other bag systems. The Rene Herse Ultralight Handlebar Bag weighs just 300 grams, yet it holds 15 liters—more than enough for the 10,000 kcal of food and all the clothing for daytime heat and almost-freezing night-time descents in the high Cascades. Even when the front rack (168 grams) is added, the system is far lighter than other bikepacking setups with comparable capacity. The rack doubles as a mount for the headlight and front fender-fairing, saving further weight.
I prefer to carry my load at the front. The bag is accessible while I ride, so I can eat and add or remove clothes without stopping. The bike is also easier to balance with a front load. (Bikes steer with the front wheel; the rear follows, with a lag and reduced amplitude.) Jumping over obstacles is also easier with a front load than with weight on the rear. The same is true for climbing out of the saddle, where a rear load feels like the ‘tail wagging the dog.’ The bag up front equalizes the weight distribution of my bike, so I can run the same tire pressure front and rear.
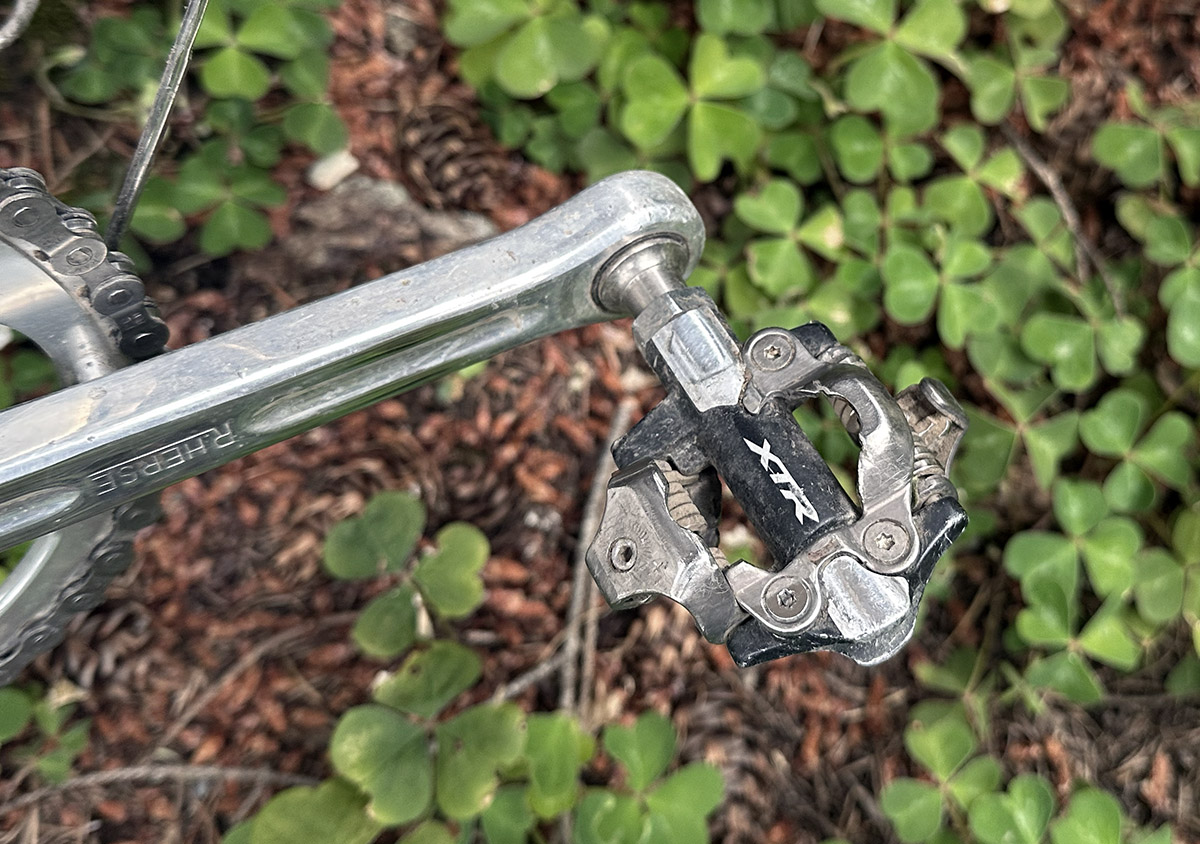
Modern where it counts
Contrary to what some may think—and despite the ‘love’—my bike isn’t ‘retro.’ I run carbon brake levers and XTR spd pedals—the same I’d run on a modern carbon bike, too.
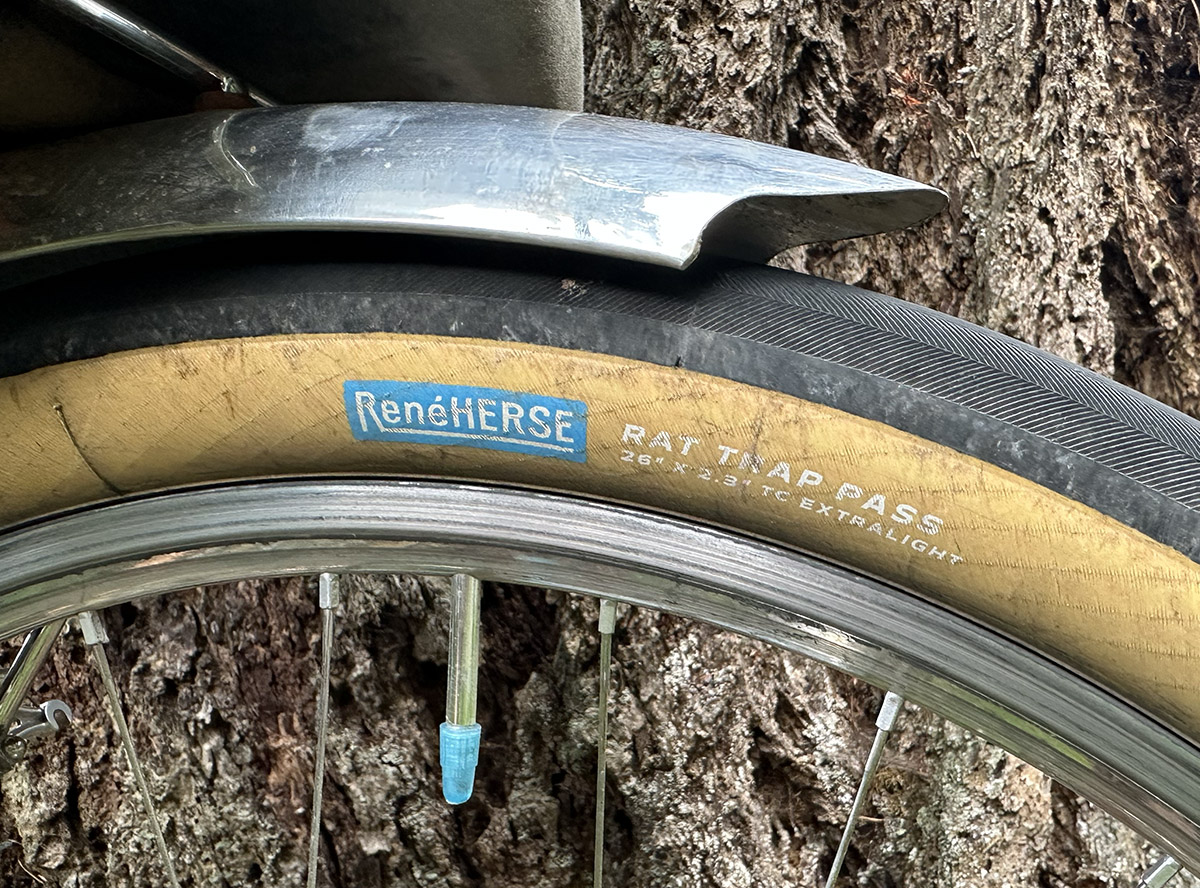
And let’s not forget: The most important part for a speedy, fun and comfortable ride is a set of supple tires. My Rat Trap Pass Extralights measure 54 mm wide. This set has already done the OCVA 400 twice now, without a single flat or other problem.
In fact, probably the most important specs of the bike are tires and pressure. For the OCVA 400, I ran my tires at 20 psi (1.4 bar). That’s 4 psi less than the Rene Herse Tire Pressure Calculator recommends. Why so low? I prioritized traction and speed on the soft and rough portions. Sandy volcanic ash makes up much of the road surfaces in the early parts of the ride. Lower pressure provides better floatation, allowing me to ride where the tracks of other riders showed them fishtailing and then walking. On rough gravel, the ultra-low pressure allows the bike to breathe with the surface rather than be jostled by the bumps.
There are downsides to such low pressure: The bike was running wide on the tight, twisty, paved descents on the outskirts of Portland. I didn’t have to slow, but I could feel that the tires were approaching the point where they’d collapse during hard cornering. And running pressures that low also stresses the tire casings. In the photo above, you can see how individual threads of the casing are starting to break. That’s happening after more than 1,000 miles (1,600 km) of fast riding on very rough terrain, so it’s a price worth paying to me. These compromises depend on each rider’s priorities. That’s why we suggest using the values of our Tire Pressure Calculator as a starting point for experimentation, not as values set in stone.
I love my Rene Herse, but I’m not suggesting this is the only way to build a bike for this kind of ride. There are many great gravel and adventure bikes out there, and there’s no single way to build a bike that’s fast, comfortable and fun on a variety of surfaces.
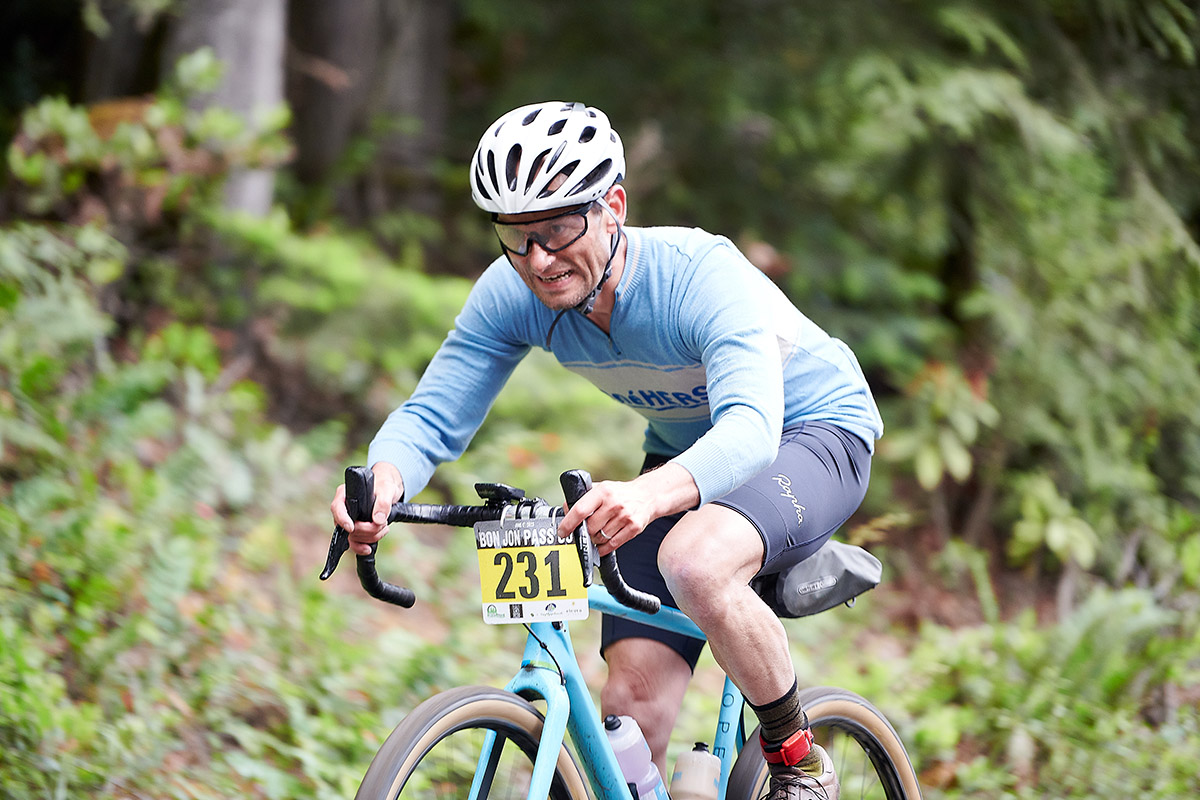
I also love my carbon OPEN (above) with its electronic drivetrain, and I’m always excited when we get to test some of the latest bikes for Bicycle Quarterly. My long-distance Rene Herse steel bike shows an alternative approach that works equally well. I hope this article has helped explain some of the thinking behind this bike, and also how everything works together as a system: Carbon bikes like the OPEN work best with large frame tubes, disc brakes and thru-axles. The steel René Herse is better suited to skinny tubing, rim brakes and quick releases. It’s not that one frame material, brake type, or axle configuration is better than the other—each is part of a different system.
Other parts can be mixed-and-matched. I’m running the same supple tires on my OPEN and my Rene Herse (in slightly different sizes). Both bikes are equipped with Rene Herse handlebars. The OPEN is intended for shorter, faster-paced rides, so it uses ‘Professional’ bars that have a long reach and generous curves for different positions, depending on how much power I’m putting out. My long-distance bike runs the ‘Randonneur’ bars with the added upsweep for that ultra-ergonomic and comfortable position behind the brake levers. Both bars are available in 25.4 and 31.8 mm diameters, so you can run them on carbon and metal bikes. Because great bikes can be made from many materials and in many ways.
Further Reading:
- FKT on Oregon Cascades Volcanic Arc 400
- The research about suspension losses in tired riders was published in Bicycle Quarterly 85.
- Aerodynamics of gravel bikes
- The science of how to make bicycles faster, more comfortable and more reliable is summarized in our book The All-Road Bike Revolution.