

Every Detail Matters: Light Mount
Recently, I talked to a famous racer who is planning an attempt for an FKT (Fastest Known Time) over a bikepacking route. We discussed timing: During the summer months, there was heat and smoke to contend with. “But if I wait until late September, the days are getting short,” worried my friend.
I reassured him that darkness need not be a major obstacle. I set my Oregon Outback FKT on the equinox, with just 12 hours of daylight. During this year’s FKT ride on the Oregon Cascade Volcanic Arc bikepacking route, it just happened that all big descents were at night. The same with the Arkansas High Country Race, where both Poteau Mountain and Flatside Pinnacle included some unforgettable high-speed gravel descents at night.
Then I remembered another friend whose photos from her FKT attempt on the Tour Divide showed her light at an odd angle, so it illuminated her handlebar bag. When I asked about it, she told me: “Yes, that light mount always rotated forward. At night, I had to rotate it back every couple of minutes. It was quite annoying. Somebody should make a better light mount.” I realized that my love of riding at night relies on a critical component: excellent lighting.
Lights on bicycles tend to be an afterthought—something you bolt or clamp onto your bike when you plan to ride at night, but not something that gets a lot of R&D. And yet, when I’m descending from the crest of the Cascade Mountains at 40+ mph (65+ km/h) in the middle of the night, my lights are far more important than ultra-fast shifting or short fenders that double as aerodynamic tire fairings. That’s why, at Rene Herse Cycles, we give details like these equal importance to everything else. Because everything matters. Here’s the story of how we perfected our lights over years of riding at night.
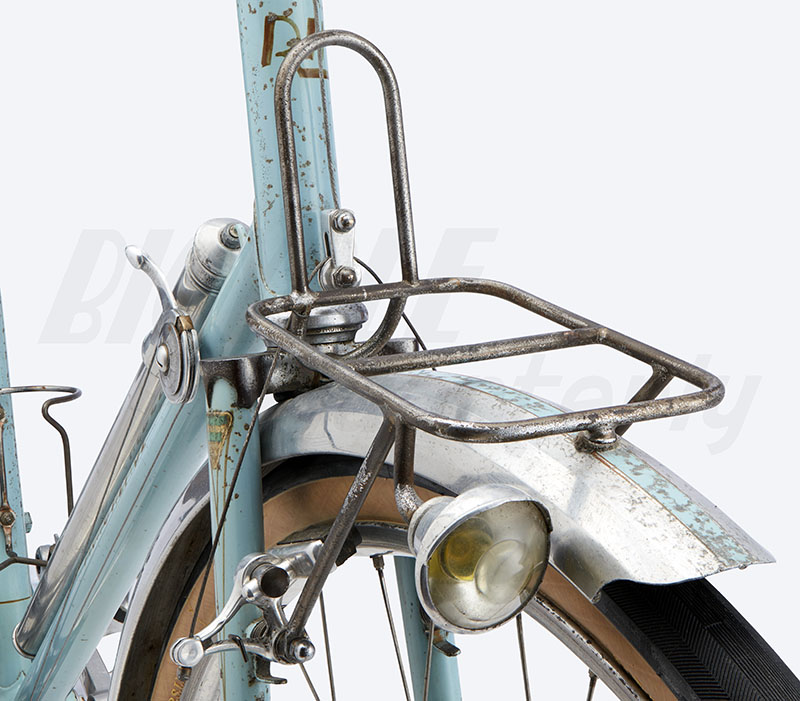
My first big event that included all-night riding was Paris-Brest-Paris, when I just out of college. I figured the Europeans, with their culture of urban cycling, knew about lights. So I bought a German light mount for the fork crown—the same model that was used on millions of German city bikes. I mounted a sidewall generator that powered a halogen headlight. I bolted on two battery-powered taillights, and I was ready to ride 1,200 kilometers over the backroads of France—or so I thought.
That front light mount may have worked well on all those city bikes, but it wasn’t up to 1200 km of spirited riding. Just before Loudéac on the return leg, after 800 km (500 miles), it broke off. The vibrations of fast riding on rough pavement had fatigued it in just a day-and-a-half.
Looking at the damage, I saw an extra hole in the light mount and realized I could bolt the broken-off mount to the dropout with the screw that also attaches the fender stay. Then I bent the mount until the light was oriented correctly. I continued my ride into the warm night.
To my surprise, the lighting was much better than before: Potholes and undulations showed up as shadows in my beam. I realized that mounting the light low creates a more 3-dimensional vision. I also discovered that I really enjoy riding at night.
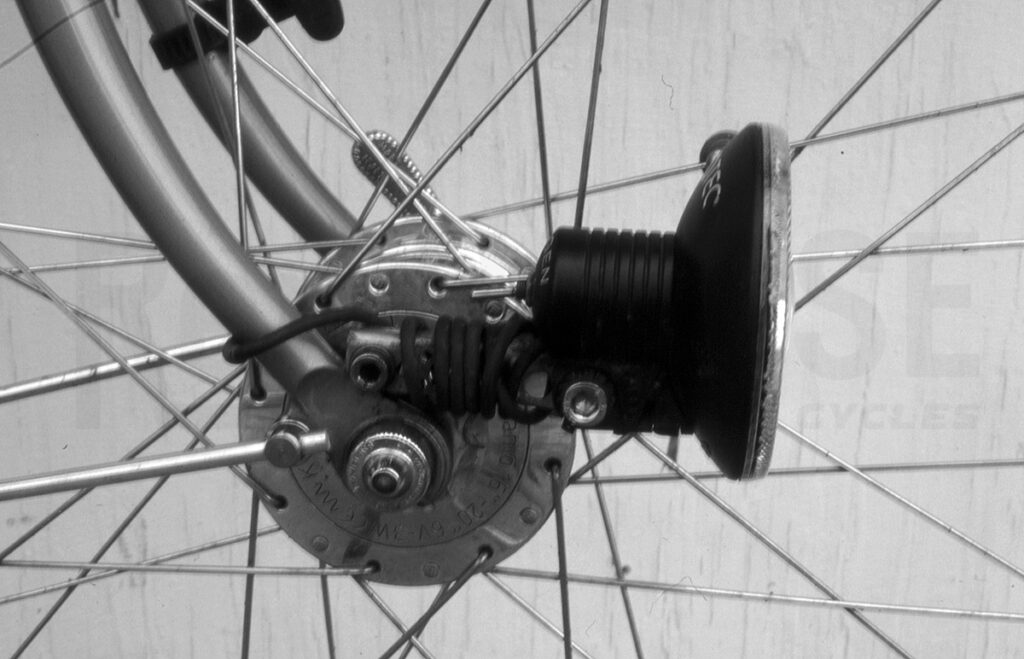
After returning to Seattle, I bought a SON generator hub and made a stronger, nicer version of that light mount on the front dropout. In fact, this mount started a trend of mounting lights on the front dropout. Nitto even offered a mount that threaded onto the end of the quick release skewer.
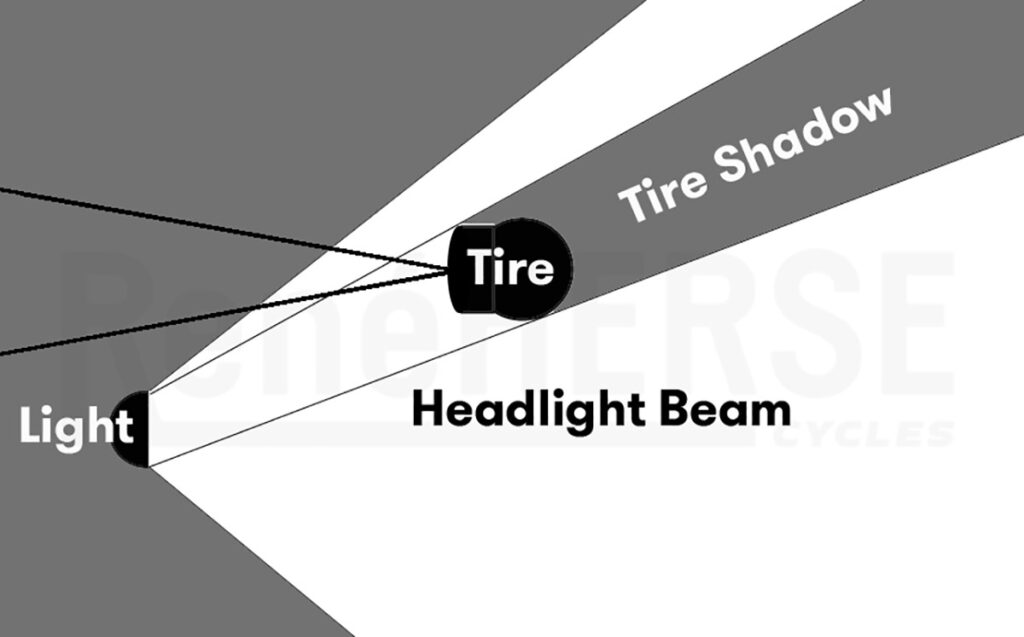
All was well until I started exploring the backroads of the Cascade Mountains with their twisty descents. My front tire cast a shadow to the left (above). Every time the road turned left, I found myself heading into complete darkness. Mounting the light on the dropout wasn’t ideal after all.
By now I had discovered the randonneur bikes from the French constructeurs, which were specifically developed for rides like Paris-Brest-Paris. With decades of experience, the mid-century builders had already figured this out: Mounted underneath the front rack, the light is low enough for that 3D vision, yet the shadow cast by the front tire is not a problem. It’s off to the side, and the bike’s path is fully lit even in tight turns.
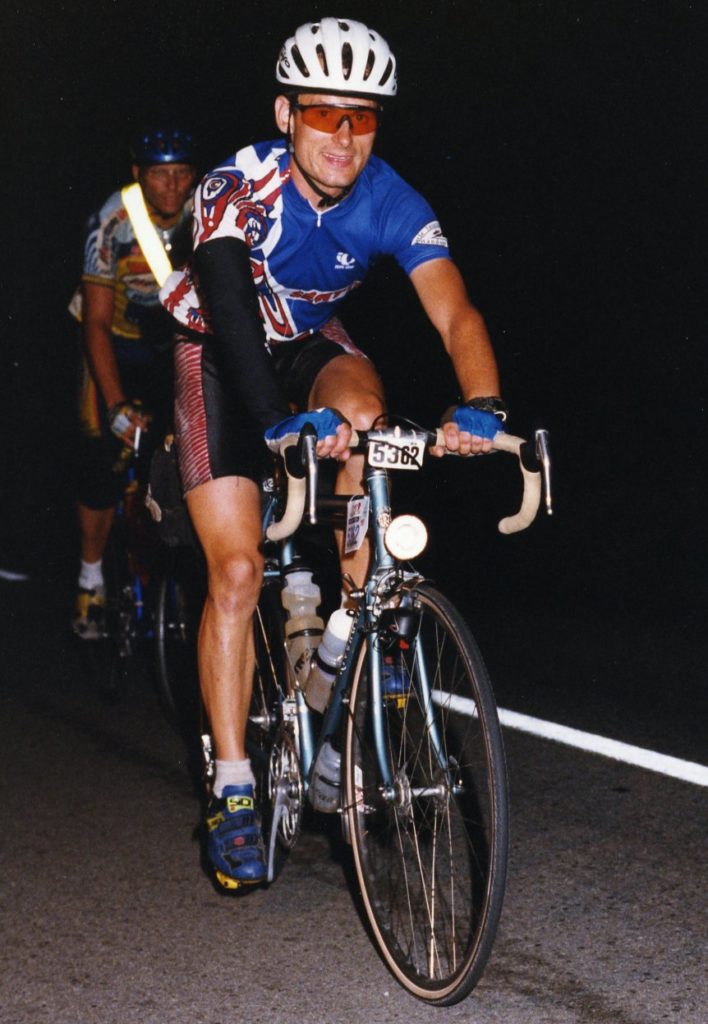
The classic Rene Herse tandem I rode in the next Paris-Brest-Paris with Jaye Haworth from Toronto had the light mounted like that. It was a great ride, and we got the trophy for the fastest mixed tandem that year. (Back then, the organizers still handed out trophies to the fastest riders.)
However, the night-time descents—much faster on a tandem than on a single—were a bit of a challenge with just a halogen light to illuminate the road. With the limited output of a halogen bulb, there was a choice: a wide, short beam or a long, narrow one. We chose a long, narrow beam, using SON’s excellent E6 light. On straight descents, we could see far ahead, but anytime there was a minor kink in the road, our narrow beam no longer illuminated the road surface, but only fields or trees.
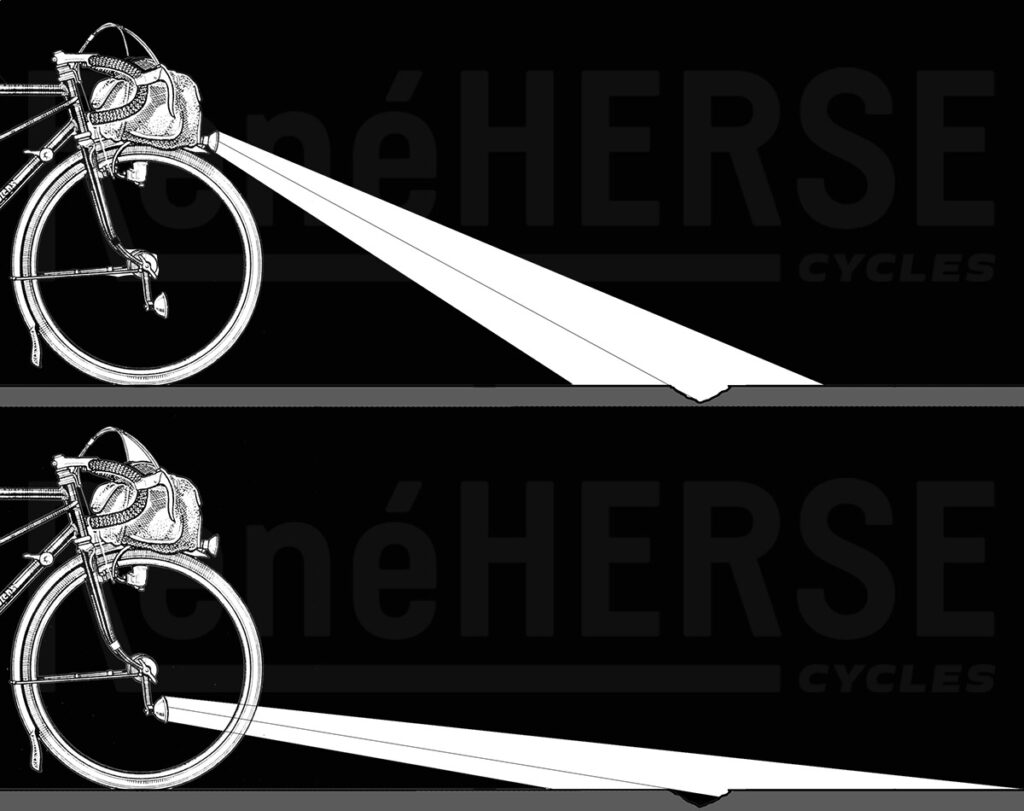
LED headlights revolutionized night-time riding. With ample light output, we finally got long and wide beams. However, more light also meant that the shape of the beam became more important than ever before. A layered beam, also used on car headlights, illuminates the road surface evenly. Round beams, as found on most bicycle lights, putt a bright spot right in front of the bike and make it difficult to see beyond this ‘curtain of light’ into the distance, where relatively little light reaches the road surface.
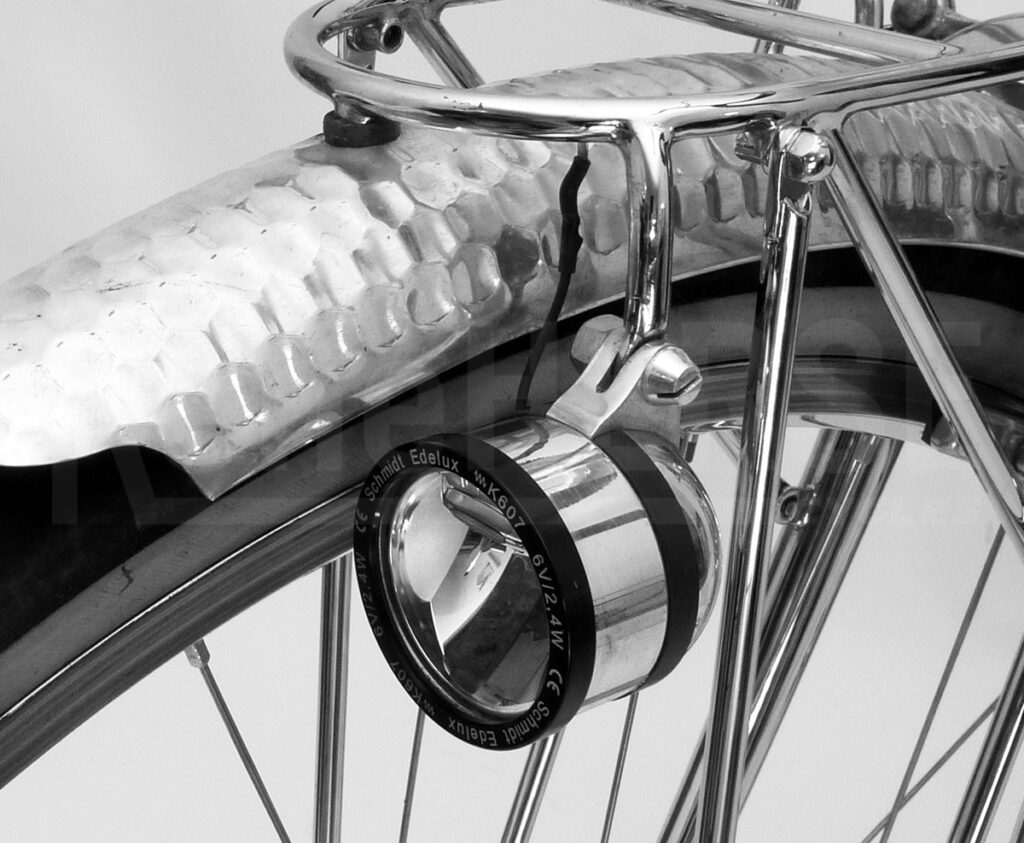
The new Edelux was excellent, but, to mount the light under the front rack, we needed a hanging version—something SON didn’t plan to offer. SON envisioned riders mounting their new light on the fork crown, German style… It’s not like we could just mount the light upside-down: A layered beam does not work when it’s inverted: It’ll illuminate mostly the sky, and not the road surface.
It took some arm twisting to get SON to make their Edelux light in a hanging version, but they finally did when we committed to buying the entire first production run. When the hanging Edelux finally became available as a Rene Herse exclusive, it proved so popular that it quickly became a part of the regular SON program.
That wasn’t the only adjustment we needed to make. The light had to be oriented with greater precision than before, because of the sharp cutoff at the top of the beam. Finding the perfect angle proved elusive: On mountain roads, we needed a higher beam, so we could see the road ahead even when going through dips in the road. On roads with traffic, the beam needed to be lower to avoid blinding oncoming cars (or bicycles). I guess we should have known: Cars have high and low beams, too.
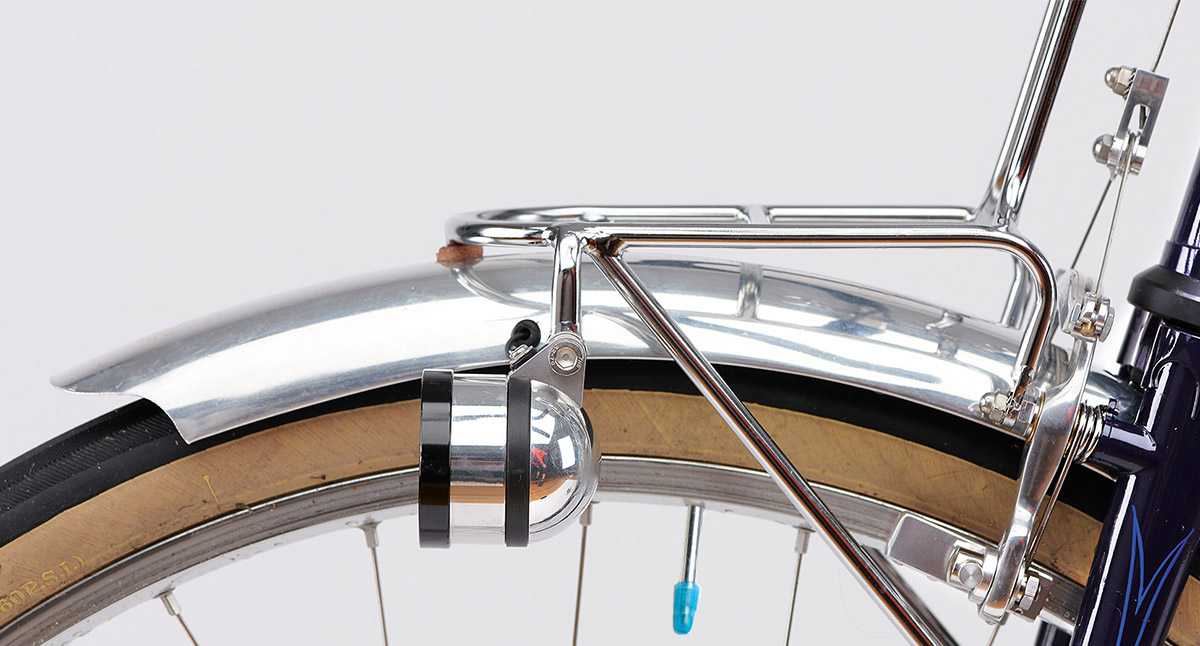
Rather than install two lights, I decided to make the angle of the light adjustable on the road. I modified my Edelux headlight by cutting a slot into the mount (above). The mounting tab on the rack goes into the slot. The bolt tightens on the two sides of the mount, so they clamp the rack tab. When the bolt is adjusted ‘just right,’ the light can be moved by hand, yet there is no risk of loosening the bolt or the nut (which both turn with the light). And the light won’t move on its own, no matter how rough the terrain. Now I could reach down and adjust the angle of the light while moving. (Riders may prefer to stop, to avoid getting their fingers caught in the spokes…)
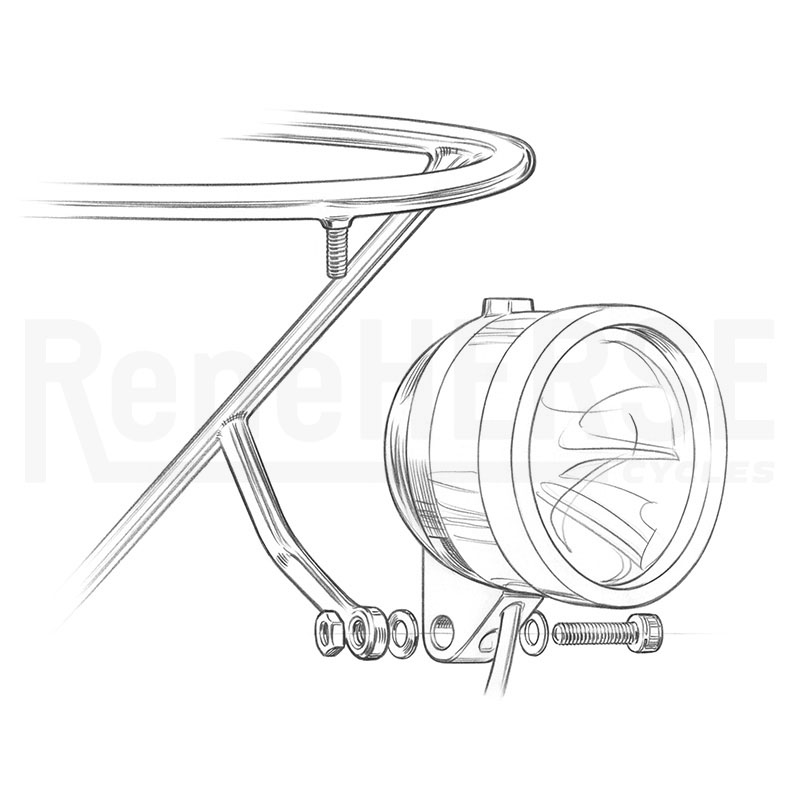
This system worked so well that we thought about a way to offer it to our customers. SON was not able to supply forked mounts, especially considering the small quantities we needed. Instead we developed a mounting bolt with a locknut that serves the same function: The light can be moved without loosening the bolt. This works with ‘standing’ lights as well. We’re also offering a separate light mount using this system.

In the meantime, we continued to perfect the position of the light. An early version gave a good beam, but the light tended to get covered in mud during rides on wet gravel. It was too close to the fender… With the next iteration, we changed the light’s position so it was not impacted by spray any longer.
After perfecting the light mounts of custom-built prototype racks, we’ve also added them to the racks in the Rene Herse program. Because we know that we’re not the only ones who want to descend mountain roads at night with confidence.
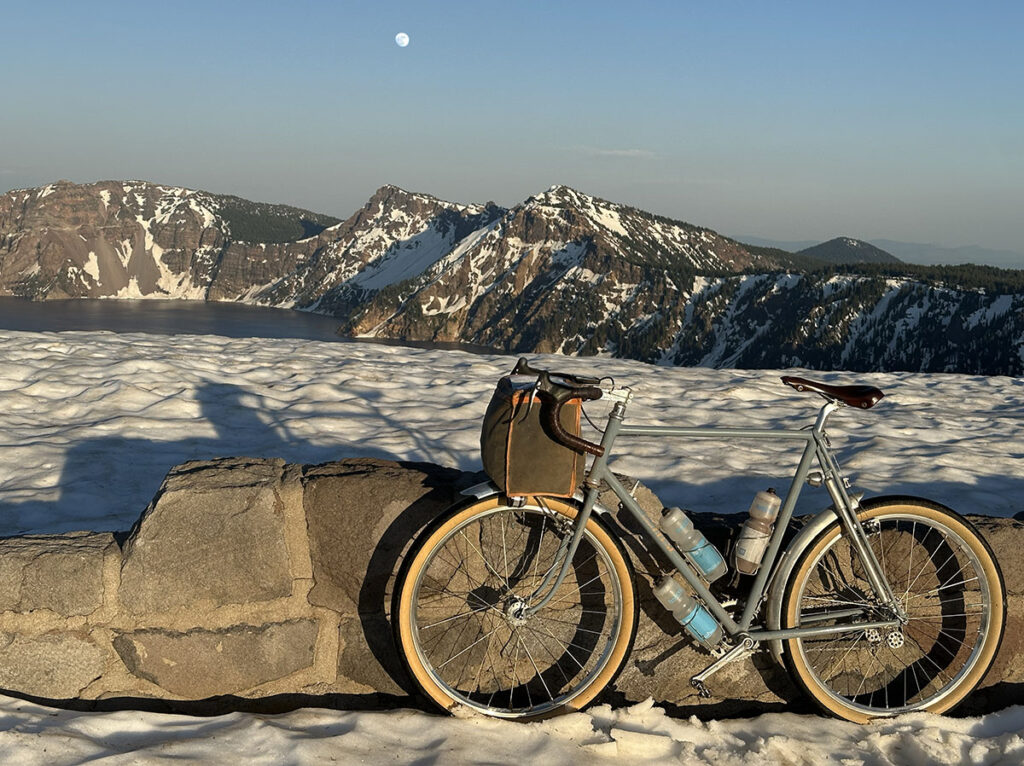
During the Oregon Cascades Volcanic Arc, I reached Crater Lake, at 7,700 feet (2,350 m) the highest point of this bikepacking route, at sunset. I spent the entire night descending and climbing the various mountain ranges that make up the Oregon Cascades. There were many challenges—snow, for example—but darkness wasn’t one of them. In fact, my light illuminated the road as well or better than daylight. Why better? Because the dappled light-and-shade of the sun shining through trees, beautiful as it is, can make it hard to see potholes. At night, they show up as shadows in the low-mounted beam of my headlight.
The light mount is just one example of how we do things at Rene Herse Cycles. Whether it’s our famous tires or less visible components: Every detail has gone through the same R&D process of optimization. Because every detail matters.
Further Reading:
- Lights in the Rene Herse program
- Rene Herse racks and light mounts
- FKT Ride on the Oregon Cascades Volcanic Arc route
