

A Better Way to Adjust Toe-In
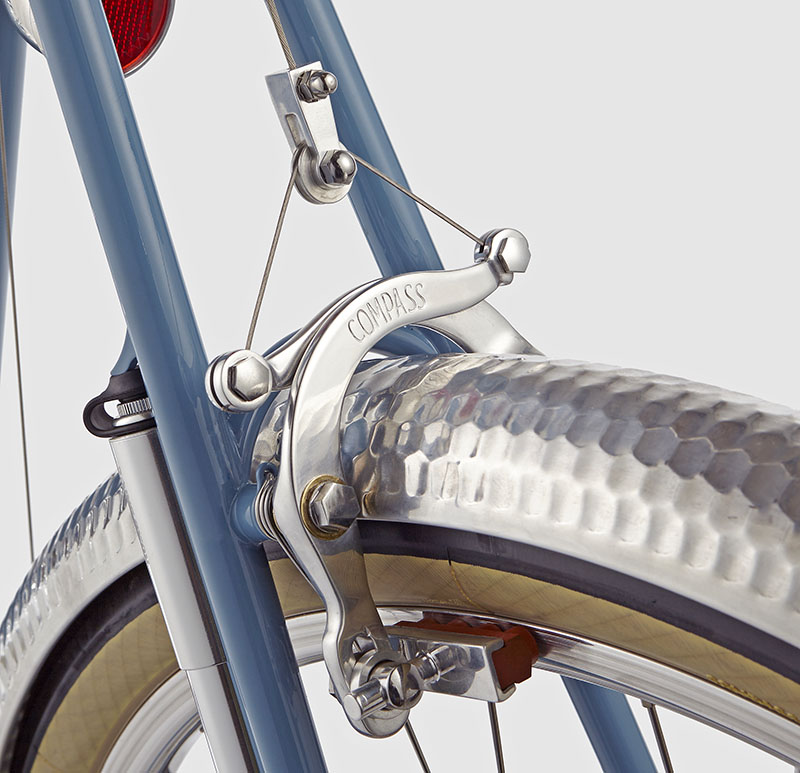
Compass centerpull brakes now come with special washers to adjust toe-in. These washers are easy to retrofit on older Compass and even classic Mafac brakes. With this system, you to adjust toe-in only once, when you initially set up the brakes, and then never worry about it again.

What is toe-in? It means setting up the brake pads so that the fronts are closer to the rim than the rears. This is important for cantilever brakes, because the fork blades twist when you brake, and the brake pads rotate in relation to the rim. With the right amount of toe-in, the pads will be parallel to the rim when you brake hard.
How much toe-in do you need? There are no firm values because it depends on how much your fork blades twist. It’s trial-and-error. Too much toe-in just makes your brakes work less effectively. Toe-out is worse: Your brakes don’t work well and they howl and squeal. When in doubt, go for a bit of extra toe-in rather than too little.
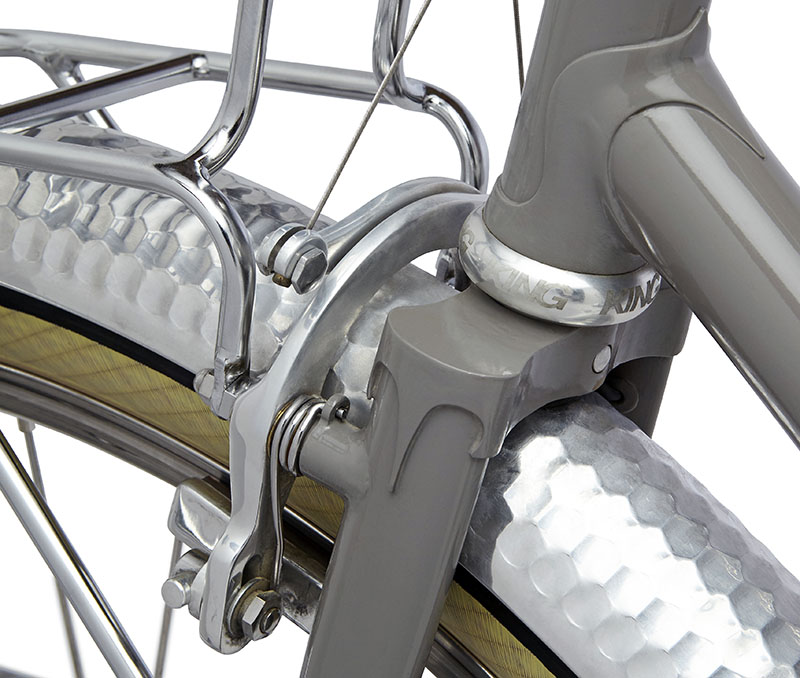
Centerpull brakes attach close to the fork crown, so the fork blades don’t twist significantly. This is why centerpull brakes offer such consistent brake modulation. It’s also the reason they don’t require toe-in. Centerpull brakes work best when the pads are parallel to the rim.
When we introduced the Compass centerpull brakes, the toe-in was not adjustable. In our testing of prototypes, we found that the brakes might squeal for the first few rides, but they became quiet as the pads wore until they were parallel to the rim. Most of our customers have had similar experiences. Riding in the rain helps, because it wears your pads faster.
However, we’ve found since that for a few riders, the brakes squealed, and continued to squeal longer than was acceptable. If the brake pivots on the frame and fork are brazed on at a slight angle, it’s possible that your pads initially have significant toe-out. Rather than wait for the pads to wear away, you’d want to compensate for the misalignment of the post by adjusting the toe-in.
We experimented with numerous ways to adjust toe-in, from the Shimano system of the late 1980s with its wedge-shaped washers to the modern spherical washers. We found all of them hard to adjust, hard to keep adjusted, and they all make changing brake pads a big pain. Basically, you have to hold the adjustment of the brake pad in three directions while you tighten the bolt:
- angle of pad to rim (seen from the front)
- alignment of pad to rim (see from the side)
- toe-in (seen from above)
As you tighten the mounting bolt, all these alignments tend to move. You never get it right, and after a while, you just give up and accept whatever you have as “good enough.” Every Bicycle Quarterly test bike with cantilevers, even those set up by the best pro shops, has had inconsistent brake pad alignment.
What is silly about this process is that, at least on centerpull brakes, the toe-in should be set only once. It compensates for slight misalignment of the brake pivots, and those will remain the same for the life of the bike. Why would you design a system that requires adjusting the toe-in again and again, every time you adjust the brake pads? Wouldn’t it be nice if you could adjust the toe-in once, and then it have it remain the same forever? Adjusting and replacing brake pads would be easy!

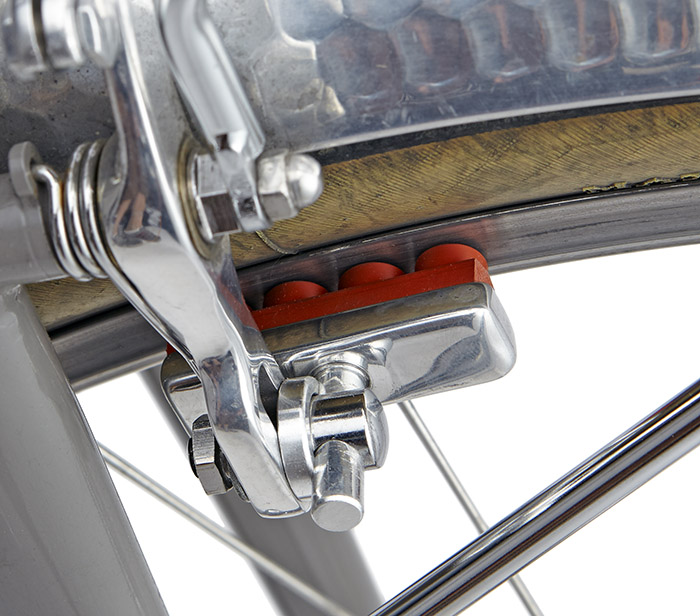
So we adopted a system that does just that. It’s really simple: The washer that goes under the posts of the brake pad has one groove that is deeper than the other. This puts the brake pad at a 2.5° angle, which gives you about 2 mm of toe-in. There is a dot on the reverse (invisible once installed) that shows which groove is deeper. Install the washer in the orientation that you want your toe-in, and you are done. The washer remains in place as you adjust or change the brake pads, so you never have to think about it again. Your toe-in always remains the same.
And setting the adjustment is easy – you just substitute the new washer and then set up the brake as usual. Since the toe-in is pre-selected, you’ll get it right every time. With our post-style pads, tightening the mounting nut only tends to rotate the pads in one direction (alignment of pad to rim), which is easy to compensate. The other movements aren’t affected as you tighten the bolt, which makes it easy to adjust the brake pads.
Worried about adjusting your toe-in in smaller increments than 2.5°? As the pads wear, they’ll take care of any small differences. Realistically, if you get within a degree or two of your target value with modern spherical pads, you are doing very well. If you need more toe-in, you can file the groove on the side with the dot a bit deeper.
The new washers are included with all Compass centerpull brakes (in addition to the washers without toe-in for bikes with perfectly placed pivots). They also are available as a retrofit for Compass and classic Mafac brakes.
Unfortunately, this method for adjusting toe-in won’t work on most modern brakes, which use “bolt-on” rather than “post-style” pads. For those, somebody should design a system where you adjust the toe-in once and for all, rather than having to fiddle with it every time you adjust the brake pads. (Some cartridge brake pads allow you to replace the pads without disturbing the holders. Unfortunately, this doesn’t help when you have to adjust the pads as they wear, so they still hit the rim in the right place.)
One more piece of news about our brakes: They now are sold individually, to give you a maximum of flexibility when spec’ing your bike.
Click here to learn more about our brakes or to order your set of washers.
