

Dark Divide 300: Bike Setup, Course Notes and Packing List
Long-distance events like the Dark Divide 300 require more than just leg power. Unlike road racing, where bikes are very similar, strategies are decided by directeurs sportif in team cars, and the rider with the most watts usually wins, there’s no established standard for bikepacking bikes, and strategy is just as important as leg power. That’s a big part of the appeal to me and many others. And with the Grand Depart of the Dark Divide 300 in less than two weeks, I want to share a few notes on the course, my bike, and what I packed during my FKT ride on this challenging route.
Let’s start with the Dark Divide 300 course: For me, it was divided into three parts (plus a 50-mile warm-up and a few miles in suburban Portland at the end):
- Elbe Hills and Sawtooth Mountains (Mile 50-106): Fast gravel roads in the mountains. Lots of climbs and descents, some rutted sections. This part is really road cycling, albeit on gravel. This year, the gravel is very loose. My bike was dancing a foot or two from side to side as I descended those sections in the dark. At times, I feathered the brakes to keep the speed in check. Be careful out there!
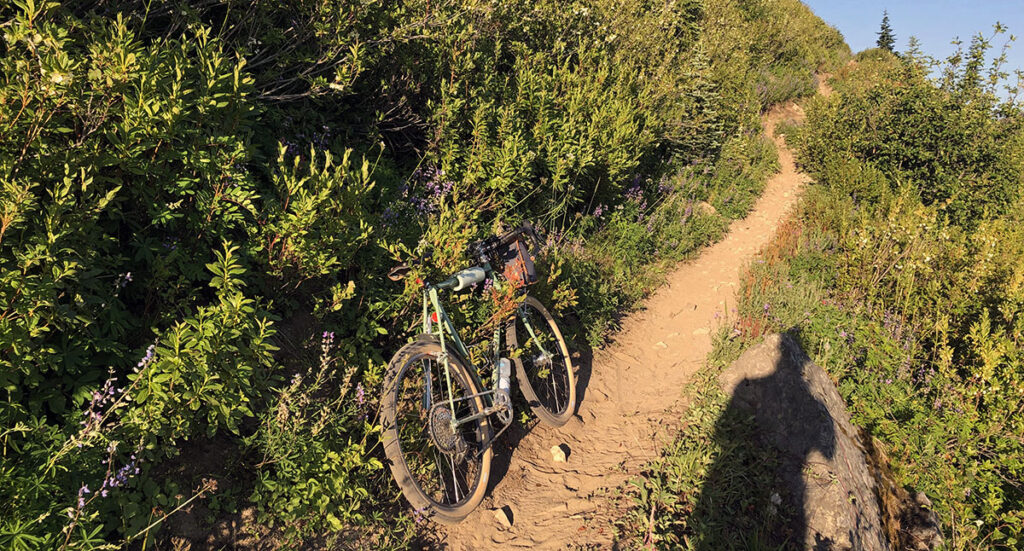
- Packwood to Trout Lake (Mile 106-198): This part is really all about Juniper Ridge. After a 20-mile interlude in the Cowlitz River valley, you climb higher and higher as you approach the ridge. The approach isn’t without challenge, though, as there are some big rockslides that you’ll clamber across. (Even more exciting if you do this part in the dark.) Juniper Ridge itself is a lot of fun. It’s a magical place, and I really, really enjoyed that section. You feel like you’re on top of the world, and you’ll want to stop every two minutes to look around and take photos. The descent from Juniper Ridge is pure mountain biking—if you’re not an experienced mountain biker (and I am not!), be careful as the trail often starts innocuously, and gets steeper and steeper after you’ve committed to riding it—and can’t stop any longer.
- Trout Lake to Fern Prairie (Mile 198-308): Don’t repeat my mistake and think that the hardest part is over when you sit in the shade at the Station Cafe in Trout Lake and enjoy your hard-earned huckleberry shake. The last 130 miles have as much climbing as the rest of the course, and the roads are the roughest of them all. The Flint Hills of Kansas are smooth superhighways by comparison! These are the roughest gravel roads I’ve ever encountered, and that says a lot. This section will test your resolve and your equipment, but you’ll be rewarded with some beautiful views.
A few more notes on the course:
- GPS: In some of the valleys, satellites may not pass overhead for half an hour or more. During my ride, this occurred during the approach to Juniper Ridge and on one of the last climbs before reaching Fern Prairie. When that happens, GPS shows only very approximate location data, and it may mis-route you when there is a fork in the road. Don’t trust your GPS when your route sheet or your feelings tell you to go the other way!
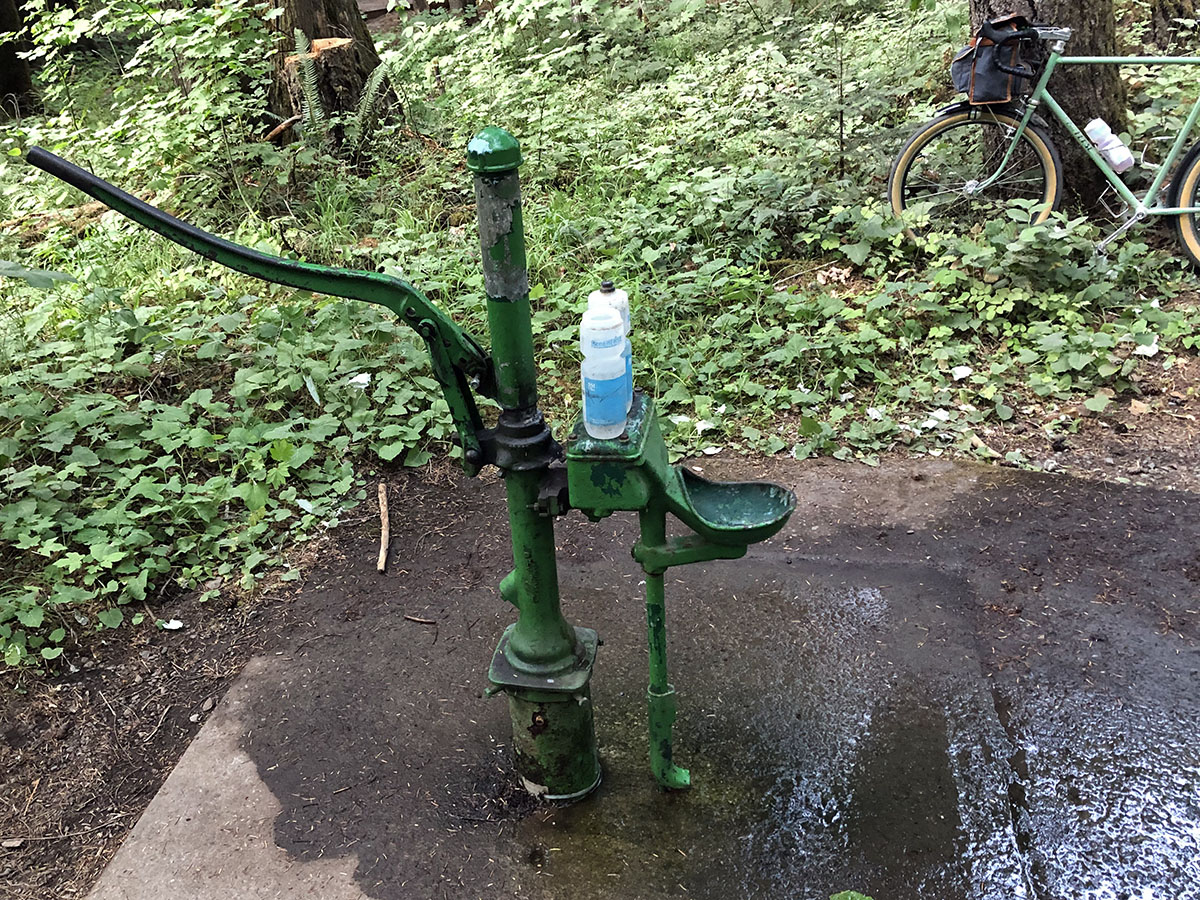
- Water at Panther Creek Campground: This is one of the last places to get water on the route, but the spigot is well-hidden. It’s between campsites 19 and 20, if I recall correctly.
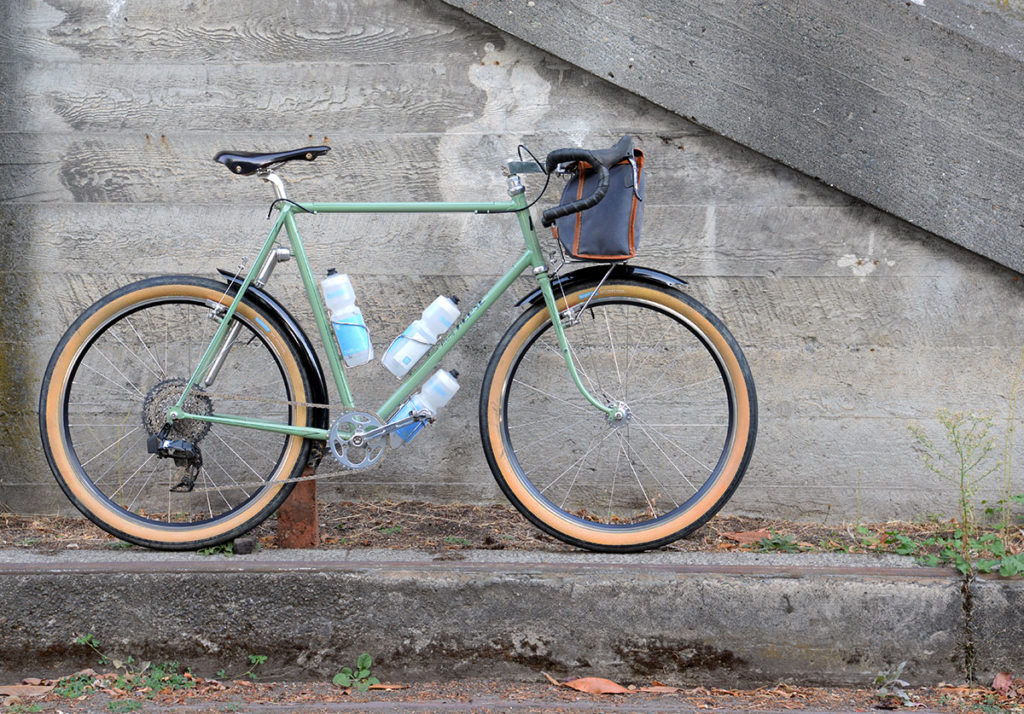
Let’s talk bikes. I opted for a bike that’s optimized for gravel roads, figuring that the added speed and comfort would make up for some ‘underbiking’ on the single-track portions. Everybody has their own preferences with respect to bikes, and you can read more about the ideas behind this bike in the links at the bottom. Beyond the obvious—your bike should be comfortable, reliable and easy to pedal—what matters for this course are really just two things:
- Gearing: I ran a 36-tooth chainring with a SRAM XPLR 10-44 cassette. That’s significantly smaller than most gravel bikes—especially when you consider that the 26″ wheels reduce my gearing further—but I was glad to have those low gears. There are many steep and loose sections on the course, and I used my smallest gear many times. When it got too steep than to pedal in the 36×44, I walked. Rather than strain against the steep grade, walking allowed me to stretch my legs. Your leg power and cadence may be different from mine, of course…
- Tires: I ran 54 mm-wide Rene Herse Extralights. There’s no significant mud on the course, and the gravel is too loose for traction, so knobbies provide little or no advantage. The gravel of the Cascade Mountains is generally not extremely sharp, so unless you’re hard on your tires—and every rider is different—Extralight casings have worked well here—at least for me. (I had no flats or mechanical issues during my ride.) As to width, wider is definitely faster and more comfortable on this course. Tire pressure depends on many factors. For reference, I was running 21 psi (1.45 bar)—about 2 psi higher than in the Oregon Outback to avoid bottoming out on the rocky trails.
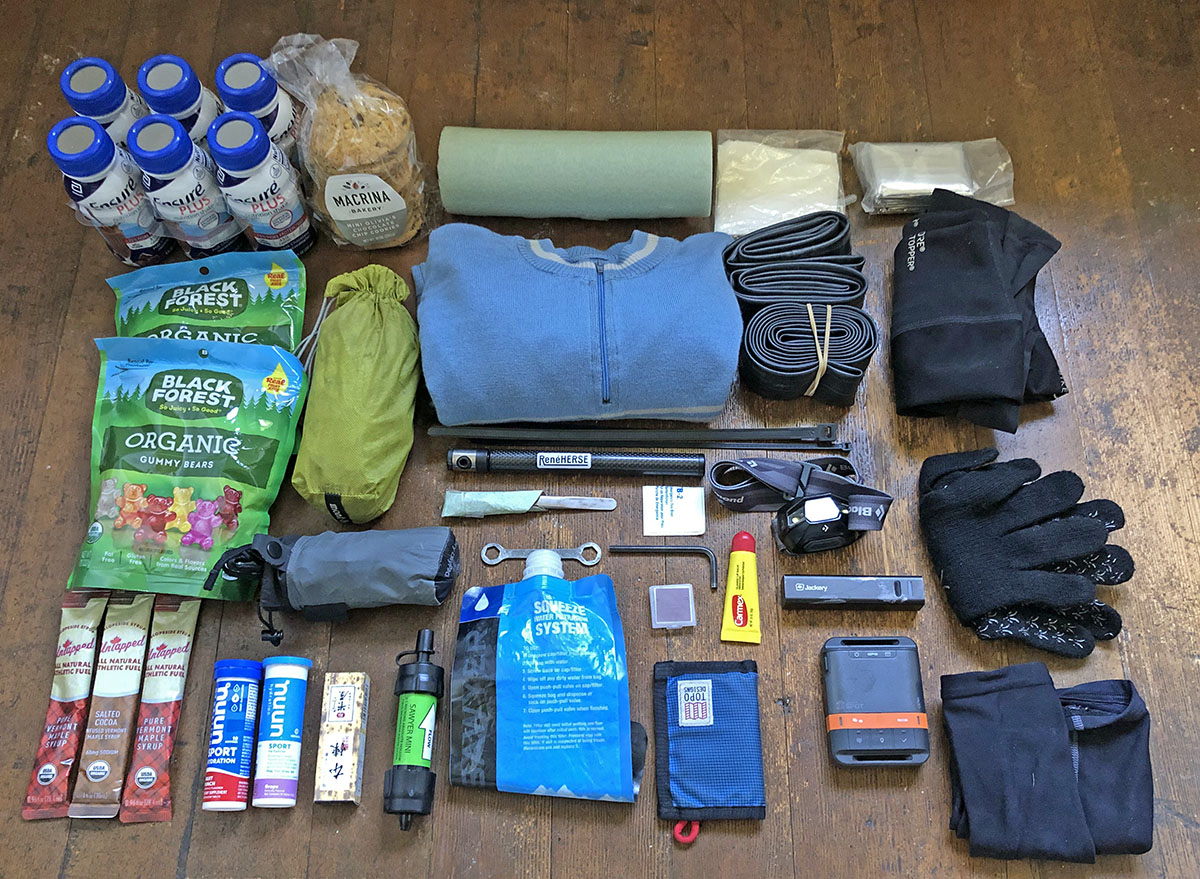
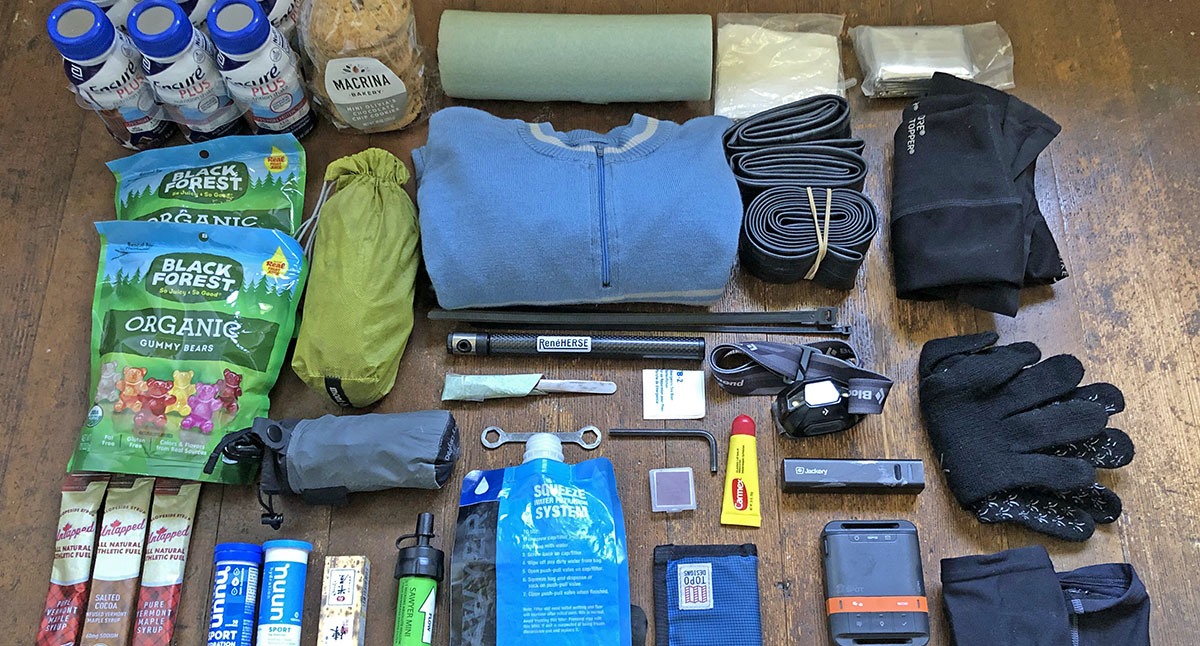
Just as important as your bike is your luggage. I carried my gear in a handlebar bag. I modified the bottom of a standard Berthoud bag so it attached to the rack with a bikepacking strap. This prevents it from moving when the bike hits big bumps. Having the bag firmly attached to the bike was also useful while portaging the bike. Here’s what I packed:
- Food: I went with easy-to-digest calories. On this course, your stomach has no opportunity to catch up if you go into a calorie deficit. I used to make the mistake of thinking that 50% of a mountainous course was uphill and 50% downhill. When you look at time instead of distance, you realize that you spend 85% of the ride climbing and only 15% descending. For me, Ensure Plus meal replacements (350 kcal/bottle), chocolate chip cookies from a local bakery (200 kcal/each), and gummi bears (800 kcal/pack) formed the bulk of my food, augmented by a few ice cream bars and a burger at the resupply stops. Japanese yokan bean paste (small rectangular box, 165 kcal) and three Untapped Maple shots (100 kcal each) provide immediate energy if I bonk. I’m happy to report I didn’t need them this time. A water filter is a must, unless you’re willing to chance it and drink untreated water from mountain streams. (Usually fine at high elevations, but…)
- Electrolytes: I use Nuun electrolyte tablets in my water bottles. I also took electrolyte tablets during the hot days (carried in the second Nuun tablet tube). This worked well—I had no problems with cramps.
- Clothes: You are going to the high mountains. No matter the forecast, be prepared for (almost) any weather. In addition to bib shorts and short-sleeve jersey, I carried arm and leg warmers, a long-sleeve wool jersey, wool gloves and an ultralight rain jacket (green stuff sack). Space blanket and toilet paper complete the kit.
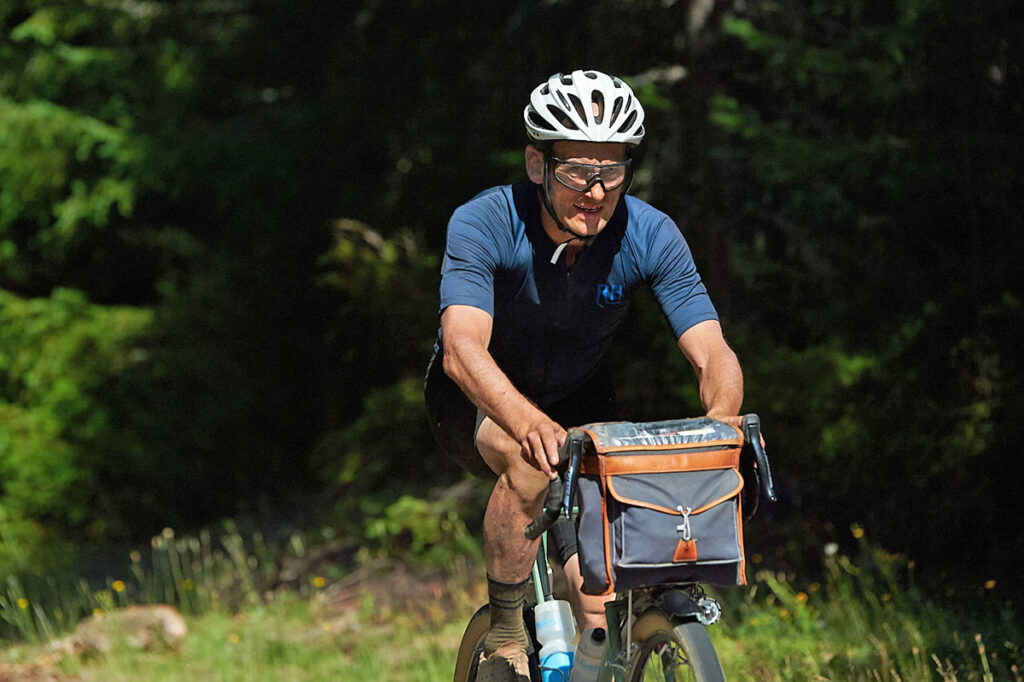
- Tools: Those depend very much on your bike. Mine is designed for reliability, so all I brought were two spare tubes, patches, tire boot, spare pump, tweezers (to remove thorns or steel wires stuck in the tire tread) and two wrenches in case I needed to adjust my saddle height. Plus two zip ties for emergency repairs. A good headlamp is essential for the non-rideable sections, if there’s any chance that you’ll ride at night. A power pack keeps the GPS running the entire distance. A GPS tracker is required by the rules of the event. Natsuko’s ultralight backpack (dark gray stuff sack; 116 g) to transfer most of my gear and lighten the bike for the portaging section on Juniper Ridge. A piece of foam pipe insulation (gray, top center) to put on the top tube of my bike when portaging. That way, carrying the bike on my shoulder for long stretches was no hardship. (You can see the foam tube on the bike in the second photo, taken on Juniper Ridge Trail.)
- Obviously, if you plan to sleep on the course, you’ll need to pack for that as well. I only brought a space blanket for emergencies…
The choices above are very personal. Presenting them here by no means is intended to suggest that this will work for everybody, or that it’s better than what you have found to work for you. Bikes, equipment and even strategy in bikepacking events is highly personal—that’s part of the appeal of these events.
Good luck to all riders in the Dark Divide 300. It’ll be hard, it’ll be beautiful, and you’ll create memories that will last a lifetime. Enjoy!
Further Reading:
- First report from the Dark Divide 300 FKT.
- More details about the sister bike to the one I used, the Oregon Outback Rene Herse.
- Afraid that ‘too much tire’ would slow you down on the smooth sections of the course? Read why that isn’t the case in our Gravel Myths series.
- The full story of this ride will be in a future edition of Bicycle Quarterly.
