

Hirose Mini-Velo
The Autumn 2016 Bicycle Quarterly includes a photo feature about riding in the Hirose Owners’ Meeting. I really enjoy these events, because they combine amazing bikes with wonderful rides. Many Japanese custom bikes are incredibly elaborate and beautifully crafted, yet they are intended to be ridden.
What makes “Hirose watching” so much fun is that each bike is completely different. Some have Hirose’s custom rear derailleurs, which are based on the classic Cyclo “pizza cutter” derailleur – except they are 10-speed compatible. I have seen at least four completely different front derailleurs Hirose has made. One bike shown in the BQ article has Mafac cantilevers, with an extra pulley to double the mechanical advantage of each brake.
Whereas most builders will turn you away if your ideas are too crazy, Hirose-san will look at you for a while and say: “That is an interesting question. Let me see how I can solve it.” The amazing thing is that he really does solve it: All his bikes work great. They have nothing of the “not-quite-there prototype” quality that you often get with one-offs.
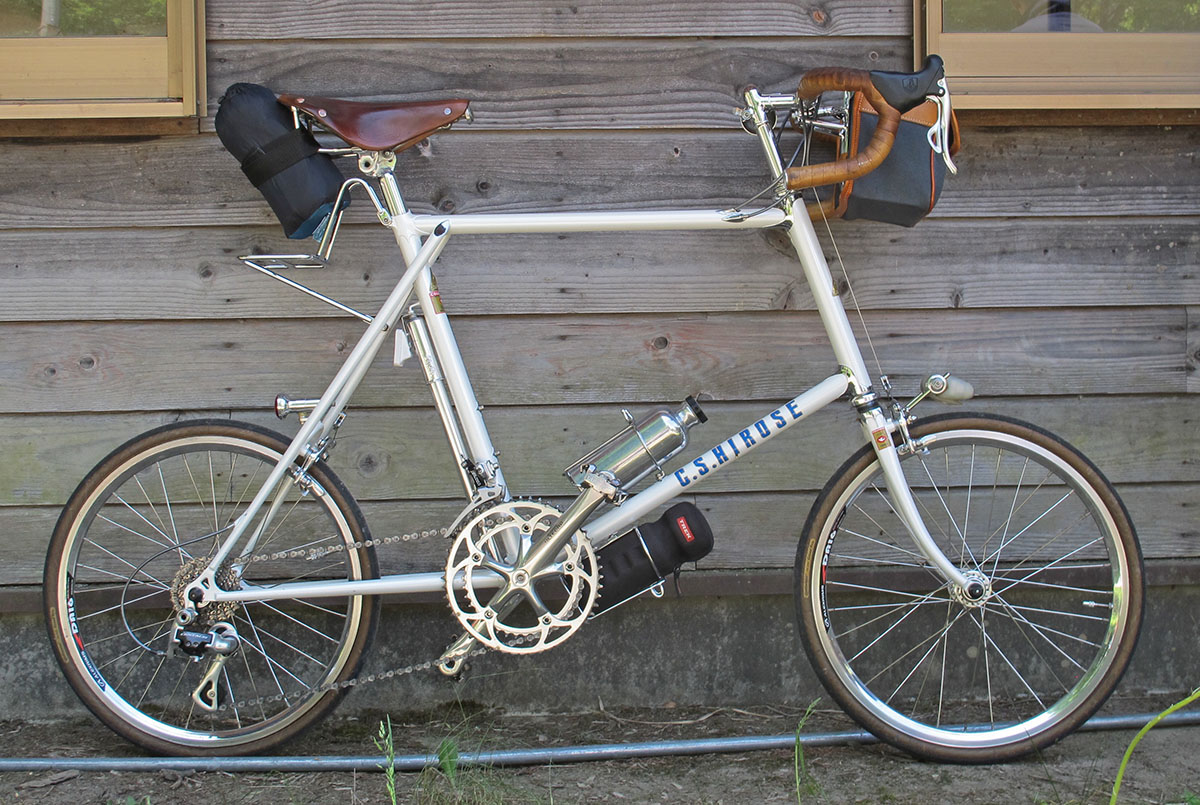
At the last Owners’ Meeting, I was especially fascinated by this Mini-Velo. Mini-Velos use smaller wheels to make them easier to portage on narrow mountain trails. They also are popular for city riding because they are especially nimble. This one looked simple at first, but a closer look showed that it was anything but. Click on the images for higher resolution.
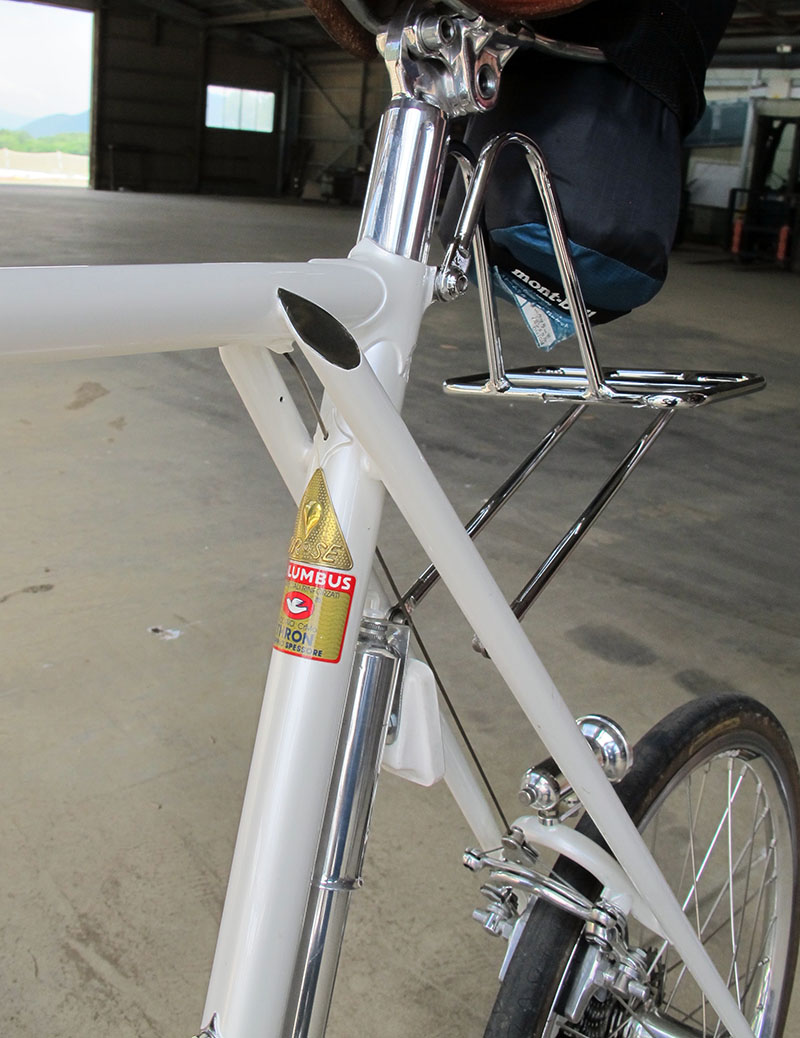
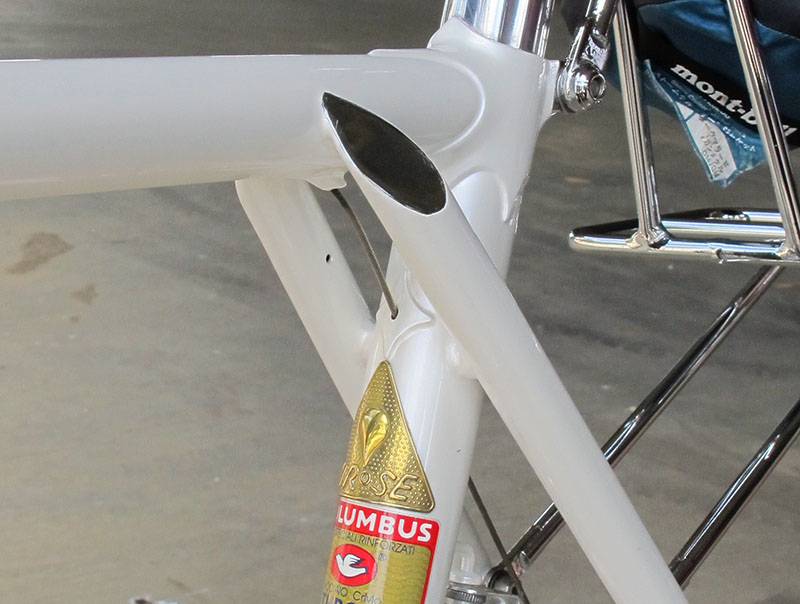
On this Mini-Velo, all cables run inside the frame tubes (except the front brake, which would require a cable run too convoluted to work well).
In the photo above, you can see the cables for front and rear derailleur, as well as the rear brake, enter the frame.
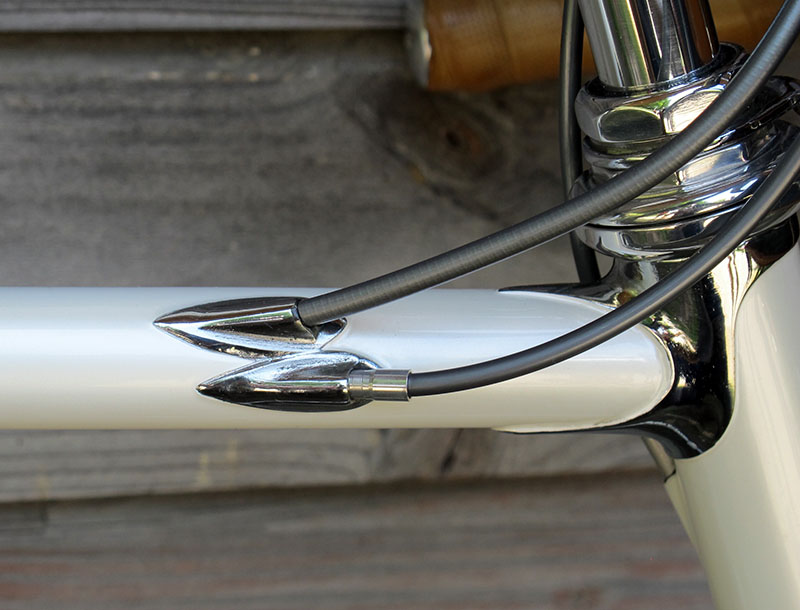
Here you see the crossed-over seatstays, and the exit for the brake cable, which then runs through the seat tube to the rear brake. Clever – but there is another reason why Hirose used the crossed-over seatstays.
The rear derailleur cable also runs through the top tube. This avoids having to route it around the bottom bracket – the straighter cable run makes for better shifting. The crossed-over seatstays allow the cable to enter the stay without having to get around the seatpost. If you didn’t know the cable was in there, you would never guess. All cables run inside small tubes that connect entry and exit points, so replacing a cable is easy. But just imagine assembling it all as you braze the frame!

The shifter cable exits the seatstay – also with a straighter cable run than if it used the usual path along the chainstay. The shifting is superb, which isn’t always the case with internally routed cables.
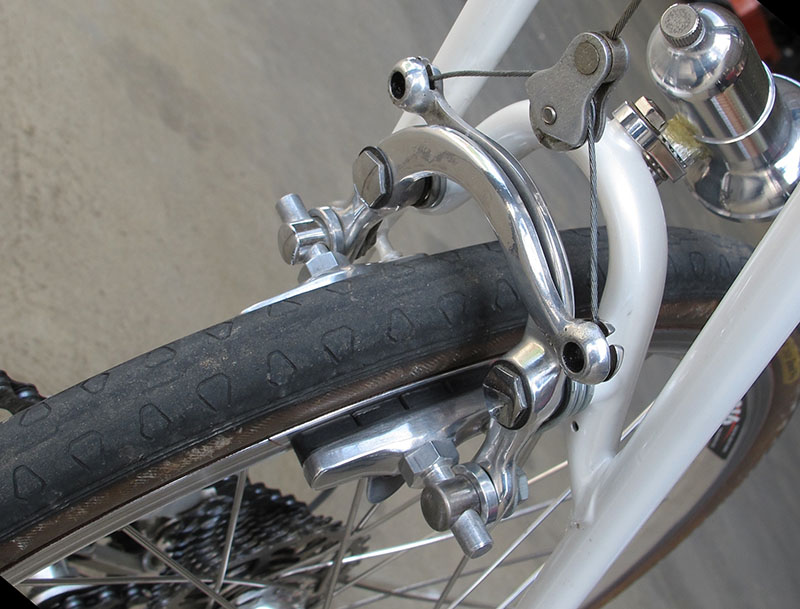
With the crossed-over seatstays and the elegant brake cable routing through the seat tube, the rear brake must be on the front of the seatstays. Hirose-san prefers centerpull brakes, and for this bike with narrow tires, he used an old set of Mafac Competitions. But with the small wheels, the brake sits much lower than usual, and the angled stays are too far apart for the brake bosses.
The solution? A curved bridge that provides the mounting points for the brake pivots with the right spacing. The brake pad holders are custom-made, too – Hirose-san does not like the riveted Mafac originals (which can loosen – this is not a problem with the one-piece Compass brake shoe holders). So he machines his own posts that screw onto modern pad holders, so he can use them with classic centerpull and cantilever brakes.
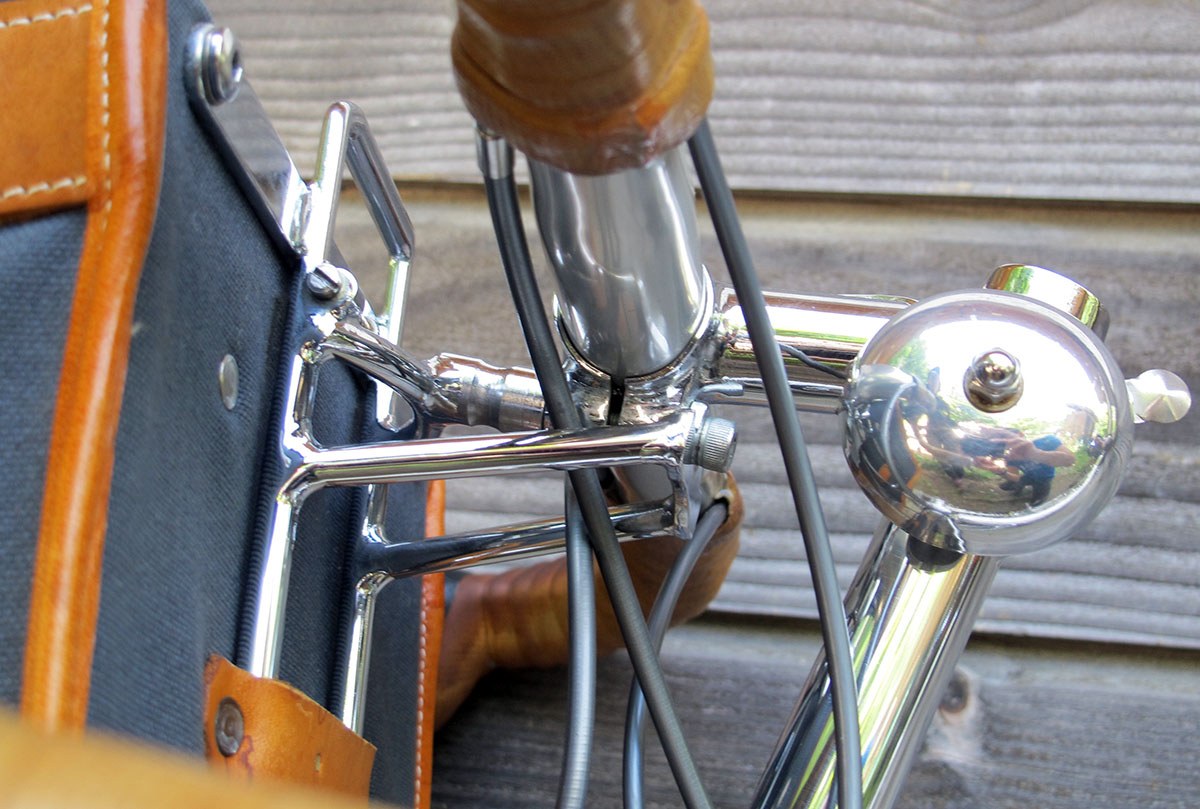
The decaleur also is a fabrication tour de force. It attaches both to the front and the rear of the (custom-made) stem! This is necessary to make it stronger and more stable, since there is no rack to support the bag. There top part of the part that attaches to the bag doubles as a handle.
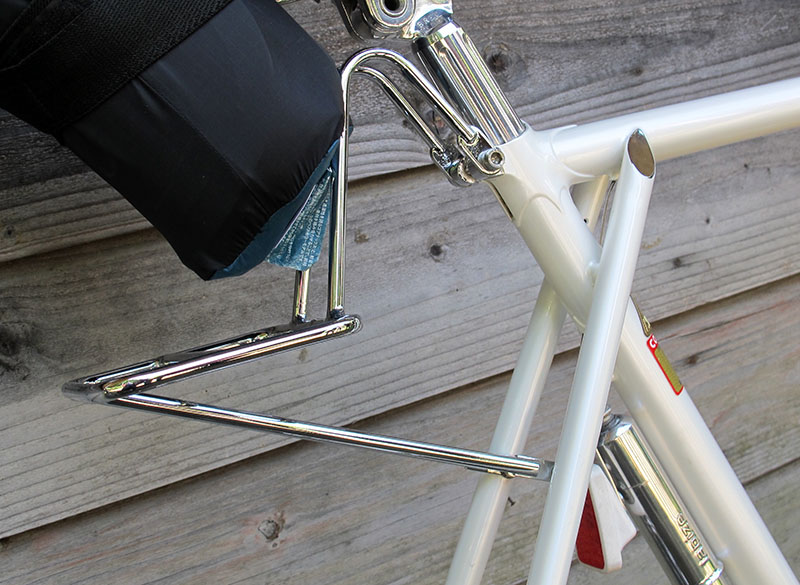
The elegant bag support doesn’t need triangulation, since the weight of the bag is suspended from the saddle.
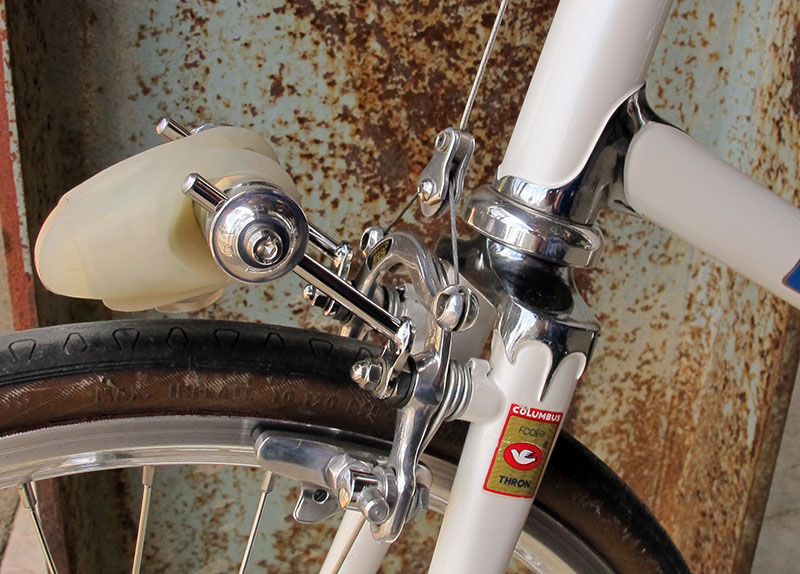
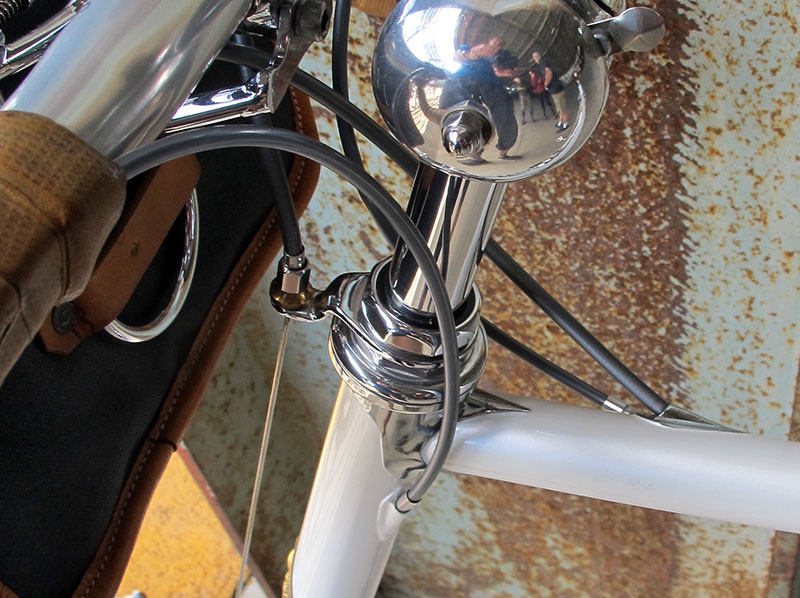
Chrome-plated lugs and fork crown add beauty, but the bike doesn’t take itself too serious – how about the custom-made holder for a whimsical front light?
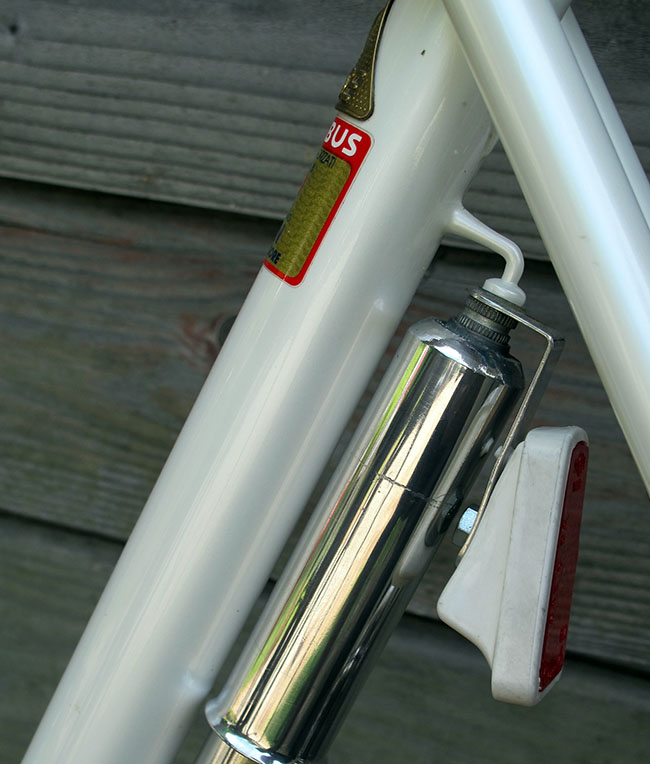
The reflector attaches to the pump, making it easy to remove if you don’t think you’ll need it.
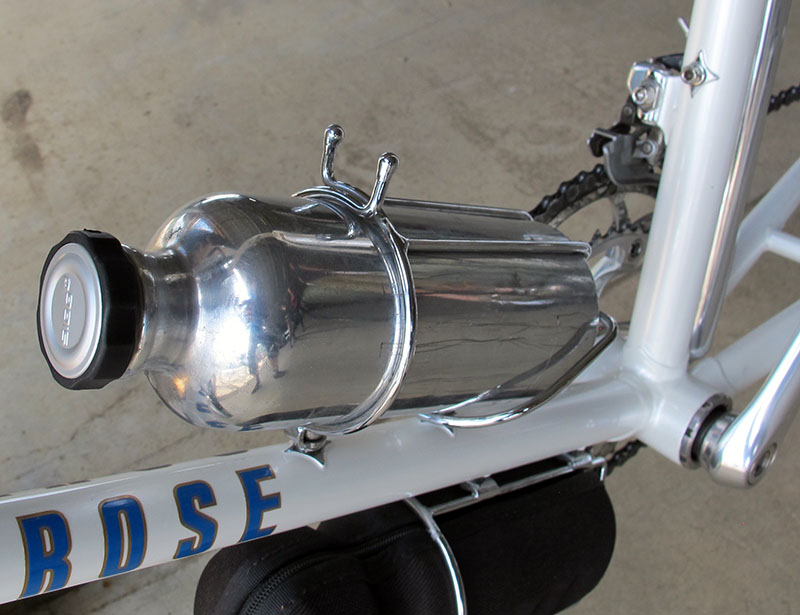
A custom bottle cage…

… and a beautiful taillight provide the finishing touches to this amazing machine. And having seen it on the road, it appears that it rides as well as it looks. It’s truly a show-case of Hirose’s genius.
Further reading:
- Hirose Owners’ Meeting, Bicycle Quarterly 57.
- A visit to Cycle Store Hirose and a ride in the Japanese mountains on a Hirose Mini-Velo, Bicycle Quarterly 53.
