What We Ride (Part 4): The Mule
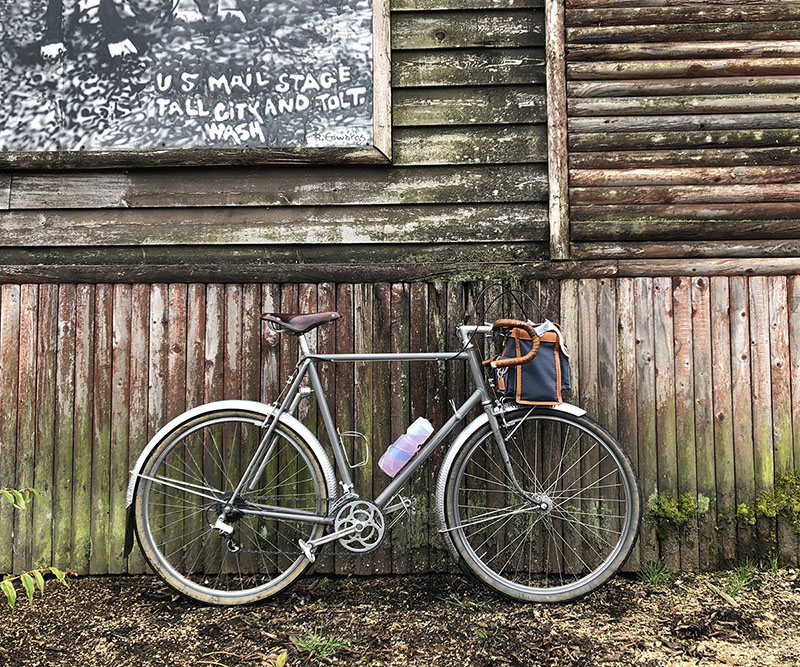
In this mini-series, we look at the bikes of the BQ Team. These are the bikes we bought with our own money and/or built with our own hands. These are the bikes we ride most often, because we feel they work best for the rides we do. And – most importantly – they are the most fun to ride.
When I first went to Japan six years ago, I realized I needed a Rinko bike, so I could travel by train to the great routes that traverse the Japanese mountains. As it happens so often, the project was delayed until the last moment. In the end, the entire bike was built in ten days. I built the frame under Hahn’s supervision. He insisted that I miter all the tubes by hand, rather than using a milling machine. It was a great learning experience, and it led to many framebuilding parts in the Rene Herse program that make it easier to build a bike like this – like the pre-mitered centerpull braze-ons that fit perfectly on the Kaisei ‘Toei Special’ fork blades.
And yes, I did finish the bike in time – building the wheels at 2 a.m., just hours before my plane left. It wasn’t painted yet when I rode it in Japan for the first time, during a memorable autumn tour of Hokkaido, followed by an incredible night-time ride across Shirabisu Pass during a lunar eclipse…
I called it the ‘Mule’ after the race cars built by mid-century Italian makers like Ferrari and Maserati. When a new model’s chassis and engine were finished, they was often clothed in a rudimentary body to start testing. In the same way, the Mule is almost a ‘proof-of-concept’ more than a polished final product.
The Mule uses a frame configuration René Herse used on some bikes for tall and/or strong riders, but that I hadn’t seen used anywhere else: The top tube is standard diameter (1″), but the down tube is oversized (1 1/4″). So the difference in the diameters of the top and down tubes is greater than usual.
The result is a frame that is a bit stiffer than my Herse, so it’s ideal for carrying a camping load in the front low-riders. It still ‘planes’ enough to make it a capable randonneur bike, even if – for me and my pedaling style – it gives up a little bit in ultimate performance to my Herse with its Superlight tubeset. Others who’ve ridden the Mule prefer its more planted feel. One added benefit: The Mule doesn’t shimmy even with a Chris King headset that has almost no damping.
The Mule has inspired quite a few modern randonneur bikes with a similar frame configurations, including the new Crust Canti Lightning Bolt, which we tested in Bicycle Quarterly 70.
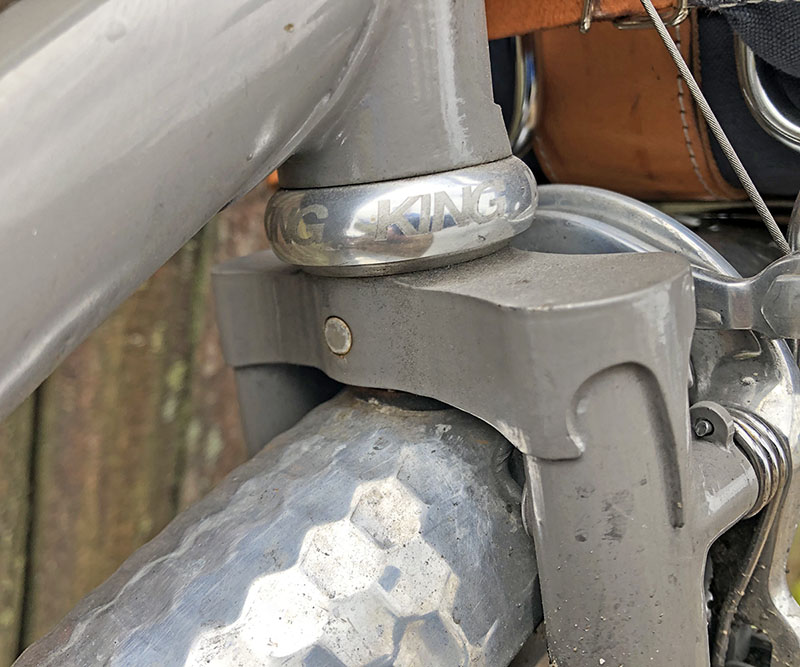
Built in such a short timeframe – and by a beginner – the Mule isn’t as beautiful as the incredible frames from masters like Peter Weigle, Mark Nobilette or the craftsmen at Toei in Japan. Before building the Mule, I had made racks and other small parts, but making a lugged frame is a different matter: You need to control the heat over a much larger area and draw the filler (silver in this case) through a much larger space. And working with thinwall tubing, you really don’t want to overheat the frame tubes. It was a challenge I enjoyed, but I also know that the Mule isn’t a masterpiece. The brazing is a tad uneven on the lower headlug, and I didn’t have time to do any filing on the fork crown. (Since then, we’ve redesigned our Rene Herse crown to make it lighter and give the reinforcement tang a nicer radius.) Peter Weigle, who painted the frame after it returned from Japan, commented: “You need to go to finishing school!”
Despite its (minor) cosmetic deficiencies, the Mule has held together remarkably well over many hard miles. And I’m proud that I was able to include a few nice touches like Rene Herse’s fender mount using a simple aluminum pin that is held in place by the tension from the eyebolt inside the fork crown. And I made a Rene Herse-style brush inside the steerer that eliminates the external wire to the taillight (and makes disassembly for Rinko much easier).
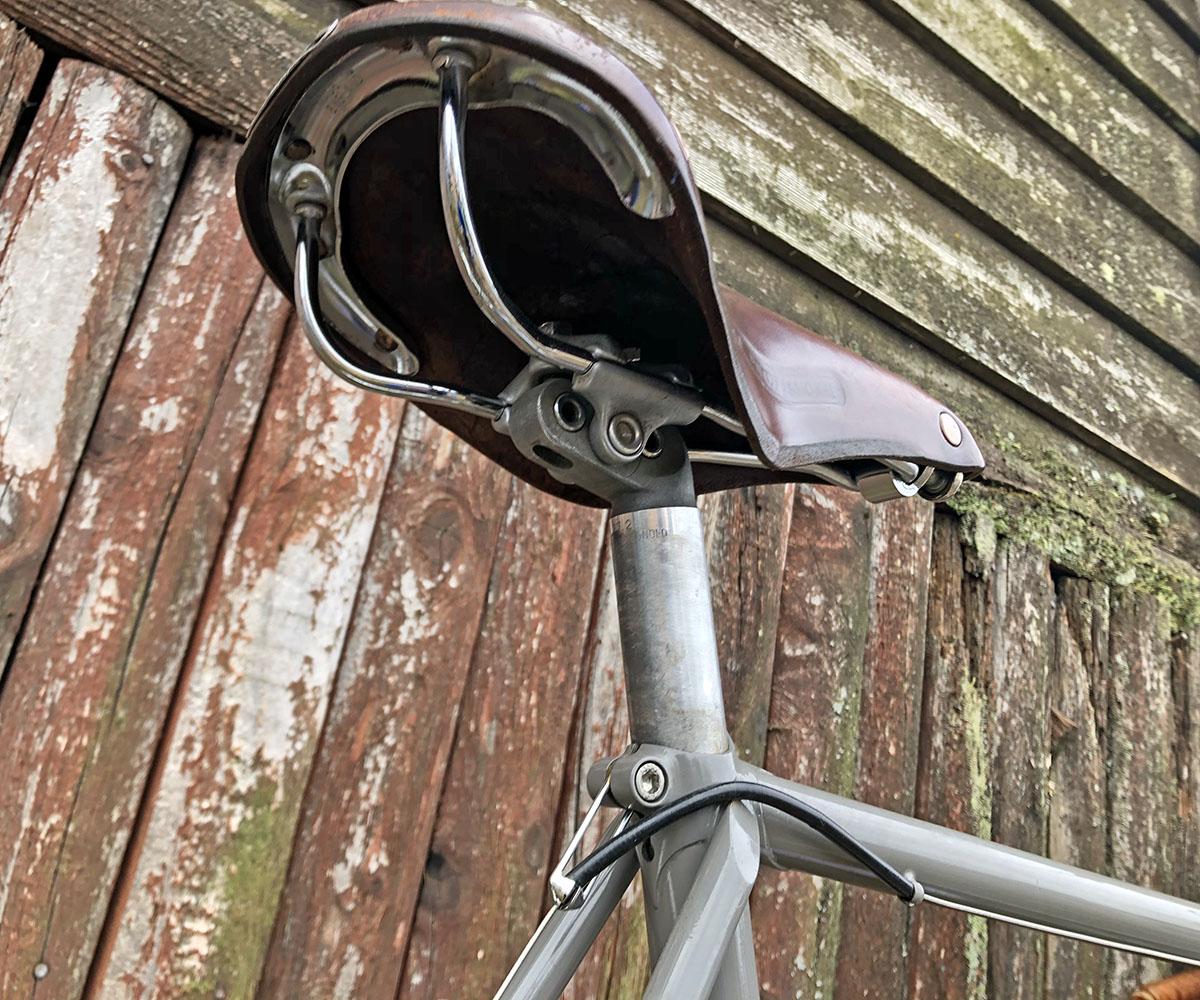
The bike runs many prototype parts, like the Rene Herse Rear Cable Hanger. While I was at it, I also made the extra-small cable stops on the top tubes. (Even though I was pressed for time, I didn’t want my first frame to have bulky cable stops!) Both parts are now available in our program.
You may notice the brake cable housing – it’s a little short. It was cut during an emergency repair: I took the bike to the Hirose Owner’s Meeting, but forgot that I had sent the prototype cable hanger to Nitto, so they could make drawings and put it into production. When I went to assemble the bike at the train station, I realized that I had no way to make the rear brake work! H. Hirose came to the rescue, with an emergency repair that included a lot of hemp twine wound around the seat tube to tie the cable housing in place. Miraculously, I was able to use the rear brake during the challenging gravel descents that followed.
The Mule is still using an old Brooks saddle that I bought many, many years ago when Brooks was still an independent company, and the quality was still top-notch. We now sell Berthoud saddles, but I don’t replace parts before they are worn out, so the Brooks will stay on the bike a little longer. The Campagnolo Nuovo Record seatpost holds the saddle in an iron fist, but it’s a bit heavier than it needs to be. I’d use a Nitto post if I were to build the bike again.
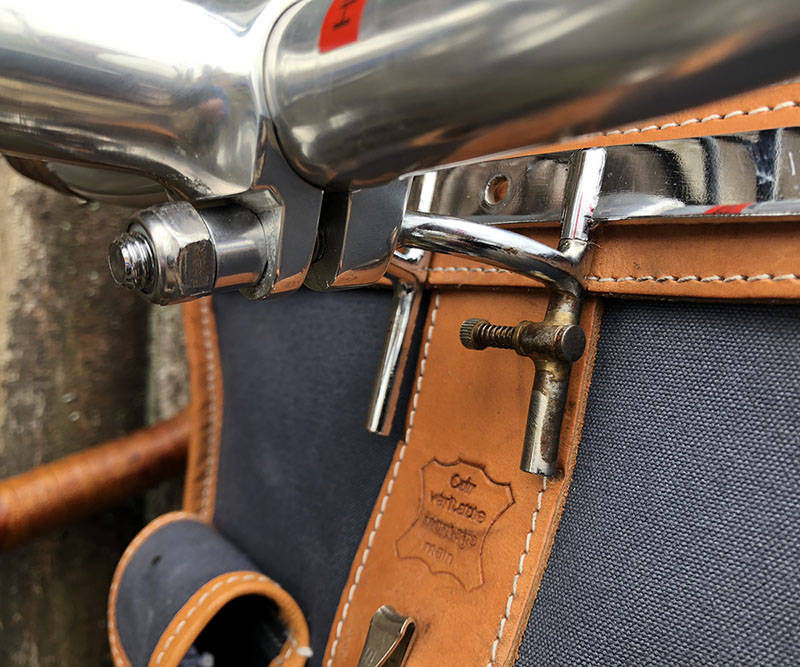
Another prototype: This was the first Rene Herse decaleur with H. Hirose’s locking pin mechanism. I made it after my handlebar bag had flown off twice. Then we worked out a licensing agreement with Hirose and made it available in our program. You can also see why our decaleurs now have a loop at the bottom: The open ends of the two tubes on this prototype tend to wear the stitching on the Berthoud bag. (This is the Mule’s second bag.) As an added plus, the loop keeps the two tubes better aligned.
Perhaps you wonder about the center bolt on the bag mount. It’s not missing – we decided it wasn’t needed, and the hole weakens the mount. Still, before making parts without a hole, we had to test it…
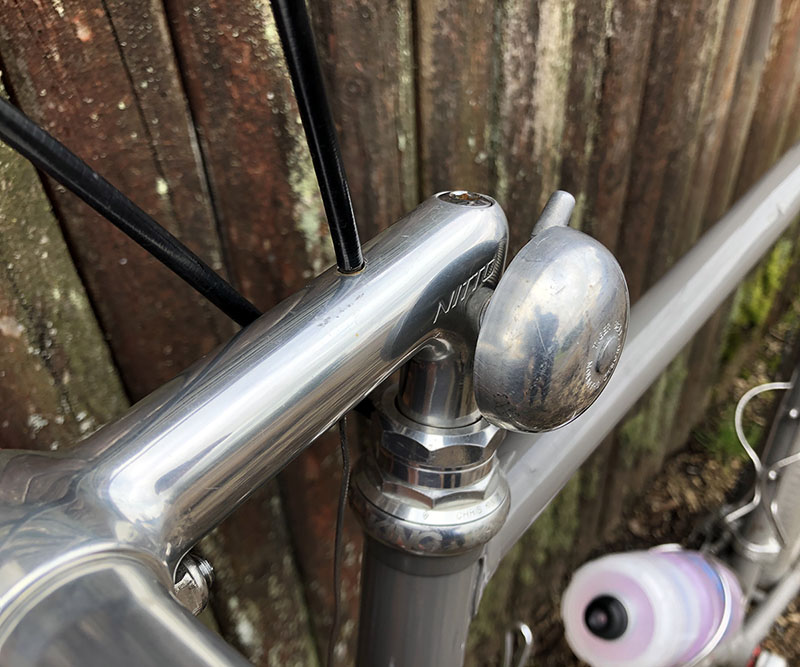
I was tired of flexy cable hangers that compromised the power of my front brake, so I drilled a hole in the Nitto stem instead. Nitto’s president, Mr. Yoshikawa, was concerned when he first saw my bike. But when he noticed that I had made the hole as small as possible – I removed the plastic cover on the housing – and drilled the larger hole for the housing just a few millimeters deep. Only the 1.5 mm hole for the brake cable goes through the stem. He smiled approvingly and said: “No problem.”
The photo also shows special Rene Herse headset spacer, which keeps the headset from coming loose without needing much torque on the locknut. It’s little more than finger-tight – great for Rinko. (Before, the headset had a tendency to come loose.)
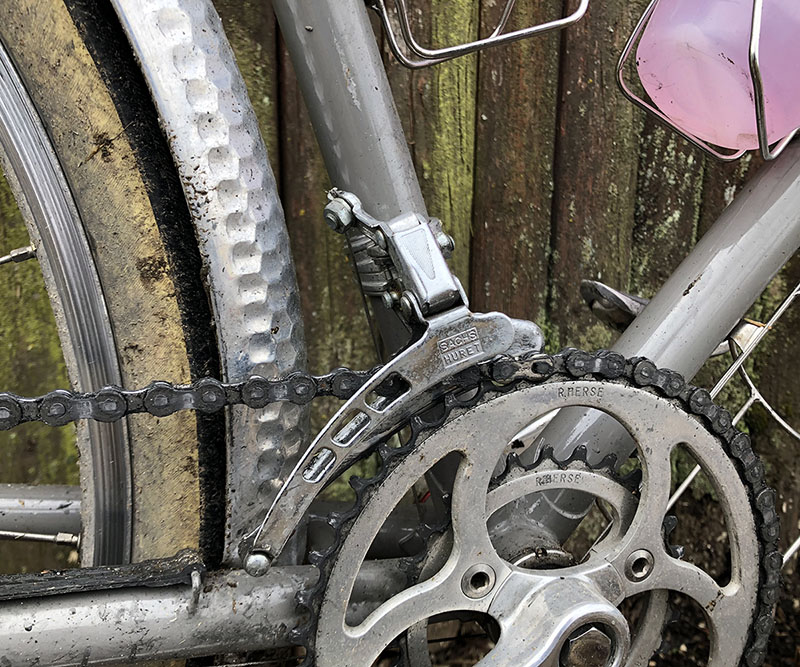
The rest of the parts are what I had lying around at the time. The Sachs Huret front derailleur’s curve shows that it was intended for a 52-tooth chainring, but it shifts perfectly with the 44×28 that the Mule has been running. Some day, I’ll replace the chainring bolts with our custom-made flat-faced Rene Herse ones, which sit flush with the surface of our thicker-than-standard chainrings. Our parts keep evolving, but I don’t always run the latest versions on my own bikes, because the old ones just keep working.
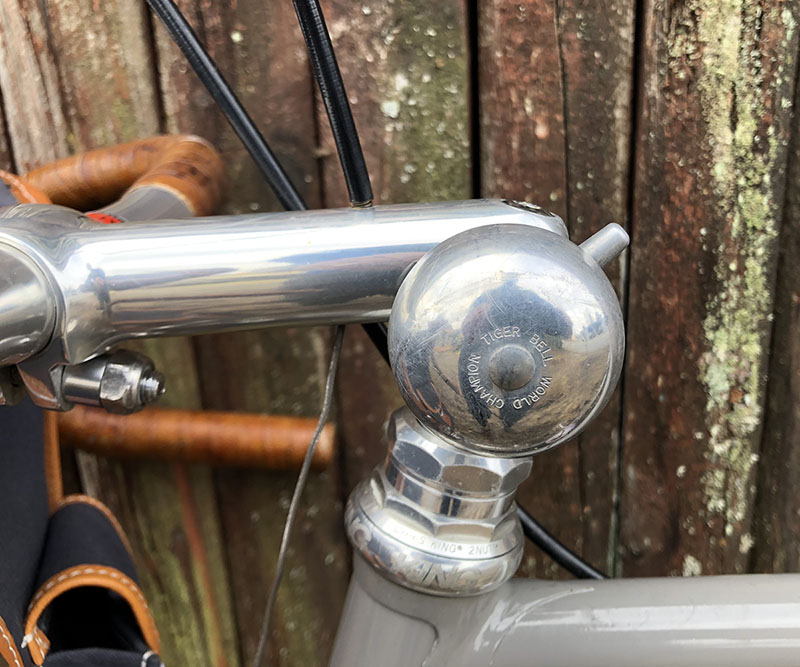
One part I am especially proud of is the bell. It says ‘World Champion Tiger Bell,’ and it’s a long-discontinued model. ‘World Champion’ is a strange thing to say about a bell, but it really has the nicest ring of any recent aluminum bell I’ve tried. The beautiful timbre reminds me of the great French Sonn-Net bells on 1950s Rene Herse bikes. Usually, you get such a nice sound only with a (heavy) brass bell, and most aluminum bells have a rather tinny sound. So perhaps this one really is the world champion of bells. (That still leaves the ‘Tiger’ part of the name as a mystery…) Recently I was able to buy a small stash of these bells at Kato Cycles, the amazing bike shop in Nagoya featured in the latest Bicycle Quarterly. That was an exciting discovery!
The kink in the brake cable is just one sign that the Mule has led a very hard life. It’s been disassembled and reassembled for Rinko at least 50 times, always in a rush. The handlebars – prototypes for the superlight Rene Herse Randonneur model – are bent, reminding me of the day when the bike fell into a ravine on the old road to Jikkoku Pass. (Water from an underground spring had softened the soil, and suddenly the narrow path gave way under my front wheel.) The paint is scuffed, and the aluminum parts have a nice, dull patina. Like all the bikes on our team, the Mule is intended to be ridden. And when we’re descending a twisty gravel road covered with loose rocks, with a full camping load in my front panniers, I know that I wouldn’t want to be on any other bike.
Here are the specs for the Mule
- Frame: 7-4-7 top tube (1″), 7-5-7 down tube (1 1/4″)
- Fork: Kaisei ‘Toei Special’ fork blades
- Rack: Rene Herse CP-1
- Cranks: Rene Herse 44×28 with SKF 107 mm bottom bracket
- Derailleurs: Huret (front); SunTour Superbe Pro (rear), Simplex Retrofriction levers
- Pedals: Shimano PD-A600 single-sided SPD
- Front hub: SON Delux Wide-Body SL, 32 hole
- Rear hub: Maxi-Car, 36 hole
- Freewheel: Shimano Dura-Ace 13-26, 7-speed
- Tires: Rene Herse 650B x 42 mm Babyshoe Pass Extralight
- Tubes: Schwalbe SV14A Extralight
- Brakes: Rene Herse centerpull
- Brake levers: Mafac
- Headset: Chris King
- Stem: Nitto NP
- Decaleur: Rene Herse (prototype)
- Handlebars: Rene Herse Randonneur, 42 cm
- Seatpost: Campagnolo Nuovo Record
- Headlight: SON Edelux II
- Taillight: Rene Herse
- Pump: Zefal Solibloc
- Handlebar bag: Berthoud GB28
- Bottle cages: Nitto
- Weight: 11.3 kg (25.0 lb) including pedals, bottle cages and pump
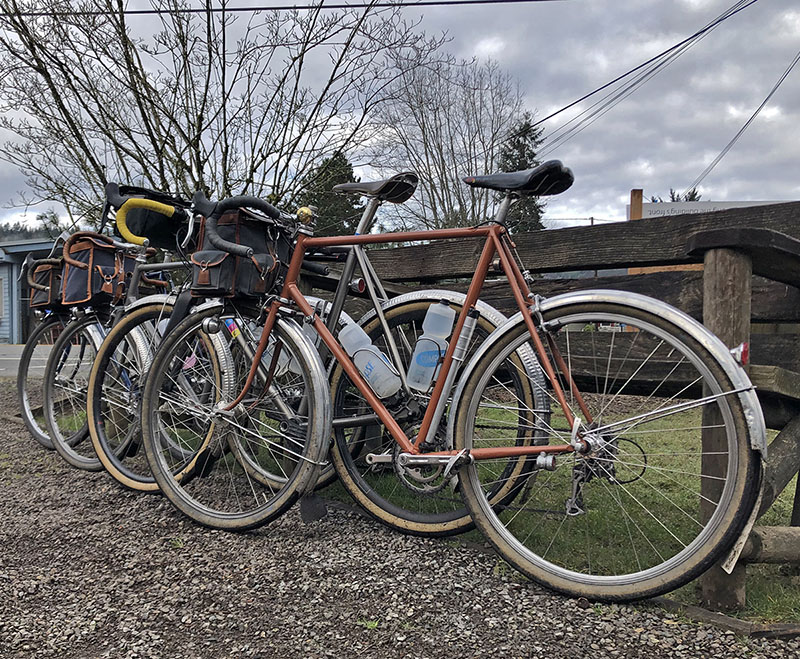
These are the bikes we own and ride. They’re a lot scruffier than the bikes you usually see featured on the internet, because they’ve been ridden for many years and many hard miles. They’re the bikes we take when we head out into the unknown, because they work best for us.
And because so many have asked about bikes for smaller riders, we’ll add a fifth bike to the series: Natsuko’s C. S. Hirose. Stay tuned!
Previous posts:
Further reading:
- The full story of the Mule and illustrated instructions for drilling the stem were published in Bicycle Quarterly 51.
- Details of how the Mule is made Rinko-compatible are in Bicycle Quarterly 65.


