

Designing the Rene Herse Taillight
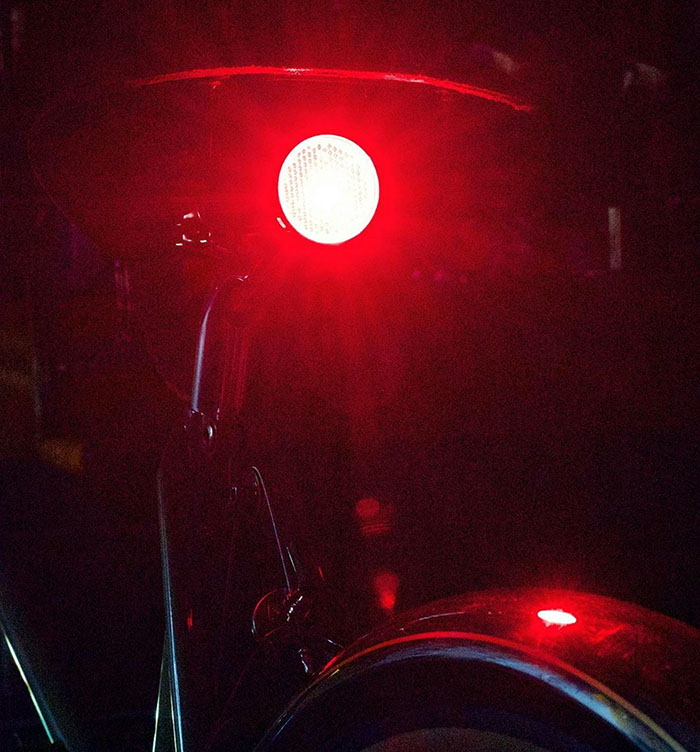
If you’ve been to the Philly Bike Expo last weekend (or looked at the photo feeds), you’ve seen many custom bikes with our Rene Herse taillights. (Above is Brian Chapman’s.) The taillight has been one of our more popular products.
As with so many projects, it all started when I needed a part for my bike and couldn’t find what I wanted: An elegant taillight mounted directly to the bike without clamps and brackets. Generator-powered – the last thing I want during a long ride is run out of batteries (or worry about it). And with the latest technology and safety: a bright and long-lasting LED that doesn’t burn out, and a standlight, too.
My taillight had to incorporate a reflector. Not only is it safer – in the unlikely event that the taillight stops working – but it’s actually required by law in many countries. My friend Hahn suggested using the reflector as the taillight lens. Not only does this eliminate the need for a clumsy separate reflector, it also gives a diffuse light that is easier on the eyes for cyclists drafting closely behind my bike. From a distance, it’s just as visible: The light output in lumens is the same, just spread over a larger area.
There was no taillight that met these requirements. So I decided to make my own.

Where to mount the taillight? That was easy, since René Herse figured it out long ago: I don’t carry huge saddlebags, so the rear of the seat tube is the perfect place for the taillight. Nestled between the seatstays, the light is well-protected, yet easy to see from behind. Routing the wire is easy, too, since it can go through the frame.
Finding a good circuit for the electronics was no problem, either: The B&M Seculite Plus has a bright LED and a standlight circuit. Its LED mounts in the center of the round capacitor that powers the standlight. The Seculite Plus represents the state of the art in taillights. It has proven ultra-reliable. And it has the right shape for my taillight.

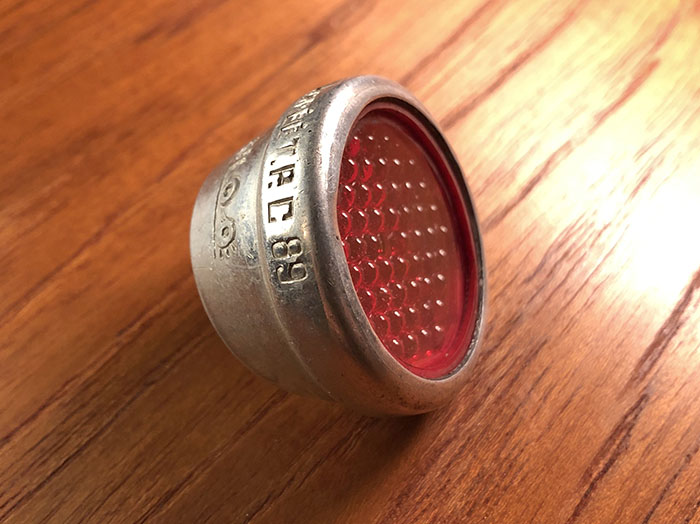
Finding a good reflector was more difficult. It turns out that many reflectors don’t reflect well at all. I wanted mine to reflect at least as well as a car’s reflector.
Most reflectors are made in Asia these days, so I asked our engineer in Taiwan to round up every reflector he could get his hands on. At night, I put each batch on the rear bumper of a car, shone a light at them, and compared. It took a while, but we finally found a reflector that worked extremely well – and also was round and the right diameter.
I didn’t take photos during that initial test, so I recreated it using my bike with its taillight. The reflector works so well that one might think the LED inside is illuminated, but it’s just the reflector in the beam of a flashlight.

Then it came to designing the shape of the taillight. There are many beautiful taillights, but none have a flat lens. Reflectors are flat, so I needed something different: I quickly realized that all the shapes designed for domed lenses would not work.
Looking for inspiration, I finally came upon this JOS reflector. It’s prized by collectors, for not only is it ultra-rare, but it’s also very beautiful. I realized that the wide ‘ring’ is key to making the shape work with the flat surface of the reflector.

With the JOS reflector as a starting point, I drew a variety of shapes. It would have been easy to draw a simple ball, cut in half, but that isn’t really aesthetically pleasing.
The shape of the taillight was constrained by several factors. In addition to the flat rear surface, I needed enough space inside for the electronics, especially the big capacitor that powers the standlight. I finally came up with a shape that transitioned nicely from the lens to the taillight mount on the seat tube.
For a moment, I thought about the German requirement that taillights must be visible from all sides. Shouldn’t my taillight at least be visible from the sides for safety? Actually, your bike is moving forward – to avoid getting hit from the side, you need to be visible from a 3/4 front view. When you are right in front of the car, you’re no longer in danger: By the time the car reaches the spot where you are, you will be gone. It’s the same with wheel reflectors: They look very impressive when they light up in a car’s headlight beam, but they don’t do anything to make the rider safer.
So why do German taillights need to be seen from all sides? Andreas Oehler from SON explained: “It’s so that riders can look back and see whether their taillights still work.” Now I understand! That was useful in the days of filament bulbs, which burned out frequently. Not only do LEDs rarely fail, but it’s a non-issue on bikes with polished fenders: The reflection of the taillight is visible from the saddle even if the lens itself is not. You can see the taillight’s reflection in the top photo of Brian Chapman’s bike. I was glad to have resolved this issue!
The next step was to make the actual light housing. Machinists will laugh: I machined it free-hand, just shaving away material, ‘etch-a-sketch’ style, until I had the shape I wanted.
Now that I had all the parts, I sent them to our engineer, so he could make the production drawings. A few days later, the phone rang: “What is that shape? I’ve measured it, but I can’t find a curve that describes it.” I explained that there wasn’t a curve since the light’s body had been drawn and machined free-hand.
At that point, we both realized why the old lights are so graceful: They were drawn by hand, and the tooling was made from wooden masters that were also carved by hand. These days, parts are CNC-machined, so they tend to be composed of simple curves and straight lines.
Of course, we needed to CNC-machine our taillight housing, so it was up to our engineer to translate my prototype into a series of curves. It’s not impossible to describe a hand-drawn shape as a series of mathematical curves – it’s just a lot of work.

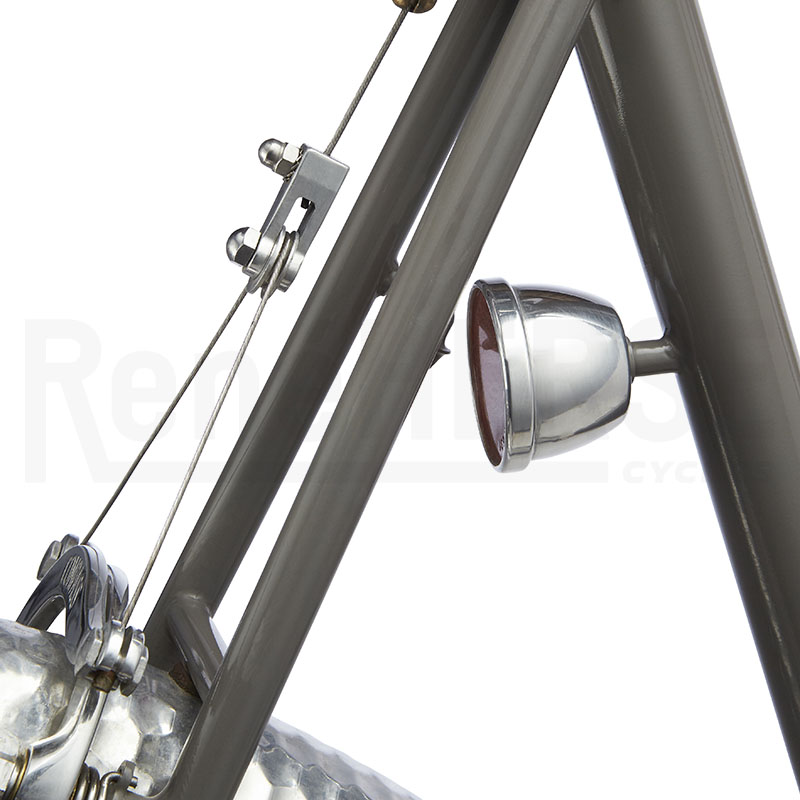
There was more to do. We also needed a braze-on. Since the seat tube is inclined, the braze-on has to be mitered just right. Plus, we wanted the braze-on to extend into the seat tube, so it acts as a stop for the seatpost and protects the wire. Otherwise, inserting the seatpost too far would damage the wire…
We designed a two-piece braze-on (this is the second version) that can easily be filed (at the square end) to move the light closer to the seat tube, giving the builder options for customizing the fit. There are also some parts inside the taillight to hold the circuit board securely and ground it against the light’s housing, so the frame can be used as a return for the current.
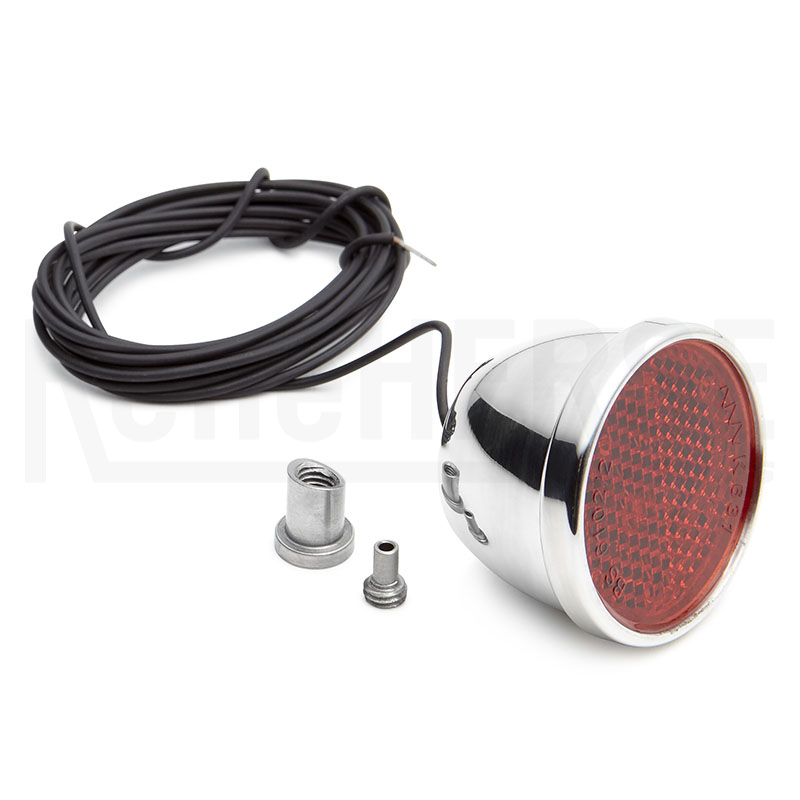
Then it came to producing the taillight. The housing is CNC-machined from aluminum, then polished. The internal parts are laser-cut from stainless steel. The braze-on is machined from steel. (This photo shows the first generation braze-on.) The wire is a special automotive wire, which is insulated with a cross-linked polymer that is extremely abrasion resistant: It won’t chafe through where the wire enters and exits the frame. We persuaded Busch & Müller in Germany to sell us separate circuit boards from their taillights.
The hardest part turned out to be the reflector. The lens was glued into the plastic housing. By pure chance, our first sample (for the prototype) had come apart easily, but when we bought a large quantity, we realized that most were glued in permanently. We had to saw off the housing and then break the reflectors loose. About half of the reflectors cracked during this operation. We talked to the sales representative for the reflector company about getting just the lenses, but that was not easy. It’s not a part the company usually sells, and we didn’t need a million of them, either. Finally, our sales guy took pity on us and simply picked up a box of reflectors when he visited the factory. We treated him to a nice dinner as thanks (and paid for the reflectors, of course).

All those parts are assembled right here in Seattle in small batches by our friend Alistair. The taillights have been very popular, and sometimes, he can’t keep up with demand. Recently, we’ve been out of stock, but Alistair has just completed another batch.

All this is a lot of effort for a ‘simple’ taillight, but we think it’s worth it – because there are no alternatives that work as well and look as nice.
We sometimes get questions for a fender-mounted taillight. It would make it easier to retrofit a bike with the taillight, and it can be an option for small frames where the rear wheel obscures the seat tube. We don’t offer a fender-mounted taillight yet, because we haven’t found a pleasant shape that is large enough to house the electronics. Simply sticking our taillight onto a fender wouldn’t look nice – the shape has to flow with the fender. Making an ugly taillight makes no sense – I’d rather mount a modern plastic light to my fender!
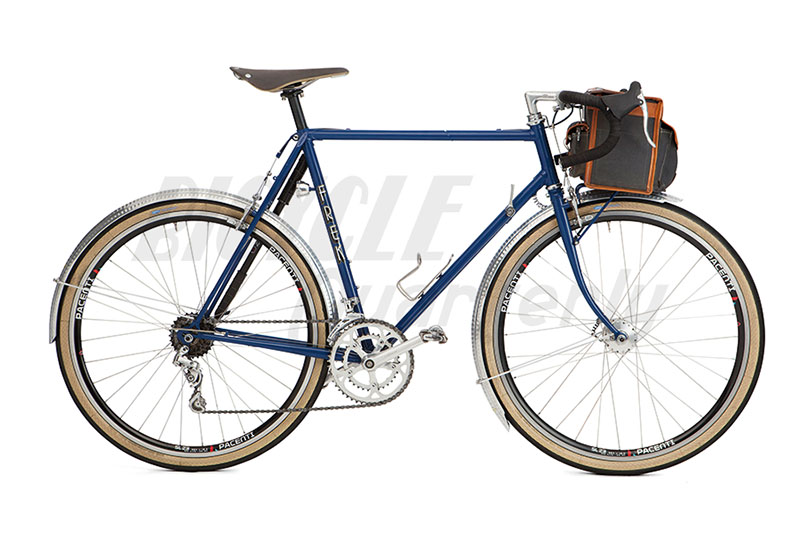
So for now, our taillight mounts on the seat tube. When you order a custom bike, it’s a great choice, or you can retrofit an old steel frame, as BQ team rider Steve Frey did with his Frek (a 1980s Trek converted into a randonneur bike, above).
Click here for more information on our lights.
