

My PBP Bike: Lights
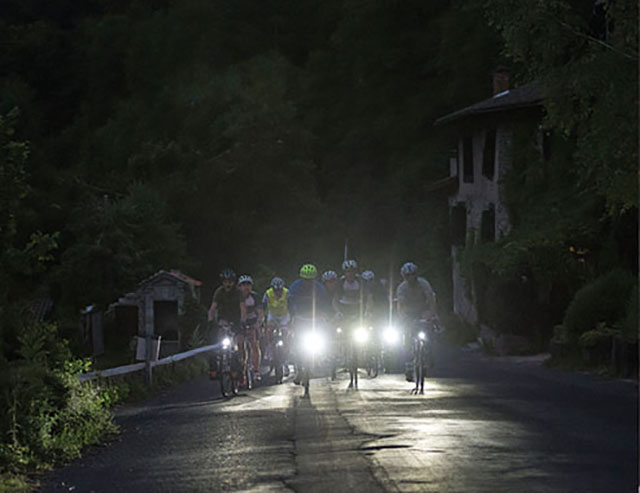
Nothing else has changed our riding as much as modern generator hubs and LED lights. When I first started riding the almost-mythical (and now long-defunct) cross-state races in Washington – Cannonball and S2S – I ran a Nightsun battery light. These races started just after midnight in Seattle, so you needed lights. Even with a heavy water bottle full of NiCad rechargeable batteries, I only got five hours run time. Just enough to make it up the first mountain pass and see the sun rise in the east – but no margin of safety if I didn’t make the 285 miles (460 km) to Spokane before dark.
When I rode my first Paris-Brest-Paris, five hours of light wasn’t going to be enough, so I ran a bottle generator instead. It made so much noise and had so much resistance that I turned it off and rode by moonlight whenever possible. And then the ‘heavy-duty’ light mount broke from the vibrations of riding across the rough pavement of Brittany.
After that ride, I invested into my first generator hub. That was a huge improvement, but night riding was still held back by the weak halogen lights of the time. You had to choose: Either have a long beam, so you could ride at reasonable speeds, or a wide beam so you could see where the road was going even if it wasn’t dead straight. I remember descending twisty, narrow farm roads during my next PBP at 40 mph (65 km/h) on a tandem, the narrow beam reaching barely far enough to give us time to react to what popped up in front of us. Cornering was based more on intuition than on what we could actually see.
Remembering that, I’m still amazed that modern generator hubs have almost no resistance, and the best lights now cast a wide and well-designed beam that resembles a car light. Now we descend mountain passes at night as fast as we do during the day – and have as much fun, too.
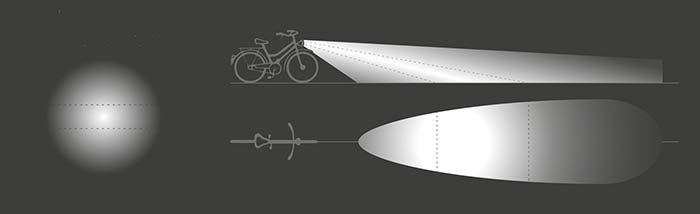
It’s a common misperception to think that a brighter light is better. The beam shape is more important than the light output. If the beam is round – as it is on many bike lights – then you create a bright spot right in front of the bike. For off-road riding, that is what you want, but on the road, you need to see far ahead. The bright light right in front means your eyes don’t adjust to the darkness. That makes it difficult to see beyond the bright spot. It feels like you’re riding in fog – you can almost see what’s in the distance, but not quite. It’s very tiring.
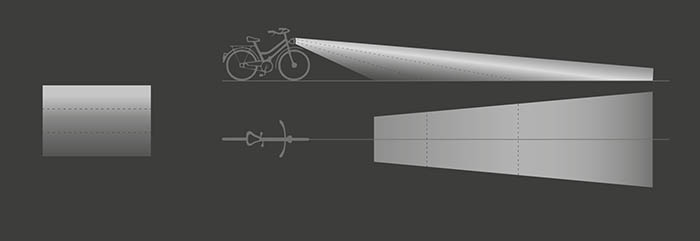
A good bicycle light has a more complex beam shape, like a car headlight. The beam hits the ground at a shallower angle the further it gets from the bike, so it needs to be brighter to put the same amount of light on the surface. A good beam gets brighter toward the top.
At the very top, the beam should be cut off, so you don’t dazzle oncoming traffic. The last you want to do on a narrow road is blind a car driver who’s coming toward you. They’ll instinctively move away from the edge of the road – to the center and toward you.
Above is the beam shape of the SON Edelux II headlight that I use on all my bikes. It’s really amazing – at night you can see almost as well as during the day.
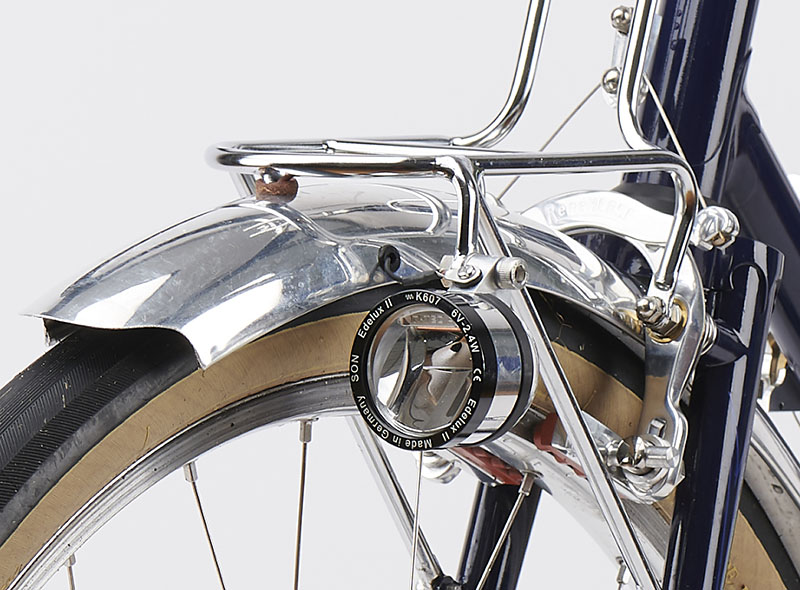
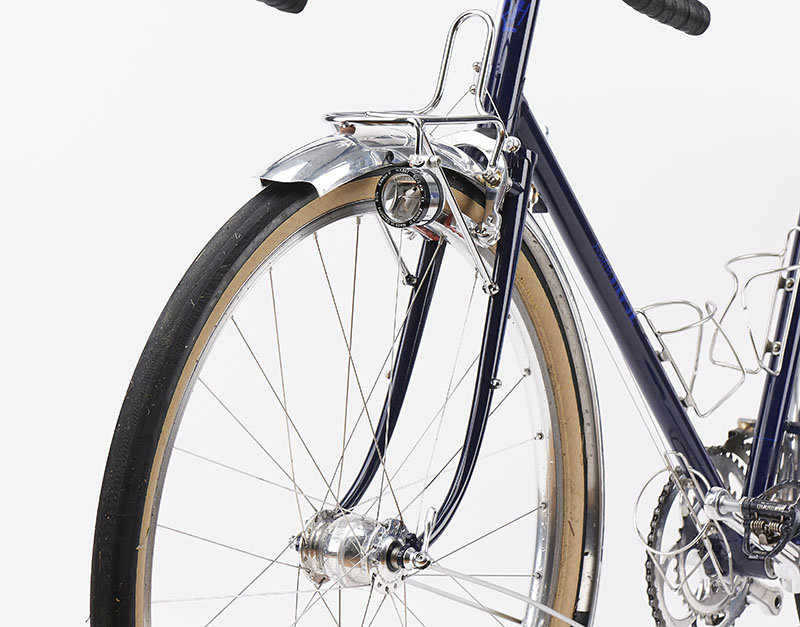
The best location for a headlight is low, so potholes and bumps cast a shadow, making them easier to see. I discovered this during that first PBP, when I repaired my broken light mount by attaching it to the fender bolt on the front dropout. That was great on the straights, but the tire blocked part of the beam. When I descended twisty mountain roads at night with that setup, I found that I couldn’t see the road when I turned!
A better location is underneath the front rack. We’ve worked with SON to develop a version of the Edelux that hangs from its mount. (With the shaped beam, you can’t just turn the light upside-down!) That makes for a simple and elegant light mount, and the weight of the light no longer tries to tip it forward.
We’ve worked out the light position on our Rene Herse racks so the tire shadow is not in the field of vision you need. Our special mounting bolt has a locknut, so you can adjust the light angle without tool, just by pushing the light – higher during mountain descents where you need to see far ahead even when you’re riding into a dip in the road; lower when there’s traffic that you don’t want to blind. And yet there’s no risk of the light coming loose. (The locknut keeps it tight.)
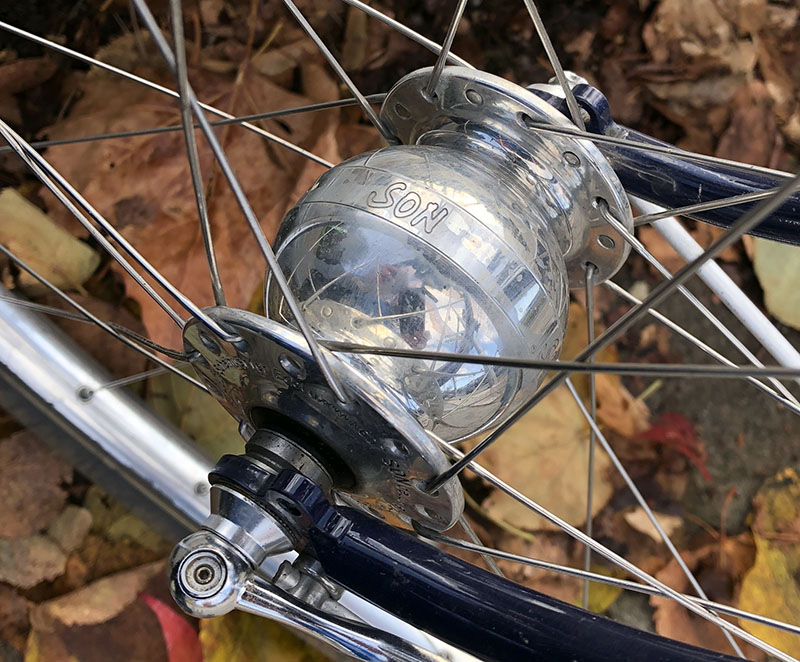
For the generator hub, I use a SON Delux. The SON Delux has the lowest resistance of any generator hub. You really don’t notice the drag even with the light switched on.
One issue with generator hubs is that there’s a lot of air inside the big hub body, and when the temperature changes, air (and moisture) get sucked into the hubs – via the bearings. I had one of the early SON hubs, and it became very rough after years of riding, and when I opened it, there was a lot of oxidation. SON then developed an ingenious system that stores the air and moisture in a separate space, and when the hub warms up again, the air and moisture goes back out. That means that the air inside the hub never changes, so no moisture can get inside… It’s brilliant, and it’s made these hubs last even longer.
The Wide-Body version has wider flanges, which makes for a stronger wheel. That way, I can run fewer and thinner spokes, yet the rim doesn’t rub on the brake pads when I climb out of the saddle. And there’s less risk of taco-ing a wheel when riding on gravel and having the front wheel slip and then catch…
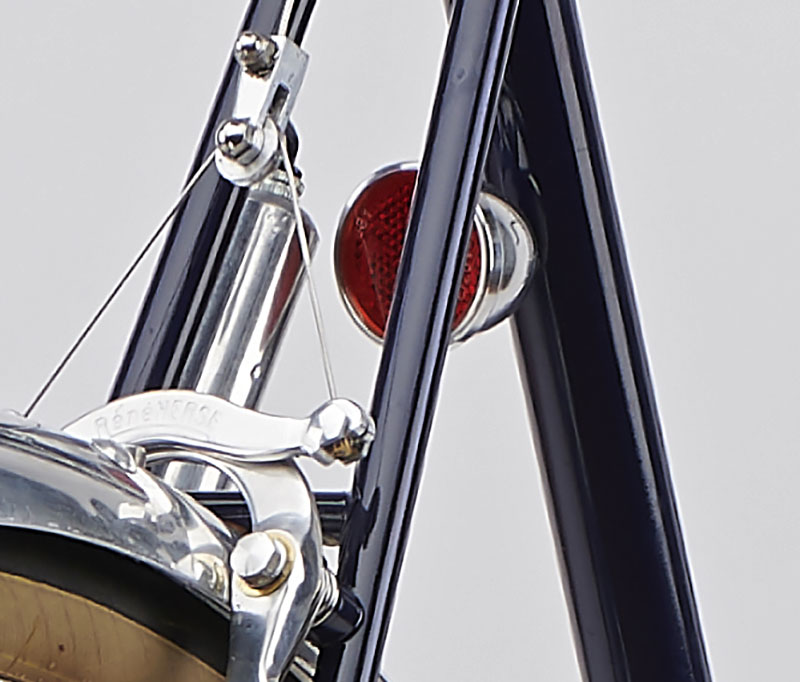
We couldn’t find a taillight that we liked, so we made our own. Inside is the proven circuit of the B&M Seculite Plus, with a bright LED and a standlight circuit. The LED shines through a reflector. Not only does this provide extra safety in the (very unlikely) event that the taillight fails, but it also creates a more diffuse light – just as visible from a distance, because the light output is the same, but easier on the eyes of the rider behind when we’re riding in a paceline.
Mounted on the rear of the seat tube, the taillight is well-protected, yet visible by cars approaching and passing you at all angles they need to see.
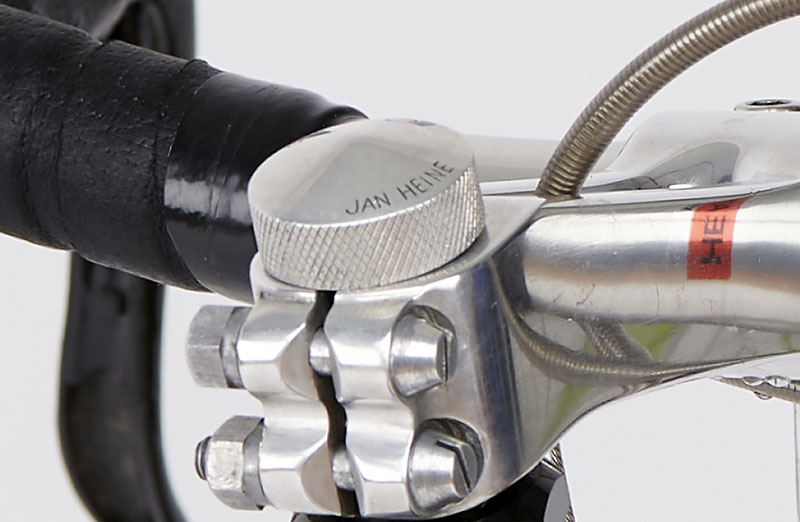
The final piece of the puzzle is the light switch that’s inside the stem. It’s always bothered me that I had to stop when I wanted to turn on my light – or reach down in the vicinity of the spokes, which is a distinctly bad idea. (And on bikes with battery lights, I need to turn on each light separately.) In my car, I can operate the lights easily and safely even while driving.
Since I made the first light switch for my Urban Bike in 2007 and published the blueprint in Bicycle Quarterly, the idea has inspired others as well. It’s simple: There’s a rotary switch inside the steerer tube, and turning the stem cap switches the lights on or off. In the future, we plan to offer our own version – together with the Rene Herse stem.
As the days get shorter here in Seattle, I’m glad that my riding no longer is compromised just because the sun goes down. Whether it’s heading out with Lael Wilcox on a 210-mile (335 km), 20-hour ride across the Cascades, or simply riding home from work, cycling at night now is as much fun as riding during the day.
Other parts in this series:
- My PBP bike: the frame
- My PBP bike: the wheels
- My PBP bike: contact points
- Why I choose centerpull brakes
- My PBP bike: fenders
- My PBP bike: rack and bag
- My PBP bike: derailleurs
Photo credits: Nicolas Joly (Photos 1, 2, 5, 7, 8).
